EDAMAME SPANISH OMELETTE

Edamame/枝豆 seem to become evermore popular throughout the world.
It is ironic that common soy beans were not Japanese originally to later become a Japanese specialty in its unripe shape!
Everyone knows about Spanish omelettes. Her is a simple recipe combining Spanish and Japanese Cuisines that I’m sure everyone will be able to expand on:
Edamame Spanish Omelette!
INGREDIENTS: For a 20cm-diameter frypan
Potatoes: 3 medium
-Onion: half 1 medium/thinly sliced
-Eggs: 3
-Salt: 1 teaspoon or as appropriate
-Olive oil: 2 tablespoons
-Edamame: 100 g (beans only)
RECIPE:
-Boil the edamame enough to be able to peel the beans easily.
-Peel potatoes. Cut lengthwise in 4 portions and cut each portion in about 3cm thick strips. Cut strips into 3 cm long pieces. Wash rapidly and drain.
-Pour oil in a frypan. Add salt (imporatnt point) first. Throw in potatoes and fry for a short while until potato pieces are completely coated with oil.
-Reduce fire to medium low. Cover with glass lid. Cook/simmer for 10 minutes.
Turn over from time to time to evenly cook potatoes. Avoid “burning” them. Once the potatoes have become translucent (if 10 minutes have not elapsed, stop cooking!), switch fire and Pour excess oil in a small bowl.
-Beat the eggs in a bowl and season according to preference. No need for more salt!
-Throw the edamame and sliced onion into the frypan containg the potatoes. Add the oil back.
-Turn the frypan around to coat all the vegetables with the ol. Cook over a small fire for about 5 minutes. Trurn over from time to time for even cooking. Avoid “burning” the vegetables.
-Season the vegetables according to preference. No need for more salt!
-Add the beaten eggs evenly. Fry, turning from time to time.
If you want to cook only on one side keep frying until the omelette is ready.
If you want to cook on bothe sides, get a plate ready in your other hand and turn the omelette onto the plate and let it slide again into the frypan. Repeat operation 2 or 3 times if necessary.

-Check by pressing a finger on the middle of the omellette. It shouldn’t sink.
-Serve on a large plate as it is or cut to size.
-Serve with a green salad and white wine!
————————-
Japanese Appetizer: Octopus & Okra Salad in Ginger Marinade

Spring and warmer days have finally come to Japan!
It is time to enjoy lighter and fresher food!
Here is a simple idea for a sanck/appetizer which can be easily prepared anywhere:
Octopus & Okra In Ginger Marinade!
INGREDIENTS: For 2~ people
-Boiled octopus: 2 tentacles (they say “foot” in Japanese!)
-Okra: 10
-Salt: as appropriate
Marinade/sauce:
-Rice vinegar: 2 tablespoons
-Light soy sauce: 2 teaspoons
-Dashi/Soup stock: 3 tablespoons
-Fresh ginger juice: 1~teaspoon(s)
RECIPE:
-Cut the octopus in thin slices and cut again across into 2~3 pieces.
-Cut the stem end off the okura. Get rid of their “hairs” by rolling them around inside a Japanese-style mortar.
-Drop the okra in warm salted water and leave them ther for a while. Scoop them out and drain well. Cut them into small squares, then chop them with a sharp knife.
-Chill the octopus and okra well before preparing them before the meal. Take them out of the refrigerator. Mount the octopus slices on a plate as shown on the picture above and top with okura. Pour the marinade over the top.
-You may mix the whole as you are eating it!
————————-
Koyadofu Oyakodon

Oyakodon seems to be a popular dish even outside Japan!
Here is a simple, healthy and light version with Koyadofu!
Before reading the ingredients, check:
Koyadofu Recipe
INGREDIENTS: For 2 people
-Koyadofu: 3 sheets
-Onion:1/2

Garlic chives (simplified Chinese: 韭菜; traditional Chinese: 韭菜; pinyin: jiǔcài, also 韮菜) are also known as Chinese chives, Chinese leek, ku chai, jiu cai, Oriental garlic chives or, in Japanese, nira (kanji: 韮; hiragana: にら; katakana: ニラ); in Kapampangan it is known as Kuse/Cu-se; in Korea known as buchu (부추), sol (솔), or jeongguji (정구지) or in Vietnamese, hẹ.
-Nira/Garlic Chives/Chinese Chives: as appropriate
-Egg: 1
-Dashi/Japanese soupstock: 300 ml/cc
-Sugar: 1 tablespoon
-Soy sauce: 3 tablespoons
-Mirin/Sweet sake: 3 tablespoons
-Two bowls of freshly steamed plain rice
RECIPE:
-In a pan pour the dashi, sugar, soy sauce and mirin. Heat slowly (avoid boiling) to dissolve and belend all the ingredients.
-During that time, if the koyadofu is dry soak it in lukewarm water until soft. Press water out of it. Cut it in pieces the size of your preference. Slice the onion fairly thin. Cut the nira into 5~7 cm long pieces.
-Drop the onion and koyadofu in the pan and cook on a samll fire for 5 minutes on medium-low fir.
-Drop the nira in the bowl and cook for one more minute on a low fire.
-beat the egg and pour delicately over the vegetables in the pan. When the egg is cooked (still a bit soft), pour the whole over two bowls of freshly steamed rice.
Easy, isn’t it?
——————————-
Koyadofu Cheese & Bacon Rolls

Koyadofu is one kind of tofu that can beasily arranged into all kinds of interesting appetizers in Japanese Homes’ Gastronomy!
Here is a simple suggetsion for yummy snack to be eaten by all, and with a good beer for adults!
Koyadofu Cheese & Bacon Rolls
INGREDIENTS: For 8 rolls
-Koyadofu: 4 sheets or 80 g
-Sliced cheese: 2
-Flour: as appropriate
-Thin pork belly slices: 8
-Salad oil a little
SAUCE:
-Dashi/Japanese soup stock (if unavailable use bouillon of your choice): 1 cup/200ml/cc
-Soy sauce: 2 tablespoons
-Mirin/sweet Japanese sake: 2 tablespoons
-Sugar: 1 tablespoon
RECIPE:

-Soften the koyadofu into lukewarm water. Press water out firmly.
Cut each “sheet” into identical halves

-Cut the sliced cheese into 4 identical parts.

-Cut the koyadofu as shown in picture through 4 fifths of it depth. Insert a pice of sliced cheese inside the cut.

-Roll the koyadofu “sandwich” inside a slice of pork belly and sprinkle with flour.
-Heat some oil in frying pan. Place the rolls together with their “tails” down. Cover with glass lid and cook over medium fire until the meat is conpletely cooked and attained a nice colour.

-Add the sauce ingredients and cook turning the rolls 2 or 3 times until the juices have practically disappeare/evaporated.
-Serve on a plate with some chopped thin leeks and if desired sprinkle with a little chili pepper!
———————–
Wasabi, Umeboshi & Avocado Salad

INGREDIENTS: For 1~2 persons
-Avocado: 1 (choose a ripe one!)
-Umeboshi/Japanese pickled plum: 1 (if you don’t want too much salt, choose a sweet one!)
-Mayonnaise: 1 teaspoon
-Wasabi paste: 1/2 teaspoon
-Soy sauce: 1 teaspoon
-Lemon juice: as appropriate
-Nori/dry seaweed: as appropriate
RECIPE:
-Cut avocado in halves, peel, discard seed and cut into samll enough pieces. Drop them in a bowl. Add the lemon juice and stir delicately. Very iportant as it will preserve the colour of the avocado and add to taste.
-Take out and discard the umeboshi seed and chop/mash fine. Add to avocado and stir delicately.
-Add mayonnaise (or vinaigrette), wasabi, soy sauce and stir/mix delicately.
-Serve in a bowl topped with dry seaweed cut in short and thin strips.
NOTE:
-Add peeled orange wedges for looks and taste!
So easy, isn’t it?
——————————-
DAIGAKU IMO

Daigaku Imo litterally means “University Sweet Potato”!
This snack/dessert became popular in the 1910’s in the vicinity of kanda in Tokyo where students were queuing at food stands serving them. They made for a hearty, cheap and nutritious food for hungry students, men and ladies alike. In the late 1920’s Tokyo University students were selling for pocket money. In 1940 they were sold by Mikawaya Store.
They are still very popular and are often cooked at homes or in Izakayas!
INGREDIENTS: For 1~2 people
-Sweet Potato (Satsuma Imo): 1
-Oil for frying: as appropriate
-Black sesame seeds: as appropriate
Sauce (tare)
-Cane sugar: 2 tablespoons
-Honey (liquid): 1 tablespoon
-Soy sauce: 1/2 tablespoon
-Water: 1 tablespoon
RECIPE:
-Clean the sweet potato and cut into one-bite dices (keep the skin on, it’s full of nutritious ingredients!). Throw them in a large pan. Pour oil on top and fry over a medium fire.
-The oil will heat up until it reaches 170 degrees Celsius. At that time the sweet potato will have attained a golden colour. Take the sweet potato dices out and let them rest on a kitchen paper to take off excess oil.
-Empty the pan of its oil and wipe the indide with kitchen paper and pour the sauce (tare) ingredients into it.
-Simmer over a medium fire. When bubbles appear, throw in the sweet potato dices and toss them until they are well-coate with the sauce.
-Serve hot on a plate with a generous sprinkling of black sesame seeds!
————————–
CHINESE-STYLE SASHIMI
![]()
Sashimi is not and should not the sole property of Japanese gastronomy.
After all, carpaccio is nothing but a varietyof sahimi!
I remember savouring this Cinese=style sashimi for the first time in Shizuoka City in a great French restaurant!
So next time you get your hands on a nice piece of fresh white-fleshed fish, why don’t you try experiment?
Below is the method. Do experiment with quantities!
Chionese-Style Sashimi!
INGREDIENTS: For 2~people
-Sole, Seabream, Snapper: a large fillet
-White leek: 1
-Fresh coriander: as appropriate
-Wantan, wonton, wuntun wrappers: as appropriate
-Peanuts: as appropriate
-Fresh ginger: as appropriate
-Lettuce: a appropriate
-Lemon or lime: as appropriate
-Peanuts oil: 2 tablespoons
-Sesame oil: 2 tablespoons
Sauce:
-Soy sauce: 3 tablespoons
-White leeks: 1 tablespoon (Chopped finely)
-Red chillies (sliced thin): 1
-Coriander (finely chopped): 1 tablespoon (chopped finely)
-White Sesame oil: 1 tablespoon
RECIPE:
-Cut the fish into thin slices.
-Cut the white leek into very thin strips, leave in water for a while and drain well.
-Cut the lettuce into 1 cm wide strips.
-Cut the wanton wrappers into 1 cm wide strips and deep-fried until crispy. Place them on a kitchen paper to absorb excess oil and cool down.
-Crush the peanuts in small bits.
-Cut the fresh ginger into very thin strips, leave in clean water for a while, then drain thoroughly.
-Prepare the sauce. in a bowl drop the soy sauce, chopped white leeks, thinly sliced red chili, chopped coriander and white sesame oil and mix well. If you warm this sauce up a little before pouring it over the fish, the flavours will be enhanced.
-On a serving dish (look at the picture!), place the slices of fish on a bed of lettuce and sprinkle with a very small amount of salt and pepper.
-Top with a much as you want white leek strips, ginger strips, deep-fried wanton wrappers, crushed peanuts, appropriately cut fresh coriander, lemon or lime slices and pour the sauce all over.
-As a last optional touch, heat peanuts oil and sesame oil (2 to 1) until it smokes and pour it over the top! You could also press a lemon over the top and add more spices in the sauce!
————————
ZUCCHINI FLOWERS FRITTERS

Zuucchini flowers have been a long-time favourite of people living around the Mediterranean Sea, especailly in Italy and French Provence.
The Japanese has recently grown fond of not only zucchini, but laso their flowers and are growing them with a revenge!
It is little wonder they come up wit their own, if much simpler, version of zucchini flower fritters!
INGREDIENTS: For 4 people
-Zucchini Flowers: 4
-Prawns/shrimps: 6 (medium-sized)
-Mozzarella Cheese (they make it in Jpaan, now! And that from real water buffaloes!): 1
-Onion: 3 tablespoons (very finely chopped)
-Flour: as appropriate (or if you are Japanese food cognizant, use tempura batter)
-Lemon juice: 1/2
-Baby leaves mix for accompaniment: as much as you like!
-Salt: as appropriate
-Pepper: as appropriate
-White wine: a little
RECIPE:
-Take the pistils out the zucchini flowers.
-“Peel” the shrimps if necessary and clean them. Cut them into 2 cm long pieces. Cut off half of the zucchini green part (not the flower) and cut again into 1 cm long pieces.
-Lightly fry the zucchini and shrimps with olive oil. Season with a litlle salt, pepper and white wine. Transfer into a bowl and let cool for a while.
-Cut the mozzarella into small pieces and add into the bowl. Mix the lot.
-Delicately open the zucchini flowers and fill them with the above mixture. Do not fill completely as you need to close the flower by twisting their extremities.
-Either wrap the flowers in a little flour or tempura batter and delicately them fry in shallow olive oil.
-Serve with baby leaves seasoned with a very little salt, some pepper and wine vinegar, and a wedge of lemon/lime.
——————–
SHRIMP RILLETTES

Rillettes is a preparation of meat similar to pâté. Originally made with pork, the meat is cubed or chopped, salted heavily and cooked slowly in fat until it is tender enough to be easily shredded, and then cooled with enough of the fat to form a paste. They are normally used as spread on bread or toast and served at room temperature.
Rillettes are also made with other meats, goose, duck, chicken, game birds, rabbit and sometimes with fish such as anchovies, tuna or salmon.
Here is a light and healthy recipe made with shrimps!
Shrimps Rillettes!
INGREDIENTS:
-Shrimps/prawns: 250 g (black tiger if available)
-Olive oil: as appropriate
-Brandy: as appropriate
A Butter:
-Butter: 1/2 tablespoon
-Garlic: 1/2 teaspoon (chopped finely)
-Carrot: 1 tablepoon (chopped finely)
-Parsley: 1 sprig (chopped finely)
-Tomato juice: equivalent of 3 medium-sized tomatoes
B Butter
-Butter: 125 g (1/4 pound)
-Salt: a little
-Cayenne pepper/Chili pepper: as appropriate
RECIPE:
-Fry the shrimps/prawns whole with their shells in olive oil until their insides are cooked. Flambe them with Brandy. Once compeltely cooled down, extract the flaesh out the shell and mince the flesh very finely.
-In a pan drop the A butter and all chopped vegetables and fry until soft. Pour the tomato juice and stirby hand. Let simmer over a weak fire for 20~30 minutes.
-Pass the shrimps and vegetables through a sieve/chinois to obtain a paste.
-In a bowl drop the B butter and let it warm up to room temperature. Add sieved shrimps and vegetables and mix thoroughly until you obtain a smooth paste. Check taste. Add salt and cayenne pepper as appropriate. Leave inside refrigerator for at least a couple of hours.
-Before eating it, bring it back to room temperature and serve with thin slices of French bread. There should be enough for 10 people (as an appetizer!)
—————————
Deep-fried Pork-stuffed Aubergines/Egg-plants

Her is another recipe for my friend, Hapabento.
It is very Japanese in concept and is called 茄子の挟み揚げ/nasu no Hasami Age, Deep-fried Pork-stuufed Aubergines/Egg-plants!
INGREDIENTS: For 5 people
-Aubergines/Egg-plants: 5 (choose long ones)
-Minced pork: 180 g (Hallal foodies can replace it with minced chicken or mutton)
-Leeks: 3 tablespoons (chopped)
-Carrots: 3 tablespoons (chopped)
-Ginger: 1 teaspoon (freshly grated)
-Cornstrach: 1 tablespoon
-Beaten egg: 1 tablespoon
-Salt: 1/2 teaspoon
-Pepper: to taste
-Deep-frying/batter:
-Egg: 1/2
-Cornstarch: 4 tablespoons
For decoration/accompaniment:
-Beansprouts: as appropriate
-Mini-tomatoes: as appropriate
RECIPE:
-In a bowl, drop the minced pork, chopped vegetables, cornstarch, beaten egg, salt and pepper and mix well by hand. Divide into 10 portions.
-Cut off both extremities of the aubergines/egg-plants and peel 4 strips out of the skin to obtain a “zebra design”. Then cut them halfway in twice lengthwise for stuffing.
-Sprinkle more cornstach inside the cuttings and fill each space ( 2 for each aubergines) with one portion of pork stuffing.
-Mix the batter (egg and cornstarch) and brush the pork stuffing outside edges with it before deep-frying.
-Deep-fry at 170 degrees Celsius until you are satisfied with the cooking.
-Meanwhile, lightly boil beansprouts in salted water then plunge them in icy water, and drain.
-When the aubergines have been cooked, you can serve them whole or cut into pieces of your preferred size.
-Decorate dish with beansprouts and mini-tomatoes as shown in picture.
-You can season them with chili pepper, rice vinegar or soy sauce (or all together)
————————–
Japanese Cuisine: Scallops & Grapefruit

The Japanese will often combine seafood and fruit in simple and beautiful recipes. Not to mention they are also very healthy!
How about this one:
Scallops and Grapefruit!
INGREDIENTS: For 5 people
-Scallops: 5~10 (depending on size. Use fresh raw ones, please!)
-Grapefruit: 1
-Wakame seaweed: as appropriate
-Trefoil: 1 bsmall bunch (or any suitable green leaf vegetable)
-Lemon juice: 2 tablespoons
-Sugar: a little
-Salt: a pinch
-Light soy sauce: a little
-Olive oil (EV): 4 tablespoons
RECIPE:
-Cut each scallop across the width into 2 or 3 slices. Heat some water to which you have added a little salt and Japanese sake (not included in ingredients). Dip the sliced scallops in it for a short time and drain them.
-Cut the wakame seaweed into 2cm wide strips. Drop them in the hot water used for the scallops. Let them warm up, take them out and drain them.
-Drop the trefoil in above hot water and leave theminside for 30 seconds. Take out. Drain thoroughly and cut into 2~3 cm long pieces.
-Peel the grapefruit and cut wedges into 2 or 3 bits.
-In a bowl, drop the lemon juice, sugar, salt, light soy sauce and mix well. Add olive oil little by little mixing all the time.
-I serving plates, arrange the scallops, wakame, grapefruit, trefoil in that order twice (look at picture above).
-Pour the dressing from the side.
Enjoy this simple appetizer with white wine or Japanese sake!
————————-
Japanese Cuisine: Aubergines/Egg-plants in Sweet and Sour Sauce

Aubergines/egg plants or “nasu/茄子” in Japanese are a universla favourite. I’m sure that Debra at Hapabento will jump on that one!LOL
Aubergines/Egg-plants in Sweet and Sour Sauce/Nasu no Agedashi Ankake
INGREDIENTS: For 4 people
Aubergines: 4 (Choose them fat and almost round!)
-Mirin/Japanese sweet sake: 50 cc/ml
-Soy sauce: 50 cc/ml
-Water: 300 cc/ml
-Dashi konbu/seaweed powder: 8 g
-Bonito shavings/Katsuobushi: 8 g
-Cornstarch dissolved in lukewarm water: as appropriate
-Ginger: freshly grated, as appropriate
RECIPE:
-Prepare the oil for deep-frying.
Peel the aubergines/egg plants and cut into 8~12 pieces each
-Deep-fry the aubergines/egg-plants until they reach a light brown/”fox” colour. Let them loose as much as oil as possible by leaving them on a mesh or a piece of kitchen paper. You will then tranfer them into serving dishes as in picture above.
-Drop mirin/Japanese sweet sake, soy sauce, water, dashi konbu/seaweed powder, bonito shavings/Katsuobushi in a pan and heat until boiling point. Add cornstarch dissolve in lukewarm water and stir until you have attained the appropriate thickness. Switch off fire.
-Pour sauce in equal amounts over the aubergines/egg-plants in each dish.
-Top with grated fresh ginger and serve.
—————————
Poached Egg, Smoked salmon & Avocado Salad

When looking for a new idea, it is sometimes more practical to look at what is avalaible all year round like eggs, tomatoes, onions, avocado and so on!
Here is a simpel idea you can improvise on for great impression with simple ingredients!
Poached Egg, Smoked Salmon & Avocado salad!
INGREDIENTS: For 4 people
-Eggs: 4
-Avocado: 2
-Smoked Salmon: 200 g
-French dressing: as appropriate
-Onion: 1
-Myoga ginger: 2
-Fresh dill: 4 sprigs
-Salt: as appropriate
-Pepper: as appropriate
-White wine vinegar: as appropriate
Sauce A):
-Mayonnaise: 60 g (make your own if possible)
-Ketchup: 15 g (try and make your own to impress your guests!)
-Milk: 1 tablespoon
-Brandy: 1/2 teaspoon
-Tabasco: as appropriate
RECIPE:
-in a pan pour water and add white wine vinegar and salt. Heat till just before boiling point. Break egg (one at a time will mean better results!) over the surface and poach. Help white to fold around the yolk. Once the yolk has started solidifying scoop the egg out delicately and transfer into a bowl of chilled clean water. Once the poached eggs have completely cooled down, delicately take them out and take as much humidity off as possible by placing them on top of a clean piece of kitchen paper.
-Peel the avocadoes. Cut them in half and discard the seed. Cut them in thin half moon slices and season them with French dressing.
-Slice the onion into very thin circles. Dropthem in cold water for a while, take them out and drain them thoroughly of all water. Do the same with the myoga ginger after having sliced it thin lengthwise.
-Sauce A):
Mix all ingredients and rectify with salt and pepper if deemed necessary.
-Like in the picture above, onto four individual plates mount the ingredients in the following order: Smoked salmon, sliced onion, sliced avocado, poached egg, sliced myoga ginger and dill. Pour an appropriate amount of sauce A) over the egg.
Enjoy!
————————–
CELERY VICHYSSOISE

It is celery high season in Shizuoka Prefecture which produces half of all celery cultivated in Japan.
Vichyssoise, a soup named after the city of Vichy in Central France was apparently created by Louis Diat, a Frenchman living in the United States.
There is a plethora of vichyssoises, be they hot, cold or chilled.
Here is a simple suggestion made with celery you can easily improvise on especially on quantities!
Celery Vichyssoise!
INGREDIENTS: For 4~ people
-Onion: 1/2 finely sliced
-Celery: 1 finely sliced
-Potato: 1 finely sliced
-Butter: as appropriate
-Chicken consomme soup (water: 500 cc/2 1/2 cuos + 2 chicken bouillon standard cubes)
-Milk: as appropriate
-Fresh cream: as appropriate
-Salt and pepper: to taste
RECIPE:
-In a all-purpose large enough pan, drop butter and melt before first dropping in the sliced onion you will fry over a medium fire until it becomes translucent. Add sliced celery and potato and fry gently, taking care that the colour does not change.
-When all butter has been wholly absorbed by the vegetables, add the chicken consomme and cook until the vegetables start disintegrating.
-Transfer the whole into a food mixer and process.
-Transfer into a large bowl set over a larger bowl containg ice to chill the soup. Add milk to thin it to your convenience. Check taste and rectify with appropriate amounts of salt and pepper. Leave inside refrigerator to chill the soup thoroughly.
-Add appropriate amount of fresh cream and stir before serving.
Top the soup with small celery leaves for better effect!
————————
JAPANESE CUISINE: NANKOTSU TSUKUNE

I have already introduced many ways to make “Tsukune”, or chicken patties in yakitori fashion.

Nankotsu/軟骨/ means cartilage or cartilageous parts of the chicken (and other animals) bones. The Japanese eat them as such in yakitori, but they also add great taste to patties. Moreover they are very nutritious, so do make a good use of them if you can get your hands on fresh ones!
INGREDIENTS: For 3~4 people
-Chicken: 200 g (minced)
-Nankotsu/cartilage: 90 g
-Onion: 1/3 of a medium-sized one
-Fresh ginger: a piece of 5×5 cm
-Salt: a pinch
-Black pepper: a pinch
-Cornstarch: 1 tablespoon
-Japanese sake: a little (for boiling wate)
-Water: for boiling
-Soy sauce: 2 tablespoons
-Sugar: 2 tablespoons
-Japanese sake: 1 tablespoon (for seasoning/cooking)
-White sesame seeds: for seasoning before serving
-Leeks: cut to length appropriate for skewers
RECIPE:
-In a food processor drop the minced chicken, onion, ginger, salt and pepper cornstarch. Let turn for a little while. Stop and drop in the cartilages/nankotsu. Turn until the cartilages have been broken into small pieces.
-Make chicken balls either by hand or with two spoons. Boil them in water added with alittle Japanese sake. Scoop balls out once they have started foating on the surface.
-In a small frypan pour the soy sauce, sugar and sake. Fry the chicken balls with pieces of leeks (broccoli is fine, too) in the sauce till they are well coated.
-Skewer the chicken balls and leek as shown on top picture. Grill them in toatser or oven until they attain the right colour and crispiness. Baste them with the remaining sauce half way!
Makes for a great snack withh beer, or a good addition to bento!
——————————-
TOFU & CHICKEN BURGERS

The Japanese love hamburgers, or any burger/patty for that matter, but they are not afraid to experiment and make them lighter and healthier.
Here is a simple recipe that can expanded and enjoyed by anyone, whatever their age!
Tofu & Chicken Burgers!
INGREDIENTS: for 10 small burgers
-Tofu: 1 block/400g (kinu/silk tofu)
-Eringe mushrooms: 1 large (if not available, chose a large and soft mushroom)
-Shiitake: 6=7 small ones (fresh if possible. If not, soften them in lukewarm water first)
-Panko/Breadcrumps: 1 and a half cups/300 ml/cc
-Boiled burdock root (or salsifis): 100 g
-Chicken (breast if possible): 100~200g (according to preferences)
-Onion: Half a large one.
-Egg: 1
-Black pepper: a little
-Daikon (grated): as much as you like
-Ponzu: as much as you like (can be replaced with soy sauce)
RECIPE:
-Rub some salt on the tofu, place a weight on it, and take out as much water out of it. Chop the eringe mushroom, onion and shiitake finely and separately. Drop the chicken and burdock root in a food processor and mince.
-Leave the chopped onion in a microwave for 4 minutes at 500W. This way,you won’t have to fry it separately. Definitely healthier!
–
-In a bowl, drop all the ingredients except the daikon and ponzu.

-Mix well by hand.

-Make 10 small realatively thin burgers/patties between your palms, and press them in their middle.

-Fry them in a little oil in a non-stick frypan over a low fire.

-Fry them slowly on both sides until they attain a nice brown colour.

-Mount them on a bed of greens. Press the water out of the grated daikon. make a ball of it and place it on top of the burgers. Pour some ponzu (or soy sauce) on the grated daikon ball, just enough to colour it.
—————————–
Kimchi Meat Balls in Sweet & Sour Sauce

I found a whole series of meat balls rcipes in my notes that I will have the pleasure to introduce. I’m sure you will be able to expand on them.
As for today: Kimchi Meat Balls in Sweet & Sour Sauce
INGREDIENTS: for 2 people
Meat balls:

-Dried Daikon Kimchi: 100g
-Minced pork: 200 g
-Panko, Breadcrumbs: 2 tablespoons
-leek (finely chopped): 2 tablespoons
-Egg: 1
-Japanese sake: 1 tablespoon
-Pepper: a pinch
-Sesame oil: 1 and half tablespoons
-Cornstarch: 1 and a half tablespoons
Sweet & Sour Sauce:
-Japanese sake: 2 tablespoons
-Sugar: 2 tablespoons
-Soy sauce: 1 and half tablespoons
-Rice vinegar: 1 tablespoon
-Ketchup: 3 tablespoons
-Chicken bouillon powder: 1 teaspoon
-Cornstarch: 2 teaspoons
–Water (lukewarm): 1 and a half tablespoons
RECIPE:
-Separate the dried kimchi Daikon and chop finely
-Mix all the meat balls ingredients in a large ball and mix well until you obtain a smooth mixture. Shape balls small enough.
-Deep-fry meat balls on low (150 degrees Celsius) fire for 14~16 minutes until you obtain a nice colour and well cooked core.
-In a fry pan drop the sweet & sour sauce, except cornstarch and water. Bring to boil first, then lower fire. Add the corntarch dissolved in the lukewarm water. Drop in all themeat balls and stir until all are well-covered with the sauce.
Serve over a bed of lettuce and brocoli boiled in salted water.
————————
Avocado & Crab Gratin (Japanese style?)

There is little to say again how tasty and healthy avocadoes are.
Since we can find them all year round, try and find some crab meat, and you will able to reproduce this easy Japanese cuisine-inspired recipe:. I’m sure you will expand on it!
Avocado & Crab Gratin!
INGREDIENTS: For two people
-Avocado: 1 large and just ripe
-Crab meat: a standard small tin (about a quarter of a cup/50 CC)
-Onion (finely chopped): 1 and half tablespoons
-Lemon juice: to taste
-Mayonnaise (make your own!): 4 tablespoons
-Mozzarella cheese: 1/4 ~1/2 ball
-Wasabi (try to real one. If not available, horseradish should be ok!): 2 teaspoons (grated)
-Salt: to taste
-Pepper: to taste
RECIPE:
-Cut the mozzarella cheese into 1 cm cubes
-Take crab meat out of tin with its water (will add taste!) and drop it in a bowl with mozzarella cheese, onion, mayonnaise, lemon juice, grated wasabi, salt and pepper. Try to experiment with quantities!. Mix well.
-Cut avocado in half(ves) and discard the seed.
Fill each half of the avocado with half of the crabmeat sauce.
-Bake in oven at 200 dgrees Celsius for 15 minutes.
-Eat it hot! Hot avocado is surrisingly tatsty, so have this appetizer in cold weather!
———————————
Japanese Cuisine: Deep-fried Meat Balls

Meat balls are easy to make and they arepopular all over the world!
The difference resides in the way of cooking and ingredients.
Here is a favourite Japanese recipe you can enjoy all year round with Japanese sake, shochu or beer!
Deep-fried Meat Balls!
INGREDIENTS:
-Minced pork: 400 g
-Green leeks: 1 tablespoon (finely chopped)
-Ginger juice: half a teaspoon
-Grated garlic: half a teaspoon
-Egg: 1
-Japanese sake: 1 tablespoon
-Salt: half a teaspoon
-Soy sauce: 1 tablespoon
-Sesame oil: 1 teaspoon
-Cornstarch: 2 tablespoons
-Flour: 2 tablespoons
-Deep-frying oil
-Greens/green leaves: for decoration
RECIPE:
-Mix well all ingredients in a larg bowl.
-Shape balls of your preferred size (small is best!)
-Deep-fry. Now if the oil is too hot, only the outside will be well-cooked. Deep-fry at about 170 degrees Celsius and slowly/long enough to allow the inside to be well-cooked.
-As they are tasty enough as they are, just add a few greens and serve!
—————————
French Cuisine: Croustillants a la Feta

Cheese is a staple in most European Cuisines.
Traditional Feta is a Greek cheese that should only include sheep and goat’s milk, although modern feta might also consist of cow’s milk.
As Feta is an aged cheese, commonly produced in blocks, and has a slightly grainy texture, it is easy to cook/use in all kind of pastries.
Here is a simple French-inspired recipe of this Greek delicacy:
Croustillants a la Feta/Feta Croustilla g
nts
INGREDIENTS: For 8 pieces
-Feta: 200 g (try and use real Greek feta!)
-Brick/filo sheets (thin pastry brick or filo/fillo): 4
-Young fresh spinach: 100 g
-Egg: 1
-Butter: 20 g
-Freshly grated Parmegiano: 30 g
-Pine seeds: 40 g
-Oil: 200cc/ml
-White pepper: to taste
RECIPE:
-Clean the spinach in running cold water. Drain them thoroughly and fry them in the butter for 5 minutes on a medium fire.
Dry fry the pine seeds for 3 minutes in an teflon pan.
-In a bowl mash the feta with a fork. Add the egg, parmegiano, spinach and pine seeds. Keep a fine pine seeds for decoration. Mix well and add white pepper.
Do not add salt as the feta is already salted!
-Cut the filo/brick sheets in four portions lengthwise. You should have 16 strips. Place one strip each on another one to form 8 double strips. If the brick is round, fold the thr curving part inside.
Place some feta mixture in one corner of the double strip and fold the rest of the strip over it so as to obtain a triangular-shaped pastry (see above picture).
Repeat with the other 7 double strips.
-Heat the oil in a deep enough pan or deep-fry pan. Deep-fry each the pastry 2 minutes for each side until you obtained a nice dark golden colour.
-Serve them immediately decorated with a few roasted pine seeds.
NOTE:
-Instead of deep-frying them, you can brush the pastries lightly with oil and cook them in the oven (over a baking sheet) for 7~8 minutes at 210 degrees Celsius. Turn them over halfway in that case.
Drink a solid dry white wine with it!
————————-
French Cuisine: Tartelettes Cressonieres au Chevre/Cress & Goat Cheese Tarts

This the perfect time of the year as cress is coming onto the markets (at least here in Shizuoka and also in Aichi)! Associated with goat cheese (perfect for cow’s milk/lactose allergics), it makes for almost a complete nutritious meal in itself!
Tartelettes Cressonieres au Chevre/Cress & Goat Cheese Tarts
INGREDIENTS: For 4 people
-Pate feuilletee/Puff pastry: 1 roll -Check this excellent recipe (in French) if you wish to make it yourself!)
-Fresh goat cheese: 200 g
-Eggs: 4
-Cress: a good quantity (up to you actually)
-Fresh Cream: 200 ml/cc
-Butter: 50 g
-Cornstarch: 1 tablespoon
-Curry mix powder: 1 teaspoon (or two saffron sprigs)
-Salt: to taste
-Ground pepper: to taste
RECIPE:
-Cut the stems off the cress. Wash the leaves and drain well. Fry them lightly in a non-stick pan with 30 g of butter for 5 minutes. Pre-heat oven to 200 degrees Celsius. Coat the insides of 4 molds with the remaining butter.
-Unroll the pate feuilletee/puff pastry. Cut out 4 circles and line the molds with them. Puncture the bottom with a fork. divide the cheese into four portions. Line the bottom of the pastry with a equal share of goat cheese (break it into small lumps with your fingers as you drop it in). Lay four equal portions of the cress over the goat cheese.
-Beat the eggs in a bowl. Mix the cornstarch and fresh cream first in a separate bowl. Add the beaten eggs and mix well. Add salt and pepper for taste. Mix. According to your preferences add curry powder or saffron and mix.
-Pour the egg-fresh milk mixture onto the cress and goat cheese. Bake for about 25 minutes.
-Serve lukewarm or hot with a well seasoned salad.
NOTE:
-If you wish to make a sole big tart, you will have to bake it for 10 more minutes.
-Serve it with a dry white wine.
————————-
Japanese Cuisine: Taro & Chicken Stew

Taro/sato imo are a very eclectic vegetable. Like potatoes, they can be cooked with almost anything!
ere is a simple very Japanese recipe:
Taro & Chicken Stew!
INGREDIENTS: For 3~4 people
-Taro/sato imo: 400 g
-Chicken breast: 1
-Japanese sake: 1 tablespoon
-Salt: to taste
-Sugar: 2 tablespoons
-Japanese sake: 2 tablespoons
-Soy sauce: 2 tablespoons
RECIPE:

-First cut the chicken into bits-sized pieces. Marinate for a while in Japanese sajke and a little salt.

-Peel taro/sato imo and cut into bite-sized pieces.
Sprinkle with a little salt, than wash thoroughly.

-In a saucepan pour some oil (not included in above ingredients) and heat. Fry the marinated chicken until it has changed colour.

-Add the taro/sato imo. Lightly fry until the oil has covered all the taro/sato imo. Add sugar, Japanese sake and soy sauce. Bring to boil first, then lower fire to low. Cover with lid. Stew for 15~20 minutes until taro/sato imo are soft.

-Stir from time to time. When you are satisfied with the tenderness of the taro/sato imo, it is ready to serve!

-Place in a dish and eat while hot.
Decorate/season with a few sprigs or leaves.
NOTE:
-There is no need to add water.
-Season with a little sesame oil at the end!
————————-
Tamagoyaki Nori Cheese Rolls

Found this easy Winter Ci\omfort food recipe in my notes which for a simple combination of Japanese and American/European (?) tastes!
It is tentatively called Tamagoyaki Nori Cheese Roll/卵焼き海苔チーズ巻!
INGREDIENTS:
-Eggs: quantity depending on the number of servings. Better think big!
-Nori/dry seaweed: a few sheets
-Cheese: slice pizza cheese is fine. Of course you can upgrade!
RECIPE:
-Make thin sheets of tamagoyaki in this way or that way first.
-Spread one sheet of tamagoyaki on workig table.
-Spread nori/dry seaweed all over it.
-Place cheese slices along one end. Think of how wide you want to make the roll when you choose the size of the cheese slices. Cut the cheese to size if necessary.
Season the cheese with black pepper if you wish for more taste.
You could vary by adding some thin ham slices, too.
-Roll the maki from the cheese end.
If the tamagoyaki was still hot, it could be eaten right away.
Better so is to place them aside until your start your meal.
Wrap them in foil paper and heat them.
before serving cut them across and serve them with the cheese flowing out!
-You may of course serve them with a sauce of your making and some greens!
—————————–
Japanese Cuisine: Ika-Mashi/Rice-stuffed Squids

Squids and rice are cheap anywhere in the world, and many gastronomies combine the two.
In Japan rice stuffed squids are called Ika Meshi/烏賊飯.

The best squids for this kind of dish are spear squids or Yari Ika/槍烏賊 in Japanese. But any kind of long squid variety, large or small should be fine with this basic recipe!
INGREDIENTS: This is the basic, therefore I leave the exact quantities to you!
-Squid (or small squids)
-Rice: normal Japanese round rice
-Glutinous rice: Mochi Kome in Japanese
-Japanese sake (if unavailable dry white wine)
-Soy sauce
-Sugar
-Water
RECIPE:

Take the head, tentacles and all innards off/out.
Don’t forget that the tentacles are edible raw, or cooked!
Clean the squid thoroughly under running cold water.

Wash the rice.
The rice should be an equal quantity of normal rice and glutinous rice.
Soak in clean cold water for a whole night inside the fridge.
Before cooking drain thoroughly.

Fill the squid with rice.
Don’t overfill it as the rice will gain in volume upon cooking and will break the squid if too much is pushed inside. Just fill the squid pushing the rice in gently without expanding the squid.

Close/lock the squid with a wooden toothpick to prevent the rice from spilling out.

Fill a pan with enough water for the squid to “float”.
Add Soy sauce, Japanese sake and sugar. That is when you have to experiment. You may also add spices but do experiment there., too. Chili pepper should be ok!
Cover with lid and let cook over a small fire.
Stew until the squid is cooked. The rice having been soaked all night should be ready.
Take the squid out carefully. Peel off the thin membrane/skin which be broken in places by then.
pull the toothpick out.
Serve it whole or cut as in top picture. Decorate with green leafy vegetables.

Here is what you can do with smaller squids!
————————————–
Japanese-style deep-fried Chicken Wings/Tebasaki Karaage

I seem to have entered a chicken mode these days! LOL
Chicken Wings in Japanese is Tebasaki/手羽先, meaning H”and Wing Extremities”!
This is a very popular morsel in this country where nothing is thrown away as far as food is concerned.
We can find some really fat/meaty ones in the market here.
They make for great snacks with beer, sake or wine!
Here is a basic (there are many variations!) recipe in deep-fried style:
Tabasaki/Chicken Wings!
INGREDIENTS:
-Chicken Wings: 8 (choose them as large as possible!)
Marinade:
-Japanese sake: 1 tablespoon (if unavailable, use white wine)
-Salt and black pepper: to taste
-Honey (liquid): 1/2 tablespoon
-Other spices: optional
Sauce:
-Garlic: 1 clove (grated)
-Sesame seeds: to taste
-Japanese sake: 2 tablespoons
-Soy sauce:1+1/2 tablespoons
-Salt: 1/2 teaspoon
-Sesame seeds: to taste (don’t be afraid to use plenty!)
-Honey (liquid): 1 tablespoon
-Other spices: optional (I use a little star anise)
RECIPE:
-Clean the chicken wings if necessary.
Sponge off any water with kitchen paper.
Place them in a bowl with the marinade ingredients. Stir them well, pressing the marinade into them with your fingers.
-Mix the sauce ingredients in a separate bowl.
-Deep-fry the marinated chicken wings in oil heated to 170 degrees. Take them out as soon as they attain a light colouring.
-Heat the oil to 180~185 degrees Celsius and deep-fry the chicken wings in two stages until they are completely cooked and crispy.
-Place the chicken wings on a grill long enough to let the excess oil drop from them.
Drop them in the bowl containing the sauce while they are still hot, mix well and serve on dish with greens.

For a closer view!
Easy, isn’t it?
——————————–
COLD AVOCADO SOUP

Avocadoes are popular, plentiful and becomeing cheaper.
Here is a hearty and delicious, but simple recipe for a refreshing soup, especially in hot climate.
Bear in mind you will have to check the Chicken Bones Soup Stock recipe first!
INGREDIENTS: For about 4 people
-Avocadoes: 2 large
-Lemon juice: half a lemon
-Chicken bones soup stock: 1 cup/200 cc/ml
-Yoghurt: 2~3 cups/400~600 cc/ml
-Salt: a little
-Black pepper to taste
-Other spices: optional and to taste
RECIPE:

Choose your avocadoes ripe.
Cut them cleanly and throw seed away.
Peel carefully and cut into quarters.

Drop the avocado quarter into a large food processor.

Squeeze in the juice of half a lemon.

Add the chicken bones soup stock.
A cup is the right amount. More, and the taste will greatly vary!

Add the yoghurt.
As for the yoghurt you can add mre if you really wish to.
Process until smooth.

Add salt and pepper (and optional spices).
Process quickly to mix them in.
Check taste and rectify if needed.
Serve in glass plates or bowls.
Do think oabout the presentation!
——————————
Japanese Cuisine: Sweet & Spicy Chicken Liver

The Japanese have their own version of”Sweet and Sour”. They actually call it “Amakara” or “Sweet and Spicy”
It is a bit different from Chinese Cuisine in taste, although the concept is very similar.
Here is another simple Japanese liver recipe that you can easily expand on:
Sweet & Spicy Chicken Liver/Tori No Amakara Ni!
INGREDIENTS: for 2 people
-Chicken Liver: 250 g (you can adapt it to any other kind of liver!)
-Ginger: 5×5 cm (fresh)
-Soy sauce: 2 tablespoons
-Sugar: 2 tablespoons
-Japanese sake: 2 tablespoons
-Mirin/sweet sake: 1 tablespoon
Optional:
-Onion: 1/2
-Boiled eggs: 2
RECIPE:
-Clean chicken liver under running cold water. Repeat operation for 10 minutes. You can add 2 tablespoons of milk later if you don’t like the acidity of the liver.
-Cut the fresh ginger into thin slices.
Bring enough water to boil in a pan. Boil the liver for 1 minute. Drain thoroughly.
-Lightly wash the liver under cold running water again. Take off all the fat and blood vessels. If you have the heart, slice it.
-In a pan, drop the liver, soy sauce, sugar, Japanese sake, mirin and ginger. Add 50 cc/ml of water. Cover with lid. Switch on the fire to strong.
-Once brought to a boil, reduce fire to medium and simmer for 5 minutes. If you want to add the onions and boiled egg, slice the onion beforehand and add the onion and boiled egg together with the liver at the same time.
-Try to reduce as much as juices as possible, but don’t overcook.

Option 1: just cooked and served with boiled eggs.

Option 2: cooked and served with both onion and boiled eggs!
——————————
Russian-style Liver sauteed with Potatoes

in spite of those vegan and vegetarian postings, I’m not ready yet to abandon meat, especially liver, which particularly healthy and tasty as far as meat comes!
The Russians do have a gastronomy, and a very homey one at that in spite of all these platters of caviar, and smoked salmon washed down with vodka or Georgia (former Russian Republic!) wine!
Here is a simple recipe to keep you warm on these increasingly colder months of the winter:
Russian-style Liver suteed with potatoes!
INGREDIENTS: For 2 people
-Potatoes: 2 (may Queen, or potatoes that fry well)
-Unsalted butter (A): 20 g
-Salt and black pepper: a little of each
-Liver: 200 g (pork or veal according to your priorities. sliced)
-Onions: 2
-Wine vinegar: 1 tablespoon
-Basalmico vinegar: 1 tablespoon
-Olive oil: 2 tablespoons
-Unsalted butter (B): 30 g
-Unsalted butter (C): 20 g
-Light flour, salt, black pepper: a little of each
-Parsley: a little (finely chopped)
-Garlic: a little (finely chopped)
-Balck pepper: to taste (coarsely ground)
RECIPE:
-Peel onions, cut in half, cut across and along and chop into 7~8 mm wide pieces.
Transfer into an oven dish. Add a little salt and 2 tablespoons of olive oil (not included in the ingredients). Mix well. Wrap it closed with some cellophane paper.
Cook inside microwave oven for 5~7 minutes at 600 W.
This step will help the onions to sweeten up and will improve the overall taste.
-Peel the potatoes. Boil them as they are. Once cooked, cut them into 1 cm thick slices.
In a frypan melt unsalted butter (A), fry the potatoes lightly into it. Season with salt and black pepper. Transfer in a separate hot dish for keeping.

-in the same frypan melt unsalted butter (b) and fry the onions in it until they get lightly brown and sweet. Transfer into a separate hot dish for keeping.
-Coat the sliced liver with a little salt, black pepper and flour. In the same frypan melt unsalted butter (C) with the olive oil and saute the liver in it.
-Once the liver slices are properly cooked on both sides, add the blsamico vinegar and saute for a while to allow the balsamico vinegar to penetrate into the liver. Transfer into a separate dish.
-In the same frypan transfer the onions back and fry them into the juices laying at the bottom of your frypan. Saute them to let them absorb those juices. Add wine vinegar and sautee long enough for the final touch.
-On a serving plate, first lay the sliced potatoes.
Lay the onions over the potatoes.
Lay the liver over the onions.
Think of presentation when arranging them on the plate. Look at pic above!
Season the whole by sprinkling the chopped leeks, chopped garlic and coarsely ground black pepper.
Serve with dark beer!
——————————
Chicken Liver Simmered with Balsamico

I love liver and am always looking for new simple ways to eat some, be it yakitori for Japanese style, stirfry for Chinese style or any European/American style!
Just found this easy recipe in my notes, which blends many influences:
Chicken liver simmered in Balasamico!
INGREDIENTS: For 2 people
-Chicken liver: 150 g
-Onion: 1/2
-Fresh Ginger: 2×2 cm piece
-Prunes: 4
-Soy Sauce: 1/2 tablespoon
-Water: 2/3 cup/140 cc/ml
-Balsamico vinegar: 1 1/2 tablespoon
-Red wine: 1 tablespoon
-Bouillon/Chicken stock: 1 cube
-Sugar: 1 tablespoon
-Chervil: to taste
RECIPE:
1-Leave the liver in water for 20 minutes. Take out veins and nerves. Cut in bite-sized pieces.
2-Slice onion into 5 mm thick slices. Cut the ginger into fine slices
3 -Gently boil the liver with some chopped leek leaves (not included in the ingredients) and scoop out unwanted matters.
4-In a pan drop the water, balsamico vinegar, red wine, bouillon, sugar and sliced ginger. Bring to light boil. Add sliced onion and prunes.
5-Wait untio it starts boiling again, then lower fire to low and simmer until satisfaction.
Serve and decorate with chervil.
——————————-
Sauteed Liver with Garlic Stems

For all the recipes I publish to help my vegan and vegetarian friends, I need my meat!
The difference is that I tried to balance my diet as much as I can.
Mind you, if one keeps to good ingredients, it is quite easy.
Here is a simple recipe, both Japanese and Chinese in cocept, which has the merits to be bvery healthy, calorie-low and balanced.
Makes for a great snack with a beer!
Sauteed Liver with Garlic Stems
INGREDIENTS: For 1 person?
-Liver (sliced): 150 g (choose the liver according to your priorities!)
-Garlic stems: 5 or 6
-Garlic: 1 clove
-Soy sauce: 2 tablespoons
-Japanese sake: 2 tablespoons
-Water: 50 ml/cc
-Salad oil: 1 tablespoon
RECIPE:
-Slice the garlic thinly. Cut the garlic stems into 6~7 cm long pieces.
-Mix the soy sauce, Japanese sake and water as a sauce in a separate bowl.
-Heat the oil in a frypan over a strong fire. Stirfry sliced garlic and liver together.
-Once the liver is almost cooked add garlic stems and sauce.
-Cover with lid, reduce fire and simmer it for about 3 minutes.
-Serve immediately.
NOTES:
There are many possible variations to this recipe:
-add spices of your liking, especially black pepper and chilies.
-add vegetables, especially leaf vegetables.
—————————-
CHICKEN WINGS RAMEN

Ramen are great, but sometimes one is stuck for variety (new ideas).
Here is a very simple recipe that anyone can succeed at with a minimum of time and ingredients:
Chicken Wings Ramen!
INGREDIENTS: For 3 people
-Chicken wings (te-basaki in Japanese): 4~6
-Japanese sake (or cooking sake): half a tablespoon or more (seasoning)
-Sesame oil: half a tablespoon or more
-salt and pepper: to taste (5~6 pinches each)
-Water: 1000cc/ml
◆Japanese sake: 1 teaspoon
◆Soy sauce: 1=2 teaspoons
◆Salt: one pinch
◆Oyster sauce: 1~3 tablespoons (according to preference)
-Ramen: 3 packs
-Leeks (chopped): according to preference
–Rayu/Japanese chili oil (ラー油): according to preference
RECIPE:

Thoroughly sponge off chicken wings of any water/humidity

Pour sake over chicken wings. Make sure they all coated and leave to marinate for 10 minutes.

Fry chicken wings 8as they are with the sake) with sesame oil and salt and pepper. make sure they are well seasoned.

Fry chicken wings until they are nicely coloured as in above picture.

Add all the water. Cover with lid. Bring to boil first. Reduce fire to low and simmer 25~30 minutes.
In a separate bowl mix all ◆-marked ingredients for chicken seasoning.
Prepare water for boiling the ramen.

Add chicken seasoning to chicken.
Boile the ramen.

Place the ramen in each of three bowls.

Top the ramen with an equal amount of chicken wings and their soup.
Sprinkle with rayu oil and top with chopped leeks.
Serve and enjoy at once!
——————–
MUSHROOMS GRATIN

When the Missus came back home from work last night, the night was miserable with wind and rain.
As I came back a lot earlier, I decided to prepare a simple hot dish to warm her up.
I had just bought plenty of mushrooms at the supermarket and they were to come handy!

I used five of them, three shimeji varieties, one eringe and the last maitake.
Of course you can use absolutely any kind of fresh mushroom in that simple recipe:
Mushrooms Gratin!
There are two ways to go about this recipe:
Either you make less sauce and include only one egg white and 50 ml of fresh cream or you use the whole ingredients like I did to avoid any wastage. In the latter case many will call thios gratinan open quiche, although a recipe is slightly different!
INGREDIENTS: For 2~4 people
-Mushrooms: as much/many as you want! At least two big fistfuls.
-Eggs: 4
-Butter: 50 g
-Fresh cream: 200 ml
-Salt, pepper, nutmeg: to taste
For frying the mushrooms:
-Olive oil + butter: 1 large tablespoon of each
-Shallot: 1 (chopped fine)
-Garlic: 1 clove (chopped fine)
-Fresh herbs: to taste, finely chopped (this where you can further improvise)
-Slat (a little!), pepper. Other spices are OK, but think about the whole balance!
RECIPE:
-Preheat oven to 250 degrees Celsius.
-Separate yolks from whites.
-Drop the olive oil and butter in frypan to fry the mushrooms. on a medium fire, fry shallots and garlic until they become translucent.
-During that time, melt 50 g of butter over a small fire in a pan or frypan. Once the butter has melted, add egg yolks and keep stirring all the time to obtain a smooth sauce. Stop for a only a few seconds to drop the mushrooms into the frypan. Fry the mushrooms over a medium high fire. Toss them from time to time while you stir the egg sauce.
-Once the egg sauce has attained a smooth and creamy aspect, add the egg whites and keep stirring energically for a while. Once everything is well mixed add fresh cream and stir again. Once it is smooth, add salt, pepper and nutmeg. Mix and switch off the fire.
Fry the mushrooms until tthey have become soft and releae their juices.
Add salt, pepper and spice and stir for a few more seconds.
-Pour all the mushrooms and their juices in a flat shallow oven dish.
Pour all the egg sauce evenly over the mushrooms.
-Bake for about 10 minutes and serve hot!
————————–
TAMAGOYAKI WITH SPINACH & CORN

I have always been surprised to find out how Japanese Omelette or Tamagoyaki is so popular abroad.
Here is a simple recipe that adults and children alike will love to eat either as a main dish or as a snack!
Tamagoyaki with Spinach & Corn!
INGREDIENTS: For 2~3 people
-Eggs: 3
-Dashi/soup stock (konbu/seaweed or chicken): 3 tablespoons
-Japanese Sake: 1 teaspoon.
-Sugar:: 1 tablespoon
-Salt: 1/4 teaspoon
-Spinach: 50 g (boiled and drained completely)
-Soy sauce: 1/2 teaspoon
-Corn: 4 tablespoons (already boiled/canned)
-Vegetal oil: 1/2 teaspoon
RECIPE:
1 Boil the spinach for a minute or two maximum. Let cool completely and press hard to drain all water out. Chop finely.
2Boil the corn if necessary and drain completely. (If canned, drain thoroughly)
3 Beat the eggs in a bowl. Add dashi, Japanese sake, sugar, and salt. Mix well. Add spinach and corn and mix well.
4 Heat frypan and cook as described in Tamagoyaki Basic Recipe.
5 Cut and serve!
———————
JAPANESE-STYLE CABBAGE ROLLS

Cabbage Rolls or stuffed cabbage have a long history and have become one almost universal dish.
The concept comes from the “dorma” in Anatolia (turkey) during the first Century A.D. which were conceived with grape leaves.
Cabbage being a prominent vegetable in Europe, it was only a question of time before cabbage leaves replaced the grape leaves!
The first mention in Japanese history dates back to 1895 when they were called “Rooru Kabetsu/Roll Cabbage” (the other way round!).
They can found in most homes, at oden restaurants and in many other establishments. They are particularly popular in winter when cabbages are everywhere in supermarkets.
The recipe below is the basic one. I will leave to you how to experiment on quantities!
Keep in mind that meat can replaced with tofu, but you will probably needs konbu dashi/seaweed stock.

Choose cabbage leaves of the same size (number depending on servings).
Bring lightly salted water to boil and dip cabbage leaves in water long enough to soften them. Lay the cabbage leaves on a piece of kitchen paper or clean cloth to take off excess water.
Put aside.

Chop some onion very fine and mix it with minced meat of your choice (pork, beef, lamb). Season with salt, pepper, nutmeg, clove and pther spices of your liking. Mix well.
Note: I personally add some chopped garlic and tiny cubes of lotus root.

Shape minced meat mixture into elongated balls of the size you wish for stuffing the cabbage. Their length should be equal to the width of your hand (that is, if you are not 7 feet tall!).
Fry them in olive oil until their surface is well cooked (this will prevent unwanted breaking off later). Sprinkle them with a little white wine or Japanese sake for more seasoning.
Place them on a plate and let them cool off completely.

Roll a meat ball in each cabbage leaf.

Bring the ends of the cabbage leaves under the roll and place each roll in the pot as shown on picture above to prevent rolls from moving away (around). If you are not confident, tie some kitchen thread around or secure them with a wooden toothpick, altough this can become very bothersome upon serving and eating.

Fill the pot with a soup made with chicken stock.
This is when you can add a few more spices, but don’t overdo it!
Of course you could could cook it with kimchi for example.
Simmer for about 30 minutes over a medium high fire.
Only then can you scoop the cabbage rolls out.
Keep in mind the soup is great, too!

Here you are! Enjoy!
NOTES:
-If served to children, careful on the spices and garlic!
-Instead of the chicken stock, you may use tonkotsu ramen soup!
—————–
JAPANESE GRATIN: DORIA

The Japanese have their own version for Gratin called Doria which is prepared with rice, especially leftover rice.
It is said it was first invented by an Italian family with the name of Doria who tried to represent the Italian flag (with tomatoes, cucumbers and chicken) in this recipe they first cooked in Paris.
It was first prepared in Japan in Yokohoma by a French cuisine chef from Switzerland at the New Grand Hotel in 1925!
It has become a mainstay in Japan in homes and restaurants.
The variations are endless, but here is the basic recipe:
Japanese Gratin: Doria
RECIPE:
I leave the kinds and weights for the ingredients to your creative imagination!
First make a bechamel sauce:
Use the smae volume of flour and butter.
Melt butter in a large saucepan.
Once the butter is melted, add flour and stir until you obtain a smooth mixture.
Add milk (warm will make things easier) cup by cup and stir well. make as much as you want. Keep stirring until you obtain a thick (the thicker, the better) bechamel sauce. Season with salt (easy on that!), pepper and nutmeg.
Set aside and let cool completely.

Slice onion thin and fry in a little oil until soft and just before colouring.
Scoop out and set aside.
You may of course add such vegetables as sweet pimentoes, etc.

The Japanese make their doria with chicken usually, but you may of course replace it any white meat, fish or seafood.
Cut the chicken into small pieces and fry them in same oil until crispy.
Scoop out and set aside.

Use leftover steamed rice.
Fry it with salt (careful on that one again!), pepper and tomato sauce (ketchup is fine, tomato puree is even better).
Season with other spices if you wish to.
Add onions and chicken and stir fry until all ingredients are well mixed.

Butter the inside of an oven dish.
Pour the whole fried rice inside.

Cover the rice with as much as bechamel sauce as you wish.
Add a generous layer of cheese of your choice.
The original recipe called for parmegiano, but cheaper cheese did not exist then!

Bake inside oven as you would do for any other gratin.
Keep in mind the colour you wish to attain.
It might be a good idea to serve them in individual dishes as they come out very hot!
Can be frozen until cooking them in an oven!

The same recipe with boiled macaroni!
——————————-
Japanese Cuisine: Seabream in Kabayaki Style

Seabreams or groupers are aslo common almost all year long.
They make for all kinds of preparation in Japanese cuisine, either in nabe/Japanese pot au feu or grilled.
This very simple recipe is a grill in kabayaki style:
Seabream in Kabayaki Style:
INGREDIENTS: For two persons
-White-flesh fish (seabreams or groupers. Recipe can apply to almost any white flesh fish): 120g~
Marinade
-Soy sauce: 1 teaspoon
-Japanese Sake: 1 teaspoon
-Cornstarch: 2 tablespoons~
-Oil: 1 tablespoon
Sauce:
-Soy sauce: 1 tablespoon
-Japanese Sake: 1 tablespoon
-Mirin/Sweet sake: half a tablespoon
-Sugar: half a tablespoon
-White sesame seeds: 1~2 teaspoons
-Finely chopped thin leeks: 2 tablespoons
RECIPE:

-Marinate fish soy sauce and Japanese sake for about 10 minutes.
-In a separate bowl mix soy sauce, Japanese Sake, mirin and sugar.
-Rest fish on a piece of kitchen paper to take excess marinade.
-Sprinkle both sides with cornstarch.
-Heat oil on a frypan and grill fish on both sides util “bubbles/eyes” appear on it surface.
-Once the heat has reched/cooked the core of the fish, slide fish against the side or corner of the frypan. Pour the sauce in the remaing space of the frypan. As soon as sauce starts boiling, caramelize both sides of the fish with the sauce.
-As soon as you are satisfied with the cooking of the fish, serve fish on a dish. Mix white sesame seeds with reamining sauce and pour over fish. Sprinkle with chopped thin leeks.
NOTE:
-Keep in mind that fish can break easily when you flip it over to fry it on both sides.
-Fry the skin side first.
————————–
Japanese Cuisine: Salmon grilled with Leek Miso

-In a bowl mix miso, sake, leek and umeboshi. Add sake if the mixture is not smooth enough. As for miso, choose one cotaining beans.
Do not be afraid to experiment as far as ingredients and quantities are concerned.

Grill with the lower face/side up first.
Turn over as the first “bubbles” appear on its surface.
Smear the salmon with the leek miso mix and grill until “bubbles apear on the fish surface.

Serve with shiso or lettuce leaves for decoration and limes forthe final touch.
NOTES:
-Take care not to overgrill the fish.
-If you use salmon with its skin, grill skin first.
—————————
French Cuisine: Young Cod and Lentils

Young cod or “Cabillaud” in French is one of those white-fleshed fish which are so easy to prepare and do not require complicated recipes!
Here is a recipe which will make you sound like an accomplished chef:
Paves de Cabillaud aux Lentilles/Young Cod Steaks and Lentils!
INGREDIENTS: for 6 persons
-6 large pieces of cod fillets, 150 g each
-Puy green lentils: 500 g
-Bacon or Pancetta: 6 very thin slices
-Carrot: 1
-Onion: 1
-Olive oil (EVO): 4 tablespoons
-Xeres vinegar: 1 tablespoon
-Bouquet garni (if unavailable, make your own with fresh of dried rosemary, thyme, sage, etc)
-Salt: to taste
-Black pepper, freshly groungd: to taste
RECIPE:
-Peel the carrot and onion. Slice the onion very thin and cut the carrot into small dices. Drop the sliced onion and carrot dices and lentils into a large pan and cover (a little higher than the whole level) with cold water (containing as little calcium as possible=soft water). Add the bouquet garni. Bring to boil. Set the heat as to simmer the vegetables for 45 minutes.
-10 minutes before the vegetables are cooked fry the bacon slices on a large non-stick frypan until golden. Take excess fat off by laying them on a kitchen paper sheet.
In the same frypan heat a tablespoon of olive oil. Lay the cod on the rypan and fry on high fire for 2 minutes on each side. Turn the heat low. Sprinkle the fish with salt and pepper and let cook for 5 more minutes on a low fire.
-Drain the lentils. Pour them on a serving dish.
Prepare a vinaigrette with salt, pepper, Xeres vinegar and the remaining olive oil. Pour it onto the lentils. Mix. Place the the bacon slices and cod onto the lentils and serve at once.
-If you serve them individually, keep six plates warm. Place each cod fillet on a bed of lentils and a slice of bacon. Sprinkle the fish with a little freshly chopped Italian parsley and just a little olive oil. Place a sprig of Italian parsley on the whole for the fnal touch.
Serve a good Beaujolais with it (not Beaujolais Nouveau, for people’s sake! LOL)
———————————-
Japanese Cuisine: Buri Teriyaki/Yellowtail in Teriyaki Sauce

Here is a simple recipe for preparing fish in teriyaki style.
I chose Yellowtail/buri as it is about to come in season!
INGREDIENTS: For 3 people
-Yellowtail slices/steaks: 3
-Salad Oil: 1 tablespoon
Tare/sauce:
-Soy sauce: 4 tablespoons
-Mirin/sweet sake: 4 tab;espoons
-Japanese sake: 4 tablespoons
-Sugar: 2 tablespoons
RECIPE:
– Prepare the tare/sauce first by mixing all the ingredients well in a small bowl.
-Heat oil in frypan.
Fry fish on the their skin first, however narrow. Then fry on one side util a nice colour is attained.
-fry other side until a nice colour is attained. Lower fire. Cover with lid and steam fry for 2~3 minutes.
-Add all tare/sauce.
Fry on a low fire for 7~8 minutes, scooping the sauce over the fish regularly.
It will be ready whenthe sauce has reduced and started caramelizing!
NOTE:
-Serve it topped with grated daikon!
——————————–
Parmentier de Saumon et Puree de Feves/Salmon Parmentier and Broad beans Hash!

Salmon and broad beans can be found on the plates and tables at homes and restaurants almost everywhere in the World.
Here is an easy recipe I found in my notes. It was both inspired by Japanese and French Cuisines, but definitely with a twist of the latter:
Parmentier de Saumon et Puree de Feves/Salmon Parmentier and Broad beans Hash!
INGREDIENTS:For 4 persons
-Salmon fillet (skin peeled off): 400 g
-Broad beans (peeled): 500 g
-Unsalted Butter 50g
-Hazlenut powder: 4 tablespoons
-Seasme oil: a few drops
-Ground pepper and fine salt
RECIPE:
-Preheat oven to 210 degrees Celsius
Put the salmon on an oven dish. Sprinkle with salt and pepper.
Cover a piece of foil paper and bake for 15 minutes
-During that time Heat a big pan full of salte water and cook the broad beans for 5~6 minutes.
Take care not to overcook!
-Drain the broad n\beans and mash them roughly witha fork inside a bowl. Add a few dops of seasme opil and a little pepper and mix.
-Fiil 4 glass cups with the broad beans has, then add the cooked salmon (after having brol\ken it into large flakes).
-Sprinkle the hazlenut powder over the top. Add a dollop of butteron top.
Grill it in the oven so as to gratine it for a few minutes.
Serve with a sprig or two of flat Italian parsley.
NOTE: Keep a few whole broad beans and mix them with the hash for better effect!
-Accompany it with a wine from my home:: Rully white (Cote Chalonnaise)!
————————–
French Cuisine: marinated Cuttlefish

The Japanese are not the only ones to eat cuttlefis or squids raw.
In French Languedoc, especially along the coastline separating the Thau Lake from the sea, locals have an interesting, is simple, way to accommodate small “calamars” (French for calamari) very reminiscent of recipes found in Greece, Italy and Spain.
Marinated Cuttlefish:
INGREDIENTS: (this can multiplied at will, so I’ll keep to elements, instead of quantities)
-Cuttlefish: Choose them small
-Garlic, finley chopped after being crushed with a fork, spoon or heavy knife.
-Lemon juice
-Olive oil (EV)
-Green chili pepper (fresh and high quality, fresh jalapenos is fine): finely chopped (discard seeds!)
-Salt & pepper
RECIPE:
-Peel off “skin” of calamari wherever possible. Clean them thoroughly under running cold water. Take off excess water with kitchen paper.
Cut into bite size or according to preferences.
-Let them marinate together with chopped garlic, lemon juice, olive oil, chopped green chili pepper, a little salt and pepper.
Proportions: 1 clove of garlic, 1 tablespoon of lemon juice, 1 tablespoon of olive oil, 1 small green chili pepper.
-Mix well and leave in fridge for at least 1 hour.
Serve in individual pots or on good toasted bread as tidbits for aperitif before a larger meal or as a snack to go with your beer or wine!
—————————-
Japanese Cuisine: Ankake Tofu Kani Chawanmushi-Tofu & Crab Chawanmushi with Sweet & Sour Sauce

Another easy recipe for the Tofu Tribe, (Terecita, Elin, Jenn and Jennifer !
This time is a tofu accomodated as Chawanmushi, a very popular dish in Japan!
INGREDIENTS: For 4 people
1)
Tofu: 450 g (fine texture/kinu dofu)
Eggs: 2
Crab: 1 small can/shredded
2) For the chawanmushi
Dashi: 2 cups (konbu dashi or fish dashi)
Salt: 1 quarter of a teaspoon
Japanese sake: 1 tablespoon
3) For the sweet & sour sauce
Dashi: half a cup
Soy sauce: 1 tablespoon
Mirin/sweet sake: 1 tablespoon
Japanese sake: 1 tablespoon
Cornstarch dissolved in water: according to preferences
Trefoil (or other leaves) for decoration: according to preferences
RECIPE:
-Chill the dashi. Beat eggs into fine omelette. Add dashi, salt and Japanese sake. Mix well.
-Use a steamer for the chawanmushi. Chawan means tea bowl/cup and mushi means steaming!
-Fill four cups with one fourth of the tofu, pouring it into the cups little by little with a spoon. Pour one fourth of the egss dashi mixture on top.
Cover each cup with a piece of cellophane paper. Steam for 2 minutes on strong fire, then 20 minutes on a low fire.
-While the chawanmushi is steaming, prepare the sweet and sour sauce.
In a small pan, pour the dashi, soy sauce, mirin, Japanese sake and bring to boil.
Shred the crab and add to sauce.
Add cornstarch and mix well until sauce is smooth. Take off fire.
Bear in mind that the sauce must be ready at the moment the chawanmushi is completely steamed, not before!
-Pour an equal amount of sauce on each chawanmushi. Decorate with trefoil and serve!
NOTE:
The chawanmushi taste is a bit weak, while the taste of the sweet and sour taste is trong, thus attaining the right balance!
————————
French Cuisine: Duck, Prunes & Hazlenuts Pound Cake

Pound Cakes should be all cakes. The recipe can be adapted for meat eaters into an eminently presentable dish!
Duck/Magret is an exceptionally easy to adapt meat in such a case.
Here is another easy French recipe with another log name (it is becoming a habit! LOL):
Cake aux Magrets de Canard, Pruneaux et Noisettes
Duck Breast, Prunes & Hazlenuts Pound Cake!
INGREDIENTS: for 4 persons
-Eggs: 3
-Flour: 150 g
-Baking powder: 3~4 g
-Sunflower Oil: 100 ml
-Unskimmed milk: 125 ml
-Gruyere/Emmental Cheese: 100 g (grated)
-Duck breast: 150 g
-Prunes (pitted): 80 g (roughly cut)
-Hazenuts (roughly broken): 30 g
-Salt: a pinch
-Pepper: 2 pinches
RECIPE:
-Preheat oven to 6/180 degrees Celsius
-Cut the duck breast in small enough pieces with their skin on. dry fry them (no oil or fat needed) on both sides 3 minutes each.
-In a big bowl or processor, mix the eggs, flour, baking powder. . Mix well. Add sunflower oil and milk. Mix well. Add cheese. Mix again.
-Add the duck, prunse and hazlenuts.
Pour the lot into a buttered pound cake mold and bake for 45 minutes.
–NOTE:
-You could use rabbit instead of duck.
-Let cool down completely before taking it out the mold.
Drink a sweet white wine with it!
———————————-
French Cuisine: Broad Beans, Parmegiano & Basil Clafoutis

Clafoutis are not all desserts. The recipe can be easily adapted to vegetables and others. Living in Japan it is a bit reminiscent of tamagoyaki!
Here is another simple French recipe with a long name:
Clafoutis de Fevettes au Parmesan et Basilic
Broad Beans, Parmegiano & Basil Clafoutis!
INGREDIENTS: fro 4~6 persons
-Broad beans (choose them small): 500 g
-Eggs: 4
-Milk: 200 ml
-Fresh cream: 100 ml
-Grated Parmegiano Cheese: 70 g
-Flour: 2 tablespoons
-Sweet basil: a small bunch (finely chopped)
-Salt: a pinch
-Grated nutmeg: a pinch
-Freshly ground white pepper
RECIPE:
-Pre-heat oven to 160 degrees Celsius
-Drop the brad beans in a big pan of boiling salted water and cook for only a minute. Strain immediately and cool under running cold water. Drain again and put aside.
-In a large bowl break the eggs. Add milk and fresh cream. Strongly beat into an omelette.
-Add salt, flour, parmegiano, nutmeg, pepper and basil. Mix well. add brad beans.
-Butter the inside of a clafoutis dish.
Pour in the broad beans mixture.
Put inside oven immediately and bake for 35 minutes.
-Serve hot or cold with a roquette salad.
-Best appreciated with sparkling rose wine!
———————————
French Cuisine: Lukewarm Carrots Salad with Orange Flower Vinaigrette

As a kid, I was not a fan of cooked carrots, whereas I could have never enough of grated carrot salad.
Age helping, my palate is finally accepting cooked carrots, especially new ones or the red Kyoto variety.
Here is a simple French recipe for new carrots with a very long name:
Salade de carottes fanes tiedes, vinaigrette a la Fleur d’Oranger
In English: Young carrots with part of their leaf stems, served lukewarm with a Orang Flower Vinaigrette!
INGREDIENTS: For 4 persons
-Carrots (young, small, with their leaves): a “bunch (at least 12 of them)
-Eggs (absolutely fresh!): 4
-Olive Oil (EV): 3 tablespoons
-Lemon juice and zeste (grated skin) from 1 whole lemon (organic if possible)
-Eau de Fleur d’Oranger/Orange Flower Water: 3 tablespoons
-Fine salt and ground pepper
RECIPE:
-Heat 1 litre of water to boil in the bottom of your steamer.
-Cut the leaves off the carrots leaving at least 2 cm of the stems on.
Quickly grate the skin off down to root point.
Make an incision all along their length.
Clean under clear cold running water.
-Place the carrots in the basket of your steamer. As soon as the water starts boiling, put the basket on top. Close your steamer and cook for 8~12 minutes.
-During that time heat some water to boil in another pan.
As soon as it starts boiling , carefully drop the eggs in the water (use a large strainer) and boil for 12 minutes.
-Clean and dry the lemon. cut the yellow part of the skin and chop finely. Pres the juice out into a glass.
-Cool the eggs under cold running water. Tap the eggs onto your kitchen board. Take off the shells.
-Mix in a bowl the lemon juice, olive oil, orange flower water, chopped lemon skin/zeste, salt and pepper. Place the warm/lukewarm carrots on 4 individual plates. Pour the vinaigrette on them. Last grate one boiled egg over each plate. Serve at once.
An Alsace type white wine would be best!
———————–
Scottish Cuisine: Green Peas and mint Soup

I have nurtured a special fondness for Scotland where I stayed many times as far back as in the 1970’s. I’m still an ardent fan of Hamilton Academics, better known as the “Accies”, Football Club (Soccer)!
Scotland has more to offer than whisky and haggis, and its gastronomy is slowly but steadily getting better attention thanks to the thousands of tourists visiting this beautiful and still wild country.
It is a very cold country in winter, and a good soup is always much appreciated there!
Green Peas and Mint Soup!
INGREDIENTS: For 4 people
-Fresh or frozen green peas: 500 g
-Lettuce leaves: 150 g
-Onions: 250 g
-Chopped fresh mint: 3 large tablespoons
-Butter: 50 g
-Fresh cream: 100 ml
-Salt and pepper to taste
RECIPE:
-Peel the onions and chop finely. Wash the lettuce leaves and cut/chop finely.
-Melt the butter in large deep pan and cook the onions slowly over a low fire. They must melt but not change colour. Add the lettuce first and after a minute or two add 1 litre of water. Cook over a very low fire for 20 minutes.
-Add the green peas and bring to boil. Take off fire.
-Add the mint and mix for a long time with an electric whisker. Season with salt and pepper. Sieve the soup through a very fine mesh and pour again into the pan.
-Add the fresh cream and re-heat the soup over a low fire, taking care not to boil it.
-Serve hot with a few green peas and mint leaves.
NOTE:
You may also serve this soup with whisked fresh cream to which you have added plenty of pepper!
———————–
French Cuisine: Beignets de Sole au Parmesan & Mayonnaise verte/Sole fritters with Parmegiano and Green Mayonnaise

A lot of peple have this cricnge/hate about mayonnaise.
Why?
Because they usually eat redy-made, meaning a sweet and cloy product akin to fast/junk food.
Make it yourself then! I can assure you your world will change (alright, I’m exagerating!LOL)!
Sole is in season. Parmegiano is a favourite. Why not indulge in the following dish (long title, sorry!):
French Cusine: Beignets de Sole au Parmesan & Mayonnaise verte/Sole fritters with Parmegiano and Green Mayonnaise!
INGREDIENTS: For 4 persons
-Sole filets: 500 g
-Bredcrumbs: 100 g
-Grated Parmegiano: 50 g
-Flour: 50 g
-Eggs: 2 (beaten in omelette)
Oil for deep-frying
-Mayonnaise:
Sunflower oil: 300 ml
Spinach: 25 g
Egg: 1
White wine vinegar: 2 teaspoons
Mixed fresh herbs (Chervil, Tarragon, ciboulette): 25 g
Salt and Pepper to taste
RECIPE:
-Prepare the mayonnaise:
First drop the spinach in boiling water. Let cook for a few seconds only. Take out. Drain well and process with herbs into a puree.
Put aside.
In a food processor drop the whole egg with the vinegar and salt.
Mix at slow speed.
Then pour the oil slowly incresing the mixer/processor’s speed along.
When the mayonnaise is ready, Drop the spinach and herbs puree in andmix quickly. Keep in a cool place
-Heat the dep-fry oil.
Cut the sole fillets in 2cm long pieces.
In three separate dishes place 1) the flour, 2) the beaten eggs, 3) the parmegiano and bredcrumbs mixed together.
Rool the fish in 1) the folur, 2) the beaten eggs and 39 into the Pamegiano/breadcrumbs mixture.
-Drop the fish into the oil and lt fry for 1 minute.
Take out and place on kitchen paper to take off excess oil.
-Serve hot with the green mayonnaise.
What wine with it: dry solid white wine!
——————–
Wine-marinated Scallops and its Red and White Wine Jelly

It’s Summer.
That is when French and Japanese cuisines tend to fuse in a new natural dimension with the need for lighter gastronomic ventures.
here is a simple recipe that will impress your friends:
Wine-marinated Scallops and its Red and White Wine Jelly!
INGREDIENTS: For 4 persons
-Scallops: 12 large
-Red wine (Chinon, or a wine both spicy and solid, but not too heavy): 450 ml
-White wine (Loire or Vouvray, or a slightly sweet white wine): 200 ml
-Gelatin: 6 sheets
-Olive oil (EV): 2 large tablespoons
-Green leaves of your choice: ~250 g
-Salt & pepper to taste
RECIPE:
-Marinate the scallops in 250 ml of red wine for 2 hours.
-Drop the gelatin sheets in a bowl filled with cold water.
Separately heat both wines slowly to lukewarm in two pans.
Take gelatin sheets out of cold water bowl, drain them and add 3 of each to each wine pan.
Wait until gelatin has dissolved.
Pour the wine jelly into two deep plates or molds.
Put in refrigerator until jelly has completely solidified.
-ake the scallops out of their marinade.
Cut them into thin slices.
heat and reduce the marinade down to one third. Add olive oil, salt and pepper to marinade.
Let cool completely.
-Clean the vegetable leaves and place at the centre of plates.
Make a rondo/circle of slices callops. Cut the jelly into small cubes and place them over or with the salad.
Pour a spoon of the sauce over the salad.
Enjoy the rest of the wine with it!
——————
Belgian Cuisine: Potato Cream, Shrimps & Smoked Ham

Belgium is one those unsung countries when it comes to gastronomy.
Who has heard of the Ardennes Forest and its abundant game and mushrooms? Have you visited Bruges? The biggest misconception is “French fries”! Sorry, mate, but they are Belgian! And what about mussles and waffles?… And the beer?
Here is a typical fare that people in Bruges are fond of:
Potato Cream (Mashed potato cream), Shrimps & Smoked Ham!
INGREDIENTS: for 4 persons
-Potatoes: 4 bintje if possible
-Small (grey) shrimps: 300 g
-Smoked ham: 4 slices
-Egg yolks: 4
-Butter: 150 g
-White wine: 3 cups/600 ml
-Olive oil (EV): a little
-Fresh cream: 1 large tablespoon
-Nutmeg: 1 pinch
-Salt, pepper: to taste
RECIPE:
-Peel the potatoes. Cut them for easier cooking. Boil them in water for 20 minutes. Mash them with a fork. Add a little of the cooking water if necessary. Add and mix in a little olive oil and the fresh cream. Keep warm.
-lightly fry smoked ham in a little butter. Get the shrimps rid of their carapace and heads.
-In a bain-marie (on the fire put a pan with water and heat, use a smaller pan and place it inside the water-filled pan so as to avoid a direct contact with the heat) pan, whisk the egg yolks quickly addin the wine to them litle by little. Then add and mix the butter, a small piece at a time. Season with salt and pepper to taste. Mix.
Add this sauce to the mashed potatoes, mixing the two delicately. Season again if necessary. Ad the nutmeg.
-In a plate place some mashed potatoes in the middle. Wrap a piece of smoked ham around it and put the plate under the grill for a few minutes to obtain a lightly coloured top for the potatoes.
-Steam the shrimps and place them on top and around the mashed potatoes. Add a touch with some flat parsley or other herb of your liking!
To be savoured with a Belgian beer!
—————————
Safran & Mandarine Mashed Potatoes with Cockles & Mussles

One should never be afraid to experiment with seasonal products.
A failed experiment is certainly better than a dish served again and again ad infinitum!
At least this dish will be remarked for its colour!
Safran & Mandarine Mashed Potatoes with Cockles & Mussles!
INGREDIENTS: For 4 persons
-Potatoes: Choose 6 beautiful ones
-Mussles: 1 kg
-Cockles: 1 kg
-Dry white wine: 2 cups/400 ml
-Mandarines: 2 (organic if possible)
-Mandarin oil: 3 large tablespoons
-Shallots: 2
-Butter: 50 g
-Fresh cream: 2 large tablespoons
-Safran powder: 2 g
-Safran filaments: a few
-Mimolette cheese
-Egg yolks: 2
-Salt & pepper (to taste)
RECIPE:
-Mandarine oil:
Take the skin off mandarines (not includging the white part). Take out mandarine wedges.
Drop them in a glass jar with some pepper and cardamom.
Cover with EV olive oil and marinate for a few days in afresh area (not in the fridge as the oil would become solid).
-Wash the mandarines under warm water and leave them in freezer for 10 minutes. Grate their skins onto a plate and press their juice into a small bowl.
-Wash the mussles.
Drop them in a deep pan and heat them together with a glass of white wine, chopped shallot and safran filaments until they all open, stirring from time to time..
Take out the flesh out of the shellfish. Filter put aside the sauce.
-Repeat the same procedure with cockles.
-Peel the potatoes, cut them into pieces and cook them in salted water. When they properly cooked, mash them and mi in mandarine oil, safran powder and the fresh cream. Season with salt and pepper. Keep warm.
-Sauce:
In a pan over a medium fire, pour in the mandarine juice and the mussles and cokcles sauce. Reduce a little. Beat the egg yolks and add them to the sauce, beating all the time as you add the butter in small pieces at a time. Season with salt and pepper, a few safran filaments and grated mandarine skin.
-Take 3 large tablespoons of the sauce and mix them with the mashed potatoes. Dop the mussles, cockles and mandarine wedges into the sauce to heat them slowly on a small fire.
-Serve the mashed potatoes mounted with thin cuts of mimolette cheese and surrund them with sauce, mussles, cockles and mandarine wedges.
Drink a dry white wine with them!
————————-
Serrano Ham Leeks Gratin!

Spain and France are neighbours. Not so long ago various parts of both countries (Catalunia, Navarra, and so on) were also part of a third country. No wonder that both Nations’ gastronomies cross each other’s paths so often as shown in this recipe simple in concept but sophisticsted in products.
Serrano Ham Leeks Gratin!
INGREDIENTS: For 4 persons
-Leeks: 10 cm long x 8. Choose thick and soft leek.
-Ham: thin slices of Spanish Serrano Ham/150 g
-Cheese: Spanish Manchego or hard ewe cheese/100 g
-Fresh cream: 200 ml
-Salt and pepper (to taste)
RECIPE:
-Poach leeks for 10 miutes in boiling salted water.
During that time, mince half of the ham and grate half of the cheese and drop them in a bowl. Add 2 large tablespoons of fresh cream and mix well.
-Cut the leeks along their length along their length to take their outer layer and extract the white cores. Mince the white cores and mix them with the minced ham and grated cheese.
-Preheat the oven to 5 (180 degrees Celsius).
Spread 1 lage tablespoon of fresh cream over the bottom of an oven dish.
Stuff the outer layers of the leeks with the ham and cheese mixture.
Place them on the bottom of the oven dish. Pour the remining fresh creamover them. Grind pepper over them and bae in oven for 10 minutes.
-Cut the remaining cheese and ham into thin slices. After having cooked for 10 minutes, take the dish out of the oven, olace ham and cheese over the stuffed leeks and put back into oven for a few minutes.
Serve the gratin very hot at once.
Drink a dry white wine with it!
——————-
Honey and Mint Pizza

Who doesn’t like pizza?
Just found this interesting recipe in my notes to please vegetarians:
Honey and Mint Pizza!
INGREDIENTS: For 4 people
-Pizza bread: enough for one large pizza. Excellent pizza bread can be bought through the Internet. Of course, home-made is best. I’m sure everyone has his/her own preferred recipe!
-Tomatoes]: medium big x 2
-Peeled tomatoes: 1 can
-Tomato puree: 2 large tabelspoons
-Ricotta cheese: 2 large tablespooons
-Mozzarella bi Bufala: 2 balls
-Fresh mint: 2 sprigs
-Honey (liquid): 2 large tablespoons
-Olive oil (EV)
-Ground pepper
(no salt needed, unless you are an addict!)
RECIPE:
-Preheat the oven to 240 degrees Celsius
-Cover the bottom of the oven late with cooking paper brushed with olive oil.
-Cut the tomatoes into slices. Discard as much pulp as possible. Put aside.
-Drain the mozzarella balls with kitchen paper and cut into thin slices.
Wash and dry the mint leaves.
-Spread (unroll) pizza bread onto oiled cooking paper (yopu may think of 4 small individual pizzas, too!).
When you garnish the pizza bread, keep in mind to leave some room around the rim for crispy look!
Spread the tomato puree first, then peeled tomatoes. Add the ricotta as uniformly as possible. Cover with tomato slices. Sprinkle with olive oil and bake in oven for 15 minutes.
-Take out the pizza and place the mozzarella slices. Put back into oven for 5 minutes.
-Take out of the oven. decorate with mint leaves and pour the honey over the whole pizza as uniformly as possible.
-Eat at once!
NOTE:
This is a basic suggestion.
Some people will like to add garlic, basil and so on.
I kept it as simple and healthy (no salt) as possible!
———————–
Smoked Salmon Nems in Vodka Cream Sauce

When Summer comes, one is looking for light but sophisticated food to go with all those cold drinks!
Here is recipe that marries concepts from South East Asia and Northern Europe:
Smoked Salmon Nems in Vodka Cream sauce!
INGREDIENTS: For 6 persons
-Smoked Salmon: 6 thin slices (fairly long)
-Mascarpone: 250 g
-Fresh cream: 150 ml
-Vodka: 50 ml
-Lemon juice: 1 lemon
-Chervil: 6 sprigs
-Ciboulette (very thin leeks): 12~ sprigs
-Baies roses/whole pink peppercorns: 12 roughly broken
-Red hot chili/Espelette: to taste
-Salt: a little (to taste)
Vodka Cream sauce:
-Fresh cream: 150 ml
-Vodka: 50 ml
-Lemon juice: 1 lemon
-Baies roses: 6
Salt and pepper (to taste)
RECIPE:
-Cut the smoked salmon slices into squares approximately 10×6 cm.
Put each over a cellophane paper piece and keep in the fridge.
-Cut the chervil and ciboulette finely.
In a bowl, beat very cold fresh cream into Chantilly cream (solid, but carful! stop before it turns into butter!). Add slowly and carefully Mascarpone into the cream, then lemon juice, vodka, chopped chervil and ciboulette and broken baiese roses, and last slat and chili pepper.
-Place this filling over the salmon slices. Roll them into nems. Wrap them tightly into cellophane paper and leave them inside refrigerator.
-Grind the beaies roses.
In a bowl mix fresh cream, vodka, lemon juice and ground baies roses with a whisk. Season it if needed and mix again. Leave in refrigerator.
-Just before serving, take nems/rolls out of the fridge. Cut each extremity for better effect (this will allow to taste them beforehand!).
Place them on plates. decorate plate with Vodka Cream Sauce.
POINT:
They look even greater served mounted with some salmon roe and ciboulette sprigs!
————–
Safran Cream Mussles

Mussles a re a favourite every where, but especially in the north of France, Belgium and Flanders.
The safran adds an exaotic note to this simple delicious recipe:
Safran Cream Mussles!
INGREDIENTS: For persons
-Mussles: 3 litres/2.5 kg
-Safran: a few filaments
-1 very fresh egg
-Dry white wine: 150ml
-Fresh cream: 200 ml
-Garlic: 1 clove (peeled)
-Bouquet garni
-Salt (to taste)
-Pepper (to taste)
RECIPE:
-Brush and clean mussles under running cold water twice.
-Drop the mussles inside a wrought iron dish (le Creuset style) with the wine, garlic, andbouquet garni. Add salt and pepper. Cover and cook on a medium-high fire. Shake mussles around regularly for uniform cooking. Cook until all mussles are open. It will take about 10 minutes.
-Drain them over a bowl. Filter the “juices”.
Take mussles out of their shells.
Take the
-Heat the juices with the fresh cream and safran added on a medium-low fire, stirring all the time. Check taste and season if needed.
-Separate yolk from white. (store egg white for another recipe).
in a separate bowl whisk the egg yolk with a little of the safran cream.
-Away from the fire, pour all the juices and the egg yolk into the wrought iron dish. Mix well. Put dish over ow mediumfire again.
-Put back the mussles inside the dish as soon as the sauce is hot enough.
-Serve the mussles as soon as they are hot enough into bowls or deep plates.
Serve either as a starter or with rice (steam or buttered)
Enjoy with a strong white wine!
—————————-
FRENCH DESSERT: TARTE AU CAFE/COFFEE TART

Here is a simple but elegant cake recipe I found in my notes to please everyone in the family!
Tarte au Cafe/Coffee Tart!
INGREDIENTS: For 6 persons
-Pastry:
Flour: 250g + 20 g for the mold.
Butter: 125 g ; a little
Sugar: 3 large tablespoons
Egg: 1
Milk: 3 large tablespoons
Instant coffee: 1 small teaspoon
Salt: a pinch
-Coffee pudding:
Mascarpone: 250 g
Eggs: 4
Sugar: 180 g
Liquid coffee extract/essence: 4 small teaspoons
Powdered hazlenuts: 20 g
Ice sugar: 20 g
-Decoration:
Ice sugar: 1 large tablespoon
Coffee beans: 4
RECIPE:
-Preheat oven to 7 (210 degrees Celsius). Butter and flour the tart mold.
-Prepare the tart pastry:
Mix flour and butter with the tips of your fingers. Add salt, sugar and egg, milk and instant coffee. Make a bowl. Spread it and insert inside tart mold. Stab the pastry with a fork at regular spaces.
Put the pastry and mold inside freezer for 10 minutes.
-Whisk mascarpone and suar inside a bowl. Add and mix the eggs one by one and last coffee extract.
-Cook the pastry inside oven for 10 minutes. Sprinkle with ice sugar and hazlenut powder. Slowly pour the pudding mixture inside the tart pastry.
ower the oven heat to 6 (180 degrees Celsius) and cook for 50 minutes.
If the color over the surface of the tart colours up too quickly, lower heat to 5 (150 degrees Celsius) and bake a little longer.
-Leat tart cool off before taking it out of its mold. Sprinkle it ice sugar and finely broken coffee beans.
-Serve lukewarm or cold.
————————–
PEACH CLAFOUTIS

Peaches being in season, it is only a queation of finding enough recipes to accomodate them!
Here is a simple recipe:
Peach Clafoutis!
INGREDIENTS: For a baking mold of 15 cm diameter
-Sugar: 6 g
-Rhum/rum: a little (to taste)
-Peach: a large one, 200g
-Egg: 1 large/52 g
-Fresh cream: 45 g
-White chocolate: 45 g
-Ready-made 15cm tart (of your choice)
RECIPE:

-in a frypan drop in sugar with some butter and heat slowly until they turn into caramel.

-Cut peach in appropriate sized wedges and fry them coating with the caramel.

-Just as the edges of the peach wedges start losing shape pour in rum.
Switch off fire and let cool.

-Drop egg in a bowl and beat well into a uniform omelette.

-Add fresh cream, beat. Heat and melt white chocolate inside microwave oven for 30 seconds.

-Pour in the egg/cream mixture into the bowl containing melted white chocolate and mix well.

-Place peach wedges inside tart.

-Pour clafoutis mixture onto peaches.

-Bake at 120 degrees Celsius for 20 minutes or until you are satisfied.
Let cool completely and chill before serving.
—————————–
Blueberry and Red Wine Ruby Mousse

Here is a seasonal dessert for adults with a wicked liking for wine!
Blueberry and Red Wine Ruby Mousse!
INGREDIENTS: For 4 cups (to share?)
-Blueberry Mousse:
Powdered gelatin or agar agar: 5 g
Water: 2 large tablespoons
Plain yoghurt: 200 ml/1 cup
Honey: 40 g
Frozen blueberries (or fresh in season): 7
Lemon juice: a little
Fresh cream: 50 ml
-Red wine jelly:
Red Wine: 100 ml
Sugar: 15 g
Lemon juice: a little
powdered gelatin or agar agar: 2.5 g
Water: 2 large tablespoons
-For decoaration:
Blueberries: to taste
Mint leaves
RECIPE:
-Blueberry Mousse:
Pour water into a bowl, add gelatin and mix in (in that order, please otherwise you will fail!)
Drop yoghurt, honey (liquid) and blueberries in a mixer/food processor. Mix until smooth.
Beat up fresh cream until it “horns” stand. Add to mousse mixture. Season with lemon juice.
Dissolve gelatin in water by gently heating it. Add to Mousse mixtureand mix. Pour the the blueberry mousse into 4 recipients of your choice and leave inside fridge for 30 minutes or until properly solidified.
-Wine jelly:
As for the bleberry mousse, add gelatin to water.
In a small pan heat red wine and sugar together to dissolve. Stop fire as soon as you think that the alcohol has evaporated. Season with lemon juice.
Let cool completely.
Dissolve gelatin in water by gently heating it. add to red wine jelly mixture and let cool completely.
Pour jelly over Blueberry Mousse and put v\back into refrigerator to solidify.
Only when the whole mousse and jelly are firm enough decorate with blueberries and fresh mint leaves.

Make a point to scoop both parts for top enjoyment!
—————————
Avocado, Scallops & Passion Fruit Carpaccio

Here is another idea as a summer salad I have just fished out one of my recipe notes.
Although Carpaccio should only apply for beef, indulge the old geezer as far as names are concerned! LOL.
Avocado, Scallops & Passion Fruit Carpaccio:
INGREDIENTS: For 6 persons
-Scallops: 12 large without any roe or strings
-Avocado: 3 ripe, but still firm
-Passion fruit: 3 large maracujas type or 5 small
-Green lemons/limes: 3
-Olive oil (EV): 2 large tablespoons
-Sweet basil: 3 lage leaves
-Salt (to taste)
-Freshly ground black pepper
RECIPE:
-Press the juice out of the green lemons in a bowl. Cut passion fruit in two and strain over the lemon juice to take pips out (discard. You may keep a few for decoration, though).Mix.
-Cut scallops into thin slices and place on a large dish with space betwen them.
-Peel the avocadoes. Cut them in two halves. Dicard nut. Cut avocado into thin slices and place between scallops slices.
-Season with salt, freshly ground black pepper, and the lemon/passion fruit juice. Sprinkle with olive oil. Cover with cellophane paper and leave iside refrigerator for 2 hours.
-Before serving, thinly cut sweet basil and decorate dish with it.
Best savoured with a dry white wine!
————————–
Vegan Peach and Luccola Salad

Fruit are great as desserts, but they have so many benefits that they aso make for some great combinations with vegetables, especially salads!
Her is an example as peaches and luccola are in season:
Vegan Peach & Luccola Salad!
INGREDIENTS: For 1 person
-Peach: half a fresh one
-Luccola: 3 leaves
-Lemon: 1 sixth/1 wedge
-Salt: a pinch (to taste)
-Ground black pepper (to taste)
-Olive oil (EV): 1 large tablespoon
RECIPE:
-Chill a plate.

-Cut each luccola sprig in 8 cm long parts. Drop into a bowl.
-Peel peach, and cut 1 half into 5 wedges (if you do not eat the rest right away, sprikle with lemon juice, wrap in cellophane paper and keep in the fridge!).
-Add in the bowl lemon juice, olive oil and salt. Lightly toss.
-Add peach wedges and toss again just a little. Place onto a plate with an eye for decoration.
-Grind black pepper over the salad!
Simple, easy and healthy!
NOTE:
Eat at once or luccola will change colour and turn soggy.
Don’t forget to bring some white wine!
———————–
Mint & Orange Peels Chicken

I love chicken! I probably eat some three times a week.
Not only is it to cook, but recipes are illimited.
Just found the following recipe in an old cookbook of mine:
Mint & Orange Peels Chicken!
INGREDIENTS: For 4=5 people
-Chicken: 1 whole
-Butter: 100 g
-Onions: 2 large/finely chopped
-Chicken stock: 400 ml
-Chiselled (thinly cut) mint leaves: a quarter of a cup/50 ml
-Chopped coriander: a quarter of a cup/50 ml
-Chopped parsley and ciboulette (very thin leeks): 2 large tablespoons
-Orange juice: 2 oranges freshly pressed
-Grated orange skin (peel): 2 above
-Crushed walnuts: 50 g
-Salt & pepper: to taste
RECIPE:
-In a large thick pan (le Creuset style), drop 50 g of butter and cook onions on a strong fire until they become translucent. Lower fir to medium. Add chicken stock. Add salt and pepper. Put the chicken inside the pan. Cover with lid. Simmer for an hour.
-In a frypan, on a low fire, drop the other 50 g of butter and cook gently all herbs and half of the chiselled mint.
-Pour onto the chicken with the orange juice, grated orange skin and crushed walnuts. Let simmer again for 30 minutes.
-Cut the chicken and serve hot decoarated with the other half of chiselled mint.
Best savoured with plain steamed rice or butter rice!
————————-
Baked Matcha (Green Tea) Cheese cake

Shizuoka Prefecture, where I live, produces no less than 50% of the national crop of green tea. You can imagine the quality of green tea consumed in homes in our Prefecture!
Matcha, high quality green tea powder has increasingly become popular in cooking not only in Japan, but abroad.
It does make for a beautiful combination with cheese cakes!
Baked Match Cheese Cake!
INGREDIENTS:
-Cream Cheese (Philadelphia style): 250 g
-Sugar: 90 g
-Eggs: 2
-Fresh cream: 100 ml
-Cornstarch: 1 large tablespoon
-Matcha: 1 nad a half large tablespoons
RECIPE:
-Preheat oven to 180 degrees Celsius
Place a sheet of cooking paper inside the cake mold
Bring the cream cheese to room temperature
-Mix softened cream cheese with sugar and mix with a hand mixer. Next add eggs, one at a tim e and mix well.
-Add fresh cream and mix well.
Mix cornstarch and matcha, then sprinkle the mixture in a “rain” over the cheese cake mixture and mix.
Pour the mixture into baking mold.
-Cook at 180 degrees Celsius for 40~50 minutes.
Atfer having cooled the cake completely leave in refrigerator to chill probably before serving.
Easy, isn’t it?
———————–
Grapefruit Chiffon Cake

As promised, here is another version of the American Chiffon Cake:
Grapefruit Chiffon Cake!
INGREDIENTS: For a 20 cm wide mold
-Eggs (L Size):
Whites: 5
Yolks: 4
-Grapefruit
Ruby: 1
White sugar: 2 large tablespoons
Powder ingredients:
Flour: 100 g
Baking powder: 4 g
White sugar: 60 g
Salad oil: 70 ml
Salt: half a small teaspoon
Dry coconuts flakes: 2 large tablespoons
Oven temperature:
160 degrees Celsius for 45~50 minutes
RECIPE:

-Take out the flesh of the grapefruit. In a bowl add the sugar and heat inside a microwave oven for 3 minutes. The sugar will take the acidity off the grapefruit.

-Let cool down to room temperature. Accelerate the process by putting the recipient into a larger one half filled with ice water.
-The egg yolks (4) and egg whites (5) should be inside two different bowls. Put the bowl containing the egg whites inside the freezer for enough time to chill them
-Mix flour and baking powder in two steps. Add coconut flakes.

-The egg whites should be chilled enough after 5 minutes inside the freezer. They are bst when ice appears around the rim.

-Beat up the egg whites.
Halfway through add two thirds of sugar and continue beating.
-The meringue should show “horns”. Keep in mind that if the meringue becomes too hard, it will difficult to milk with something else!
-Put back the meringue into the freezer. Otherwise it will become sticky and runny.
Preheat oven to 160 degrees Celsius.

-Add salt and one third of the sugar to the egg yolks.
Beat slowly.
-The salt will help “whiten” the eggs after a few minutes and hold back the sweetness of the sugar.

-Baeting slowly all the time, add salad oil. Mix well. Add grapefruit. Mix well.
-Last add flour, baking powder and coconut flakes mixture. Fold in gently with saptula.

-Add half of the meringue and mix well.
-Once well mixed, add second half of mringue and mix. This way will prevent any mistakes!

-Pour in the cake mixture into the mold.
-Insert a long stick inside the mixture and turn around 10 times to ensure than no bubbles will break the surface of the cake while baking!

-Bake in oven at 160 degrees Celsius for 45~50 minutes. Insert a stick in the cake if you are not sure it is completely cooked. If the stick comes out clean, the cake is ready!
————————-
Tuna and watermelon Salad

This particular salad is actually called “Yukke” in Japanese, and it is inspired from Korean gastronomy, the most influential foreign gastronomy with the Chinese one in Japan’s everyday meals!
“Yukke” could be roughly (many people might disagree there, sorry!) as “Tartare”.
Great in summer with a glass of sake or shochu!
INGREDIENTS: For 2 persons
-Watermelon: Including the red and white parts/150 g
-Raw tuna: 100 g
-Sesame oil: one and a half large tablespoons
-Miso: 2 small teaspoons
-Soy sauce: 2 small teaspoons
-Powdered/ground sesame seeds: 2 large tablespoons
-Grated garlic: to taste
-Fresh egg yolks: 2
-Leaf vegetables: shiso/perilla, Myoga, thin leeks, etc (to taste)
RECIPE:
-Cut tuna and two thirds of the watermelon (red part without the pips/seeds) to small enough sized pieces.

-Cut the white part of the watermelon into thin strips as shown above.
-Grate the remaining watermelon (red part) and mix well with sesame oil, Miso, soy sauce, powdered/ground sesame seeds, and grated garlic.
Add the cut tuna and red watermelon pieces and mix.
-On to different plates, palce the watermelon white strips first and then the tuna and watermelon as sown in top picture. Make a small well on top and delicately drop an egg yolk. add chopped leaves for better effect and taste.
NOTE:
-As watermelon tends to give away water, eat as soon as prepared.
-For people whole like their food spicy add ingredients of your liking!
—————————
Rare Blueberry Cheese Cake

I posted a baked blueberry Cheese Cake yesterday. Here is the “rare” version as the Japanese describe their bain-marie cooked Cheese Cake as opposed to the fully baked variety!
Rare Blueberry Cheese Cake!
INGREDIENTS: For an 18 cm diameter mold
Cheese cake
-Cream Cheese (Philadelpia type): 250 g
-Sugar: 80 g
-Eggs: 2 medium-sized
-Fresh Cream: 200 ml
-Lemon Juice: 1 large Tablespoon
レモン汁 大さじ1
-Flour: 3 large Tablespoons
-Blueberries (frozen): 130 g
-Biscuits: 100 g
-Butter: 50 g
Sauce:
-Blueberries (Frozen): 130 g
-Sugar: 50 g
-Lemon Juice: 2 small teaspoons
RECIPE:
-Drop biscuits in a food processor and process until you obtain fine crumbs. Add melted butter and process.
-Place baking paper inside mold. Pour biscuits mix in and spread evenly. Leave inside fridge until further use.
-Clean the food processor. Drop in the cream cheese, sugar, eggs, fresh cream, lemon juice and flour. Process one at a time until mixture is smooth before dropping in the next ingredient.
-Transfer the mixture into a separate bowl. Add three fourths of the frozen blueberries. Mix them in carefully so as not to break them.
-Pour the cheese cake mixture directly onto the biscuit base. Place remaining blueberries on top. Cook in bain-marie at 170 degrees Celsius for 60 minutes.
-Leave cake inside the refrigerator after having completely cooled down.
-Blue berry sauce:
Drop blueberries, sugar and lemon juice in a cooking recipient.
Cover with cellophane paper and cook inside a microwave oven at 500~600 W fro 3~4 minutes. Take out and stir for a while. Let cool completely and leave inside refrigerator.
-Serve the cheese cake chilled with a good dose of chilled sauce.
NOTE:
When you add blueberries to cheese cake mixture, do not overmix, otherwise the whole thing will turned blue!
Best served when chilled.
Think about about extra decoration for better efffect (mint leaves, etc…)
————————
Blueberry Chicken

Blueberries and other red fruit (cassis, redcurrants, raspberries, etc.) can be married to certain meats, especially chicken and game.
I’ve always found the sweet and salty combination intriguing.
Here is a very simple suggestion that can be easily developped into a superlative creation:
Blueberry Chicken!
INGREDIENTS: For 2~3 persons
-Chicken, preferably thigh: 300 g
-Blueberries: 100 g
-Garlic: 1 clove
-Laurel: 2 leaves
-Salt: 1 small teaspoon
-Black pepper: to taste
-Sugar: 1 large tablespoon
-Flour: 1 large tablespoon
-Grapeseed oil: 1 large tablespoon
-White wine: half a cup
-Water: 300 ml
-Vegetable accompaniment: to taste and avaibility
RECIPE:
-Sprinkle chicken with the salt, pepper and flour.

-In a frypan over a medium high fire pour grapeseed oil and heat. Fry the chicken skin down utntil golden brown. Turn over and repeat.

-When both sides of the chiken have attained a rich golden-brown colour, pour out oil (do not wipe the frypan. Leave the chicken inside.) Pour water as to reach half of the height of the chicken. Add fresh blueberries.
-From this moment prepare the vegetables you wish to accompany the chicken with. You will be able to time their cooking with the chicken and serve all at the same time.

-Add crushed and minced garlic, laurel leaves (whole). Cook untill “stock” has been reduced to half. Turn over chiken halfway.
-When the stock has reduced to half, take chicken out and place on a dish or plate.

-Add the sugar to the sauce and heat until the sauce becomes syrupy. Discard laurel. Pour over the chicken. Serve with vegetables (boiled or sauteed)
NOTE:
There is naturally plenty of scope as far as spices are concerned. I personally like to add a little nutmeg and thyme.
————————–
Blueberry Yoghurt Chiffon Cake

I certainly felt better when Suzy reminded me they just had a news report in the States that said blue berries are the most healthy food item in the world! I still have quite a few up my sleeve! LOL
For once I would like to introduce a version (there is another one coming soon!) of that famous American Cake:
Blueberry Yoghurt Chiffon Cake!
INGREDIENTS: For a 17 cm wide aluminium mold
-Egg yolks: 4
-Blueberry Jam: 30 g
-Yoghurt (no need to reduce the amount of water): 150 g
-Salad oil: 2 large tablespoons
-Egg whites: 4
-Flour: 90 g
-Sugar: 40 g
RECIPE:
-In a large bowl mix egg yolks, yoghurt and blueberry jam.
Add oil and mix well.
Sprinkle flour on top in “rain” and mix well.
-Preheat oven to 170 degrees Celsius.
In a separate bowl beat the egg whites with sugar in two steps with half of the sugar each.
Check that the meringue is solid and “stands up”.
-Once the meringue is ready, pour one third into the bowl containing the batter and mix well with a whisker.
-Add remainder of meringue and mix the lot with a spatula.
-Pour the batter into the mold delicately and bake for 35 minutes.
Cover with a piece of foil paper midway if you don’t want the cake top to overcook.
-Once cooked, turn mold over onto a plate.
Wait until the cake has completely cooled before taking it out of its mold.
-Before eating it is best to chill the cake in the fridge after having taken it out of its mold.
————————-
Baked Blueberry Cheese Cake

With blueberries in full season, I seem to have entered a “blueberry mode”! I do have a few recipes on my “desk” right now, and you can expect at least three more coming in the near future!
her is another version of Japanese cheese cakes:
Baked Blueberry Cheese cake!
INGREDIENTS: For a 15 cm wide mold
-Cream Cheese (Philadelphia style): 200 g
-Sugar: 4~5 large tablespoons
-Eggs: 2
-All-purpose flour: 3 large tablespoons
-Fresh cream: 100 ml
-Lemon juice: 1 large tablespoon
-Blueberries (frozen): 120 g
RECIPE:
-Preheat oven to 180 degrees Celsius.
Place baking paper inside mold.
-In a larg bowl drop cream cheese. Add sugar, eggs, flour, fresh cream in that order and mix well one by one. Last add lemon juice and mix well.
-Drop bluberries in and quickly mix. Pour cheese cake mixture into mold and bake for 40~50 minutes.
NOTES:
-You could use an 18 cm wide mold, but it will take less time to bake.
You may use a square mold to allow you to cut the cake into “sticks” for a different presentation.
Above picture shows a cake to which 60 g of crushed Graham Crackers mixed with 15 g of butter to provide a more solid base!
————————-
Quick Summer Dessert: Blueberries Tofu

Tofu for dessert?
And why not?
Easy, healthy and great for the whole family!
Bluberries Tofu!
INGREDIENTS: For one dessert
-tofu: 100 ml (half a cup)
-Frozen bluberries: half a cup
-vanilla ice cream: a small scoop
-Fresh bluberries: 2~3
RECIPE:
-Drop all ingredients in a mixer/blender and blend until blueberries are reduced to pulp.
-Pour inside recipient/cup/glass of your choice. Decorate with fresh blueberries.
Note: don’t overblend, otherwise ice cream will turn liquid!
———————–
Fruit Chocolate Cream Mousse

I’ve always loved choclate mousse and cream as far as I can remember and am always on the lookout for a simple recipe!
Here is one that even chidren could make:
Fruits & Chocolate Cream Mousse!
INGREDIENTS: For 5 people
-Chocolat Cream Mousse:
Milk Chocolate (use you favorite brand!): 65 g
Fresh cream: 200 cc (1 cup)
Fruit marinade:
Seasonal fruit (I cho0se mango this time as they are available most of the year): 1
Liqueur (Your favourite!): I chose rum this time: 2 large tablespoons
RECIPE:

Any fruit is fine. Think of volume and cuts: pears, strawberries, cherries, blueberries, raspberries, …

Marinate your fruit with your favourite liqueur.

Melt the chocolate over a bain-marie at about 50 degrees celsius.

Whisk the fresh cream up to your own liking.

Add one third of the whisked fresh cream and mix gently.

Add rest of fresh cream and mix gently. If you whisk it too hard, ingredients will separate.
Fruits & Chocolate Cream Mousse

Place marinated fruit into recipients.

Pour chocolate cream on top and leave in refrigeartor for 2 hours.
Before serving decorate each cup using your imagination!
————————–
Vegetable and Fruit Yoghurt Mousse

Is your whole family vegetarian?
Here is a dessert for all, adults and chidren alike:
Vegetables and Fruit Yoghurt Mousse!
INGREDIENTS: for 8 people
-Mousse:
Vegetable Juice: 200 cc (1 cup)
Fresh cream: 200 cc (1 cup)
Yoghurt: 250 cc (1 and a quarter cups)
Sugar: 100 g
lemon juice (to taste)
Gelatin or agar agar powder: 10 g
-Jelly:
Vegetable juice: 350 cc (1 and three quarters cups)
Sugar: 200 cc (1 cup)
Sugar: 30 g
Gelatin or agar agar powder: 10 g
-Topping:
Blueberry jam (to taste)/You may use other fruit jams naturally!
-Others:
Lukewarm water to dissolve gelatin: 6 large tablespoons each
RECIPE:
-Preparing jelly:
Add water to vegetable juice and warm up inside microwave oven for 30 seconds. Take out, add sugar and mix.
Add gelatin dissolved in lukearm water and stir well.
Pour in individual recipients. Let cool.
Leave inside refrigerator for 40~60 minutes until it has properly solidified.
-Preparing mousse:
Mix fresh cream with sugar in blender or whisk until half solid (should still see bubbles)
In a separate bowl pour vegetable juice, yoghurt and lemon juice. Add gelatin dissolved in lukewarm water and mix well.
-Let cool and pour over jely in individual recipients. Leave in refrigerator until properly solidified.
-Once the mousse ad solidified, top with jam thinned with a little water. If the dessert is for adults only, thinning the jam with liqueur is a good idea!
Open to imagination and variations!
————————-
Cherries Red Wine Compote

While cherries are still to found aplenty and at cheap prices, it is always a good idea to make preserves.
I remember my father back home preserving dark cherries in kirsch (cherry brandy), putting the jars away inside a small pantry, locking it and keeping the key with him as they would quickly disappear as I, my two brothers and one sister got drunk on them as kids!
Here is a simple recipe making use of light coloured cherries and red wine:
Cherries Red Wine Compote:
INGREDIENTS:
-Cherries: 150 g
-Sugar: 3 large tablespoons
-Red wine: 2 larg tablespoons
RECIPE:
Wash cherries in clear cold water. Stab 5 of them with thin needle.
In a small bowl, drop in sugar with a little water. Warm up in a microwave oven until sugar has dissolved. Add a little more water and let cool down completely.

Place cherries inside the pan with their stems taking care that the cherries don’t overlap.
Pour in red wine. Add sugared water. Add water to just reach the top of the cherries. Cook on a small fire for 10~15 minutes.

Pour the lot inside a preserve glass jar and close. Let cool completely and leave inside the refrigerator for a whole week.

Here they are!
Savour them with a coffee, dark tea or a dram of kirsch!
Note that they should be cooked over a low fire, otherwise the skins would break.
These cherries can be used on ckaes in clafoutis!
———————–
Easy Summer Salad: Zucchini, Grapefruit & Dill Salad

As I said before, Summer comes with all kinds of fruit and vegetables that can be combined into simple and refreshing salads. They are welcome at home and summer parties.
To be enjoyed with all kinds of ades (for the kids?) or white wines (including the bubbly ones). In Japan, sake of course!
Easy Zucchini, Grapefruit & Dill Salad
Ingredients: For 2 people
-Zucchini: 1 preferably green, but yellow would be intereesting (or even a combination of the two!)
-Grapefruit: hal a fruit
-Dill: 5=6 sprigs
-Olive oil (EV): half a large tablespoon
-Fresh cream: 1 nad hal large tablespoons
-Salt and white pepper (to taste). One may add (up to a point) other spices including chili pepper! One may use ground black pepper instead of white pepper for better effect!
Recipe:
-Cut extremities of zucchini and discard. Cut into very thin slices. Warap inside cellophane paper and leave in microwave oven for 2 minutes. Cool and then chill. Discard water.
-Extract flesh out of grafruit and cut wedges into small bits.
Separate “leaves” from dill sprigs as finely as possible.
-In a bowl, pour oil, salt, fresh cream and mix. Add dill and mix. Add zucchini and grapefruit.
Arrange into individual dishes as delicately (lovingly?) as possible. The visual effect is most important!
I leave to you as to which variation you might tempted to try!
————————–
Easy Summer Salad: Grapefruit & Avocado Salad

Summer comes with all kinds of fruit and vegetables that can be combined into simple and refreshing salads. Moreover, they make for healthy snacks for the family and summer parties.
To be enjoyed with all kinds of ades or white wines (including the bubbly ones). In Japan, sake of course!
Simple Grapefruit & Avocado Salad
Ingredients: For 2 people
-Grapefruit: 1 large, sanguine type preferable
-Avocado: 1 large. Choose it soft, but firm enough to be cut
-Salt: a pinch (to taste)
-Ground pepper (to taste)
-Lemon juice
-Olive oil (EV): 1 large tablespoon
Recipe:
-Peel grapefruit and extract the “meat” carefully the wedges over a bowl. Cut the wedges into bite size pieces and drop them in the bowl where they will be kept with any juice that has flowed from them.
-Cut Avocado in two, discard the large seed, peel and cut into bite-size pieces. Add some lemon juice to them to preserve colour in a separate bowl.
-Add Avocado to grapefruit. Add salt, ground pepper and olive oile. Mix well but as delicately as possible.
-Serve in individual plates with all the “juice”. Add basil of other herb leaves for decoration and taste.
————————
Saucisson brioche/Sausage in Brioche

Even to these days I cherish thememory of this French specialty originating from the City of Lyon that we were served either as an appetizer or main dish: Saucisson Brioche, namely a sausage baked inside a salty (as opposed to the sweet pastry) brioche.
The recipe is not that difficult and open to many variations!
INGREDIENTS:: For up to 6 people
-One sausage. In France, it would be a Lyon sausage, of the soft type including pistacchio. Some soft sausages found in Italy, Germany and he US should well! If you eat kosher or halall, choose a sausage of mutton or beef.
-All purpose flour: 250 g
-Dry baking yeast: 4~5 g
-Eggs: 3
-Fresh Cream: 150 ml (thick type or sour cream)
-salt: to taste
RECIPE:
-Prepare the pastry:
In a large bowl break the eggs and beat them with a fork. In a separate bowl sift the flour and yeast first. Add the eggs to flour little by little mixing them in with a spatula. Then add cream and mix until you get a smooth batter.
-Poach the sausage for 15 minutes in boiling water. Take out and peel “skin” off.
-In a pound cake mold, non-stick if possible, put a large piece of cooking paper buttered on both sides. Pour in half of the batter. delicately put the sausage in the meiddle and cover with the rest of the batter. Cover with a piece of cloth and let rest for 15 minutes at room temperature.
During that time preheat oven to 6/7 (200 degrees Cesius).
Bake in oven for 40 minutes.
Take out of the mold still hot and serve just above lukewarm with a lettuce salad.
Red Bourgogne wine is best with it!
Note: You can cook the day before and reheat it before serving!
—————–
Japanese Mango and Rare Cheese Cake

The Japanese make a distinction between two kinds of cheese cakes:
-Just “cheese cake” means it has been baked
-“Rare Cheese cake” means that the cake is not cooked.
This particular recipe is dedicated to Elin and her love for mangoes!
INGREDIENTS: For 4 servings (18×9 cm pound cake mold)
-Cream cheese (Philadelphia): 150 g
-Lemon juice: 1 large Tablespoon
-Sugar: 45 g
-Plain yoghurt: 150 g
-White wine: 3 large tablespoons
-Gelatin powder or agar agar powder: 5 g
-Fresh cream: 100 ml (half a cup)
-Rum: 1 large tablespoon
-Cake margarine: 30 g
-Coconuts sable biscuits: 60 g
-Allspice: half a teaspoon
-Dried mango: 3~4 slices
-Fresh or canned mango: 4 cubes
-Green pistachio: 4
RECIPE:

Place cooking paper inside a pound cake mold.
Mix crushed coconuts sable biscuits, margarine and allspice.
Spread equally on bottom of the mold.
Leave inside refrigerator.

Cut dried mango into small pieces and season with rum.

In a separate small bowl/deep plate pour in wine. Then (the other round will result in failure!) sprinkle with gelatin powder and mix until smooth.

Soften cream cheese in a microwave oven for about 30 seconds. Add lemon juice, sugar and yoghurt. Mix well until smooth.

Add wine and gelatin to cheese cake mixture and mix well, taking care not to make bubbles!

In a separate bowl, whisk fresh cream up to 7/10 solidity (too solid is not welcome!) . It should still be bubbly. Add a small part to cheese cake mixture and mix well. Add rest of fresh cream and mix carefully, taking care not tobreak bubbles.

Add rum-soaked dried mango to cheese cake mixture. Mix just enough for uniformity.
Pour the lot into mold and leave insid eefrigerator until it has completely solidified.

Decorate with whipped cream, pistachio and mango cube before cutting and serving!
———————–
French/Japanese Cake: Pear Madeleine

Just discovered this intriguing little cake called Pear Madeleine by a Japanese friend. American friends would definitely find another name including the word “cupcake”!
Incidentally my own mother’s name was Madeleine! Coincidence?
INGREDIENTS: for about 12~13 cakes
-Butter: 125 g
-Egg: 1 large
-Sugar: 70 g
-All-purpose flour: 100 g
-Baking powder: 1 small teaspoon
-Almond powder: 20 g
-Walnuts: 20 g
-Pears: 4 cuts from halved pear can
For the nappage/topping:
-Water: 100 ml (half a cup)
-Sugar: 40 g
-Agar agar: 1 g
RECIPE:
-Cut half of the pear slices into small bits for the cake pastry. Cut the rest of the pears into thin slices for topping. Crush walnuts into bits, roast them lightly and put aside.
-Beat butter until it becomes whitish. Add sugar and mix well. In a separate bowl break egg and beat into light omelette. Add and mix with butter mixture little by little.
-Add in the following order: almond powder, flour and baking powder, mixing them in with spatula.
-Add and mix in crushed walnuts and pears bits. Leave in refrigerator overnight.
-Transfer cake mixture into cup of your choice with a spoon. The paste will be a bit hard, but try to put the same amount in each cup. Preheat oven to 180 degrees Celsius.
-Bake inside oven for 5 minutes and take out. Place a pear cut on each cake and put back into oven for 20~30 minutes.
-Nappage: Pour all ingredients in a bowl and heat over a light fire. When completely dissolved, brush syrup on the cakes.
When completely cooled down, preserve them so as they do not dry up.
NOTE:
The cake mixture will somewhat feel too hard/solid but it will melt in quickly inside oven.
——————–
Japanese Cheese Cake: The basic Recipe

I have been recently asked a lot of questions about Japanese-style cheese cakes. Incidentally I had never heard of cheese cakes before I came to Japan 33 years ago. After investigation, cheese cakes have been around the world for quite a long time and developped into many varieties. Among them, the Japanese style seems to have acquired a lot of popularity, to the point that many customers expect them to be on offer in Japanese Izakayas abroad!
Here is the basic recipe as far as it goes in this very country.
It should provide a base from which one can create more sophisticated desserts!
INGREDIENTS: For an 18cm-diameter cake
-Cream cheese (philadelphia style): 250 g
-Fresh cream: 1 cup/200 ml
-Eggs: 2
-Sugar: 80 g
-All purpose flour: 3 large tablespoons
-Lemon juice: 2 large tablespoons
For the base:
-Biscuites (or crackers of your choice): 90 g
-Unsalted butter: 40 g
RECIPE:

-Put biscuits/crackers inside a tight seal vynil pouch. Close. Crush until fine.
Take crumbs out and mix with melted unsalted sugar.
Lay cooking paper inside a cake mold.
Spread crumbs on the bottom . Press with masher for uniformity and solidity.
-Soften cream cheese inside microwve oven for 30 seconds~1 minute.
Divide into 3 or 4 parts.
-In a mixer/blender drop eggs, sugar, lemon juice and flour. Mix well.

Pour in fresh cream and then cream cheese little by little. Mix well. Stir with a spatula from time to time to help.

-Pour the cheese cake mixture over the crumbs.
Preheat oven at 170 degrees and bake for 40~45 minutes.

The colour should be a nice brown-orange. In Japan they say “kitsune iro/fox colour”!
Leave inside the mold.
Let it cool completely.
Leave inside the fridge at leat 12 hours. before unmolding and serving.
For better cutting, wipe the knife clean after every cut!
If the cake attains its colour before the cooking time has elapsed, cover with foil paper and put back into the oven.
In the case colour does come quickly enough raise the oven temperature.
—————————-
French Cuisine: Double Galette de pommes de Terre au Crabe/Double Potato & Crab Galette

French Cuisine is not so much about creating grand ood for special events but more about arranging leftovers or available ingredients.
Here is an easy and typical French recipe making use of was found in the fridge and pantry:
Double Galette de pommes de Terre au Crabe/Double Potato & Crab Galette!
INGREDIENTS: for 4 people
–Potatoes: 800 g (Bintje type is best)
-Crab: 1 can containg 250 g
-Chervil: a good bouquet of it
-Oil/Olive oil: 2 large tablespoons
-Salt, nutmeg & pepper: to taste
RECIPE:
-Preheat ovn to 6 (180 degrees Celsius)
-Peel and wash potatoes. Drain water and wipe them with kitchen paper. Grate them into fairly thick strands. Wipe them again inside kitchen paper. Add salt, pepper and nutmeg. mix well.
-Chop chervil. Press all liquid out of crab. Mix xrab with chervil. Put aside.
-Heat the oil in a non-stick frypan equipped with a removable handle. Drop half of the potatoes inside. Press potatoes with a tablespoon to form them into a galette/pancake and fry for 5 minutes on a strong fire to add it a nice colour. Cover it then with the crab-chervil mixture. Spread rest of the potatoes on top to cover the whole. Press lightly with a tablespoon for evenness.
-Put frypan inside oven without its handle. Cook for 15 minutes.
Slide the galette onto a plate. Cover plate with frypan and turn around so as to have the galette back into the rypan with its bottom side up.
Cook again for 15 minutes.
Serve hot with a green salad!
———————–
Japanese Vegan Snack: Ume-Shiso Kyuuri/Cucumber, Pickled Plums & Perilla Salad

Here is one simple recipe I consider as a Japanese “National” snack that will have all vegans and vegetarians rushing for:
Ume-Shiso Kyuuri/Cucumber, Pickled Plums & Perilla Salad!
Ingredients might not be easy to find, although they are probably available on the Internet under various forms.
INGREDIENTS:
-Cucumbers. If possible, Japanese style, long, thin and crunchy
-Shiso/perilla leaves: 4
-Umeboshi/Japanese pickled plums (there are salty and slightly sweet varieties. Either is fine!)
-Salt: 2 small pimches
-Sesame oil: a little
RECIPE:
-Wash cucmbers under running clear water and wipe them thoroughly with kitchen paper.
-Cut both ends of cucumbers and discard. Tight-seal cucumbers inside a vynil pouch and break (instead of cutting) them roughly into bite-sized pieces by hitting them with pestle over a kitchen wooden board.
-Discard pip/stone inside umeboshi and cut into small pieces.
Cut the shiso into very thin strips.
-In a bowl, mix thoroughly by hand cucumber, umeboshi and shiso.
Add salt an sesame oil. Stir and serve.
Note: Will be very tasty after being chilled inside the fridge.
The best umeboshi for this recipe are the sweet ones pickled into honey.
Make sure that the cucumber are dry after first washing them or the dish will be running with water.
I personally add some sesame seeds for effect and taste!
—————————-
Soft Peach and Cheese Cake

I’ve heard that Japanese Cheese Cakes are very popular in North America.
Since I already Have posted a snack and a chicken dish today, I thought I ought to finish it up wit a dessert before going back to work! LOL
It is also peach season right now in Japan. If you want to use fresh peaches for this recipe, choose them firm or make a compote with them first!
INGREDIENTS:
-Cream Cheese: 250g

This is the Cream Cheese most used in Japan. Does it exist in North America?
-Fresh cream: 100~130 ml according to preferences
-Canned white peaches: 1 can
-Sugar: 40~50 g
-Canned syrup: 35 g (from the peaches can!)
-Eggs: 2
-All-purpose flour: 30 g
RECIPE:

Take peaches out of the can. Keeping six slices apart for topping, crush the other peach slices with a fork.

Soften cream cheese inside microwave oven for 20~30 seconds. Strongly stir it inside a bowl until it becomes absolutely smooth.

Add sugar and syrup and stir well.
Make sure the whole is smooth and without any “solid” parts left.

First add egg one at a time and stir until completely smooth. Add flour and stir until completely smooth (important!).

Add fresh cream. Mix until smooth. Add crushed peaches. Mix until smooth.

As on the picture above, inside a baking mold/dish place lightly oiled (light vegetal oil) wide strips of kitchen paper. This will help takinf\g the cake out of the mold as it is very soft!
Pour in the whole cake mix and place peach sliced on top for decoration.

Bake at 180 degrees Celsius for 40 minutes.
As all ovens have their own “character”, check the colour until you are satisfied.
Stab with a thin wooden toothpick. If it comes out clean, the cake is ready!
Note: The cake might be difficult to unmold as it is soft. Do it carefully.
If you have one, use a mold with a movable bottom.
It’s best to let cool first and leave it in the refrigerator for a night before serving.
The above recipe is for the whole family. Adults can add peach liqueur as a finishing touch!
——————————
Chicken and Sweet Potato in Sweet and Sour Sauce, Japanese Style

I’ve been posting recipes for vegans and vegetarians for quite a while and since I haven’t any introduction of a fish or else ready right now, I thought an easy chicken recipe was in order! Great with a beer in this hot weather!
INGREDIENTS: For 2 persons
-Chicken thigh: 180 g
-Salt, pepper, Japanese sake (rice wine, or white wine if not available) for the chicken marinade: to taste
-Sweet potato (satsuma imo): 150 g
-Cornstarch: according to your preferences
-Cashew nuts: 30 g
For the sweet and sour sauce:
-Sugar: half a large tablespoon
-Soy sauce: half a large tablespoon
-Rice vinegar: 1 large tablespoon
-Water: half a cup, 100 ml
-Ginger: 2 slices finely cut
-Cornstarch: 1 teaspoon
Others
-Oil for frying
-Black sesame seeds and finely chopped thin leeks for topping
RECIPE:

Take unwanted fat from chicken and discard. Cut into one bite size.
Put into a bowl with salt, pepper and Japanese sake. Let marinate for 10 minutes.

In another bowl, cut sweet potatoes.Leave skin on. Not need to add water as they are to be fried immediately. If dirty, wash thoroughly with clear cold water and dry them.

Pour some oil on a frypan and fry sweet potato and cashew nuts on a low fire. Take cashew nuts out once they have attained a nice light g\brown colour. Cook sweet potato on low fire until a knife get through them easily. Fry them a little more over a strong fire and lay on a kitchen paper.
Keep the frypan with its oil for the chicken!

Prepare the sweet and sour sauce:
In a different deep pan pour in Sugar, Soy sauce, Rice vinegar, Water, Ginger, and Cornstarch. Heat over a low fire, stirring slowly all the time with a wooden spoon.
Careful about the timing. If you heat it too long,it will solidify!

Drop the sweet potato and cashew nuts in the sweet and sour sauce. switch off fire and wait for a while.

Take chicken out of its marinade and sprinkle it with cornstarch.
Fry the chicken in the frypan used for the sweet potatoes and cashew nuts (add oil only if absolutely necessary!).
Fry until crispy, then add to deep pan containing the sweet potato and cashew nuts in sweet and sour sauce.
Cook on a low fire long enough for taste to spread equally.

Transfer onto a plate and season it with black sesame seeds and finely chopped thin leeks.
—————————-
Watermelon non-wheat flour mini-Cakes

This particular recipe is dedicated to This Cat Can Cook who amused me with his comments and has a love for Watermelon.
Now, wheat flour allergics will be glad to know that none of it is being used!
INGREDIENTS: for 9~10 cakes
-Watermelon, red part, no pips: 150 g
-Eggs: 2
-Rice flour/powder: 60 g
-Sugar: 25 g
-Butter: 50 g
RECIPE:

Cut 100g of the watermelon in small cubes 1x1x1 cm. Blend rest into juice (40 ml).

Melt butter in electric oven at 5~600W for 40~50 seconds or until it is completely melted. Keep warm.
Pre-heat oven to 180 degrees Celsius.

Mix sugar and eggs together. Warm sufficiently until it gets to your “skin temperature”.
Beat up at High Medium speed until it forms a bubbly but fine paste. Continue to beat at low speed for 3 more minutes.

Add rice flour and delicately with a spatula.

Mix in melted butter and watermelon juice delicately.

Pour in molds.

Place a watermelon cube on top and bake for 20 minutes at 180 degrees Celsius.

Let the cakes cool before taking them out of their molds.

Serve them upside down decorated with mint leaves.
————————–
ZUcchini and Potato in Soy sauce Marinade

As Lojol rightly said, zucchini is a very versatile vegetable that can be paired with all kinds of other ingredients.
Here is a simple recipe to illustrate:
Zucchini and Potato Soy Sauce Marinade!
INGREDIENTS: For 3~4 people
-Zucchini: 1 medium large, 200 g
-Potatoes: 2 small, 200 g
-Olive Oil (for frying)
-Salt and pepper: a little to taste
-EV Olive Oil: 1 large tablespoon
-Soy sauce: 2 large tablespoons
RECIPE:

-Withe a vegetable peeler, peel small strips of zucchini skin for better pattern.
Cut Zucchini into 8 mm thick slices and again across to create “half moons”.
Peel skin off potatoes, cut in 8 mm thick slices and clean in clear cold water.
-Drain potatoes (don’t wipe them) and put them inside a heat-resistant bow. Cover bowl with cooking cellophane paper. Leave 4~4:30 minutes inside Microwave oven at 500W.
-Pour soy sauce and EV oil in another bowl and mix well with an electic whisk.
-Heat olive oil in a frying pan and fry zucchini over a fairly fire.
-When the zucchini has aattained a satisfying color on both sides, add potatoes. Fry for 1~2 minutes. Add a little salt (not much needed there) and asome pepper ( a little more might be welcome.
Mix and drop everything into the soy sauce-olive oil marinade while it is still hot.
-Turn over for time to time until it has completely cooled down.
-Serve with a few small tomato slices for better colour presentation!
————————
Non-Mayonnaise Avocado and Soy Beans Coleslaw

Here is a simple coleslaw recipe that vegans, vegetarians and omnivores alike can enjoy in Summer:
Non-Mayonnaise Avocado and Soy Beans Coleslaw!
INGREDIENTS: For 4 people
-Cabbage: 4~5 leaves
-Onion: half a large one, shredded, washed in cold water and drained before usage
-Avocado: 1 large
-Lemon Juice (or apple vinegar): 1 large Tablespoon
-Soybeans: 100 g. Boiled in water, cooled and drained (if uanavailable, can be replaced with any kinds of beans or chick peas)
-Salt and Pepper: to taste
RECIPE:
Cut the cabbage in vey thin strips (chopped). Drop into a large bowl. add a little salt. Mix and little while.
As explained above, mince onion, washi in clear cold water and drain thoroughly to take off the onion acidity.

Once the cabbage has become softer, mix with onion, cut avocado and lemon juice. Mix the whole, crushing/mashing the avocado in at the same time.
Once mixed to you liking, add soy beans and check taste. Rectify if necessary.

Note: Put chopped onion inside a stocking-style fined netting piece. Keeping it close with your hand, dip it in cold clear water for a while, then take out and press water out. If you do it stongly enough, no need to waste kitchen paper!
Careful about the amount of salt added to the cabbage. Too much and the cabbage will become soggy. If there is too much salt, watch it with clean cold water. The cabbage will taste and feel better if still a little crunchy.
Serve inside a half avocado “skin” (keep some sprinkled with a little lemon juice and securely closed inside a Tuperware box in side the fridge until usage).
———————-
Zucchini and Cheese patties

Zucchini are in season right now.
Here is a healthy idea for a hot snack to go with your cold drink:
Zucchini and Cheese Patties!
I dedicate this recipe to Lojol as it is very easy and great for adults and kids alike!
INGREDIENTS: For 5, 6 people
-Zucchini: 300 g
-Eggs: 2
-Shredded cheese: 120 g
-Flour: 3 large tablespoons
-Saltand pepper: a littke (to taste)
-Oil: a little
RECIPE:

Shred the whole zucchini with their skin and put inside a large mixing bowl.

Add eggs, shredded cheese and flour. Mix well.
Just before cooking add salt and pepper. Mix well.
Note: If you add salt and leave alone for too long, water will come out of the zucchini!

Heat thick frypan ell. add a little oil and fry patties until they attain a rich light-brown colour.

As there is enough to make 15 small patties, do it in two sequences.
Great as they are or in addition to a bento.
Really easy, think as them as a children’s cooking lesson!
Adults can work on the recipe and add all kinds of ingredients, or serve with differents sauces!
—————————-
Tofu recipe: Tofu Manju with Ankake Sauce/Tofu Dumplings in Sweet and Sour Sauce

Here is another simple tofu recipe dedicated to Elin, all tofu lovers, vegans and vegetarians:
Tofu Manju with Ankake Sauce/Tofu Dumplings in Sweet and Sour Sauce!
INGREDIENTS:
-Tofu (momen tofu style9: 1 “Cho”/200 g
-Carrot: one fifth
-String beans: 2~3
cornstarch: 1 large tablespoon
-salt: a pinch
For sweet and sour sauce:
-Dashi (Konbu dashi/seaweeed stock): half a cup/100 ml
-Soy sauce: half a large tablespoon
-Sugar:2 large tablespoons
-Rice vinegar: 1 large tablespoon
-Cornstarch dissolved in water: to one’s personal liking
RECIPE: For 2 people

Press water out of tofu. Sift it completely. Boil finely cut carrots and string beans until soft enough. Drain all water.

drop tofu and vegetables in a mixing bowl. Mix in cornstarch and salt. Divisde in 4 and make balls. Wrap each individually in cellophane paper. Twist cellophane warap and secure with rubber band or string.
Steam for at least 4 minutes.
Sweet and sour sauce:
Heat dashi stock, soy sauce, rice vinegar and sugar, stirring all the time. Mix in cornstarch dissolved in water.
The sauce is ready.
Serve dumplings on plate and cover them with the sauce!
Enjoy!
————————
Vegan/Vegetarian Recipe: Japanese-style String Beans and Tofu

Here is a simple and popular Japanese recipe that can please anyone, vegans, vegetarians and omnivores alike: String Beans and Tofu!
INGREDIENTS: For 2 people
-String Beans, 5~6
-Tofu: half a block
-Miso (of your choice), 1 teaspoon
-Mirin/sweet sake, half a teaspoon
-Sugar, half a teaspoon
-Freshly crushed Sesame seeds (do it in a mortar with pestle)
RECIPE:
-Drain water form tofu and roughly mix with miso, mirin and sugar.
-Peel away strings if any, cut beans into 4cm trunks and boil for 40 seconds. The beans should still be a bit crispy. Drain and let cool.
-Drop beans into tofu. Mix roughly with a spoon, cutting the tofu into small bits as in above pic.
-Sprinkle with sesame powder before serving.
Enjoy!
Naturally, this could be one of a whole plate of vegan/vegetarian snacks.
One can also add lightly boiled carrots. The combinations are endless!
—————–
French Cake: Tourteau Fromager

Following a discussion with my good Foodbuzz Friend, Jennifer Razon, about the Tourteau Fromager Cheese cake mentiond on my last posting on French Gastronomy on Stamps (No 20: Poitou-Charente), I decided it was best to introduce the recipe (with the help of Wikipedia) for all our friends’ benefit!

Tourteau Froamger is an ancient French regional Pastry/cake from Poitou Region, not to be confused with “tourtons”, which are mountain cakes.
Ingredients:
-Very fresh cheese (in Poitou it is fresh goat cheese, just out of the dairy. Similar to Fromage blanc. Goat cheese is best, but mixed with Cow cheese is fine, too. Cow’s fromage blanc is fine, too!): 200 g
-Sugar: 150 g
-Flour: 50 g
-Egg yolks: 4
-Yeast: 1 teaspoon
-Bitter Almond (amande amère) extracr: a few drops
-Beaten egg whites: 4
-Pâte brisée

Pate Brisee recipe (Shortcrust pastry recipe):
Ingrédients
Flour: 200 g
Butter: 125 g
Sugar: 100 g
Oil: 20 cc
Water: 200 cc
Alt: a pinch
Pour the flour into a large bowl and “dig a well” in the center.
Pur oil in well.
Add butter (the butter is soft, never melted!).
Add Sugar and salt.
Knead the whole as to form a ball.
Spread on oven paper inside cake dish.
Cook in oven until hard enough.
Take out and let cool completely.
Utensil:
Use a high and round Mold made of metal.
Recipe:
Mix cheese and sugar. Once the mixture is homogeonous (regular), add eggs and the flour/yeast mixture.
Pour inside Pate Brisee/Shortcrust pastry and let rest for a couple of hours.
Then cook for 1 hour (mderate) or 45 minutes at 180 Celsius degrees (hot).
Once cooked, the cake appears as seared black outside, but this is only a thin layer over a soft body. It will protect your cake for a good deal of time.
The French eat it as it is, but you might want to scrape the black ayer away.
All traditional recipes are slightly ifferent from home to home. This is an example you can work on!
—————————–
Mizuna & Sukimi Maguro Salad

Here is a very easy and typically Japanese salad you can serve as a snack, accompaniment or main dish depending upon your mood.
Mizuna (Japanese: 水菜, also called Xiu Cai, Kyona, Japanese Mustard, Potherb Mustard, Japanese Greens, California Peppergrass, Spider Mustard, etc.) is a popular variety of Japanese mustard greens with jagged or frilly dandelion-like leaves and a sweet, mild, earthy flavor.
It goes with almost anything.
We even eat it in nabe at home.
Last night, the Missus used a bunch of them cut to size bite to form a bed with some very thinly sliced spring onions (very sweet)
Sukimi Maguro is very finely chopped or grated tuna.
By grated, I mean that the usual method is to “scratch” the meat off the skin of the tuna with a spoon. Or if you have a good piece of relatively cheap tuna, chop it until you obtain a fine paste.
Season to your taste. The Missus mixed in ponzu and wasabi dressing (mild), place it on top of the greens with chopped thin leeks.
Served with an extra dash of ponzu it makes for a very tasty and healthy snack (with sake, of course!)
————————–
French Pissaladiere: Recipe, History, Facts & Etimology

(Wikipedia)
When Babeth pointed out that my brother’s creation ought to be called something else, I decided to investigate.
I must say that I gladly owe her an apology and will tell Francois to rename it something like “French-style healthy Pizza”!
Being aware of my younger brother’s character, I’m in for some flak from both sides of the World!
Now for Wikipedia’s definition:
[Pissaladiere or Pissaladina (pissaladiera in Provençal, “piscialandrea” in Ligurian) is a type of pizza made in southern France, around the Nice, Marseilles, Toulon and the Var District, and in the Italian region of Liguria, especially in the Imperia district. Believed to have been introduced to the area by Roman cooks during the time of the Avignon Papacy, it can be considered a type of white pizza, as no tomatoes are used. The dough is usually thicker than that of the classic Italian pizza, and the topping consist of: sauteed (almost pureed) onions and anchovies. No cheese is used, again unlike the Neapolitan pizza, however in the nearby Italian town of San Remo mozzarella is added. Now served as an appetizer, it was traditionally cooked and sold early each morning.
Another view held by food specialists is that pissaladiere is not a pizza, but a flat open-face tart garnished with onions, olives, anchovies and sometimes tomato. The etymology of the word seems to be from Old French pescion from the Latin piscis.]
I would tend to believe that Pissaladiere is more a local Provence gastronomic creation, although one must remember that Provence (the name itself could mean province/colony) changed hands many times including those of the Celts, Greeks, Romans and Italians.
Knowing the French propensity for arguments, some will soon (and rightly so) point out that after all, it is only another “poor people’s” food, like bouillabaisse, aligot or fondue (or pizza, or pasta!), which has turned into a fashionable gastronomy with the consequent “evolution”!
This “battle” is not confined to France or Europe but as far as the States as illustrated in the excellent posting by Daria in Paris. But it can also bring people together like Brunsli so funnily described!
———————–
PIZZA: Easy French Pissaladiere

Pissaladiere is the French version of the Italian Pizza.
It originated in southeast France.
The main difference is that it usually makes use for more vegetables and less cheese. Actually if it obviously does not look like a pizza, it can be called a pissaladiere!LOL
The merit of it is that it is usually lighter both in calories and taste.

My youngest brother, Francois, came up with this simple recipe.
As he works for Areva and has to spend a week every month in the States I believe he has been “influenced”!
For the bread base, he used a large frozen filo-style sheet. He first covered it with onions, large shallots and garlic, which he had cut into thin slices and previously fried in olive oil. He then covered them with a generous amount of thinly sliced ripe tomatoes (this was the end of the summer). Plenty of ground black pepper, herbes de Provence (dried aromatic herbs), a little salt and some secret seasoning (up to you there!) and that was it!
Baked into a hot oven to the right crispiness, it made for a great snack with some heady red wine!
—————————–
PIZZA: BOURGOGNE-STYLE ESCARGOTS PIZZA

The Italian are not the only ones to make pizzas!
The French do to, and I have this very, very simple recipe for a Bourgogne-style pizza!
Prepare your own pizza dough, it’s so much better. Brush with plenty of tomato sauce (I recommend basil). Place plenty plenty of mozzarella slices all over it.
Next use frozen ready-made (or home-made. A good way to use any leftovers!) escargots with their butter. A few black olives, sliced mushroms, some ground black pepper, et voila!
Even my American friends won’t leave a crumb!
——————————–
Cream Sauce Prawns and Potatoes Pagoda

Frankly speaking, I was stumped by how to call this simple, healthy but fullfilling home-made recipe reminiscent of the Curry Sauce Mango Prawns and Scallops recipe I posted a couple of days ago!
Lauren would probably have kicked if I had called it “Prawns and Potatoes Sandwich in Cream Sauce”! LOL
As with other recipes, it can be multiplied into many variations. Vegetarians can replce the prawns with boiled cauliflower and Brocoli for example!
Ingredients (for 2 people/large apppetites!):
Small -medium prawns: 18 without their shells and kept in a little lemon juice
Potatoes: 4 medium-large
Courgette/Zucchini: 1 small cut in thin strips (at least 9 or 10. See pic above)
Eringi Mushrooms or subsitute: 2 large cut in thin strips (at least 9 or 10. See pic above)
Fresh dill (for decoration)
Fresh sweet basil (for topping)
Sauce:
Shallots: 1 large, finely chopped
Garlic: 1 large clove, finely chopped
Red, yellow, green pimento: 2 large tablespoons of each, finely chopped
Fresh Cream: 1 cup (200 cc)
White wine: 1 quarter of a cup (50 CC)
Olive oil
Lemon juice: 1 lemon
Salt, pepper, nutmeg, chili pepper (the last to taste). You can make it Indian by using curry mix powder.
Recipe:
Organize yourself so as to have everything on hand and ready from the beginning!
You will need at least two frypans and one deep pan.
-Cut potatoes as thin as possible. The thinner, the better. Also keep in mind you have to make 6 “pancakes”. Wash them. Take all water off them with a clen cloth or kitchen paper. Add a little salt, pepper, nutmeg and chili pepper (last one can be discarded) to them in a bowl.
-Pour a little olive oil in one non-stick frypan. On a medium-large fire wait until oil is hot enough and form a “pancake with potato slices. The trick is that no space should be left between potatoes and at the same time avoiding two sliced to cover each other completely. Wait until potatoes have cooked enough to stick together (“help” them if necessary by pressing them). Turn them over and cook the other side to a nice crispy light brown. Continue until you have obtained 6 “pancakes”. Keep warm.
-While the potatoes cook, fry first zucchini then eringi mushrooms in a little olive oil until tender to taste. Add a (very) little salt to them while cooking. Keep warm.
-Sauce: In a deep pan, pour 3 large tablespoon of olive oil, heat oil over medium fire. Fry shallots and garlic. When shallots have become translucent, add wine, fresh cream, lemon juice, salt, pepper, nutmeg and other spices. Take it easy with salt and spice at first. You can always rectify later. Let cook for a few minutes. Sieve sauce, add chopped pimento and cook for a good 5 minutes on a medium fire. Lower fire if it boils.
-Fry prawns in a little olive oil until only their centers are still a little raw. If you cook them any longer, they will harden up.
On a large plate you had kept hot in the oven, first place one potato pancake then 3 prawns on top. Repeat the operation twice more to obtain the “pagoda” or “Sandwich” shape. Place alternatively zucchini and eringi around to form a crown. With a large tablespoon scoop up the pimento out of the sauce and pile them on top of the Pagoda. Pour the sauce on the vegetables around the Pagoda. Decorate with plenty of fresh dill around and sweet basil leaves on top as shown on pic above.
Serve with a dry white wine or Pilsner tye beer. Non-drinkers could drink a nice fresh lemonade (real one!) with it!
Enjoy!
—————————–
Mango Curry Cream Sauce Prawns and Scallops with Wild Rice

Here is a simple recipe of mine (yes, I do sometimes cook for the Missus! LOL) I have wanted to introduce for a long time. It calls for reasonably easy to find ingredients in many parts of the World. It is of course open to many variations!
Ingredients: For 2 people
-Fresh or frozen scallops: 12
-Medium-size prawns: 12
-Broccoli or Romanesco: 12 “flowers”
-Basil leaves: 12
-finely chopped red and yellow pimento: 4 large tablespoons
-Wild rice: 1 cup (200cc)
-1 large mango: cut in small cubes
-Lemon juice: 1 large tablespoon
-Fresh cream: 1 cup (200cc)
-White wine a quarter of a cup (50cc)
-Chopped Shallots: 1 large
-Chopped garlic: 1 clove
-Curry mix powder (or paste) 2 large tablespoons
-Salt, pepper (and spices to taste)
-White Butter: 1 large tablespoon
-Chicken stock: half a cup (100cc)
-Olive oil: 2 large tablespoon
Recipe:
-Cook the wild rice in lightly salted water for at least 20 minutes.
Drain water completely. Add butter and chicken stock and cook on a medium fire until you are satisfied with the consistency of the rice. keep warm
-Prepare sauce:
Pour oilive oil inside a large saucepan over a medium fire. Drop in shallots and garlic and fry until shallots become translucent. Add wine, mango, curry powder and fresh cream. let cook for a few minutes, mashing mango from time to time.
While doing this, first boil Romanesco broccoli in slightly saulted water until tender enough ( a couple of minutes). Drain and keep warm.
In a fry pan pour a little olive oil. Fry prawns, then scallops (season with just a little salt and pepper) long enough to cook the outside but leaving the inside almost raw. They will be more tender for them. Keep warm.
-Sieve the sauce for smoothness and getting rid of unwanted fibers.
Add chopped pimentoes and basil laves, heating the sauce over a small fire for a couple of minutes.
Season the sauce with salt, pepper and spices to taste.
On a large plate (that you would have kept warm inside the oven!), place the scallops, prawns and broccoli alternatively in a crown.
Pour plenty of sauce all over.
Finally transfer the wild rice in the middle for good effect!
Enjoy!
——————–
Quick Snack: Cream Cheese Tomato Rolls for the Beer!

There are times, be it in Winter, Spring, Summer or Autumn, when you just don’t have the will to venture into another cooking expedition, but still want to offer and eat quick, simple and yummy food!
Here is suggestion that you can store inside the fridge just in case hungry friends barge in with some beer (or mineral water! LOL). It can be easily adapted for vegetarians!:
I don’t have to bother with quantities really.
Just know that you need an equal amount (in volume) of Philadelphia (for example) cream cheese and fresh cream lightly beaten to a semi-hard consistency.
In a bowl mix the cheese and cream well. Add a little salt, pepper, nutmeg and whatever spice you fancy. Add some finely chopped herbs!
As for the tomatoes, choose them as large as possible, but not too ripe to avoid them breaking away. Peel them first, by making a light cut near the stem and plunging them in hot water (or holding them over a flame). When the skin starts opening, take them out and plunge them in cold water. They should peel off very easily.
Cut them in half, empty them, “spread” (you might have to help with a few small cuts) them on a kitchen paper to sponge water off.
Note: do not salt the tomatoes, or they’ll give out gallons of water!
On a large enough piece of cellophane paper spread the tomato flesh, fill with an adequate amount of cream cheese mix, and make a roll closing the cellophane paper around. Twist the ends shut.
Leave in refrigearator until served.
Simple presentation suggestion (look at pic!):
A three-piece presentation is easiest with cut sweet pimento and boiled broccoly stems (a good way to use them!).
Cut the rolls half-way at a slant for better effect.
Add lightly boiled turnips, pieces of raw ham, and plenty of greens.
Serve with a pot of vinaigrette or dip sauce.
Simple and appetizing!
Good for hungry kids, too!
————————-
HERB-ROASTED QUAIL & RATATOUILLE

I did publish the pic of this dish I made for the Missus (Yes, Rowena, I do sometimes cook! LOL) some time ago, but never had the time to publish the recipe.
It is pretty simple and straightforward and has the advantage to look appetizing and satisfying! Even kids will love it!
Of course you can replace the quail with any fowl (have you ever tried guinea fowl?)
Natasha will certainly agree with me, if the ingredients are good, you cannot fail!
For 2 persons:
-2 large quails
-Filling:
Finely chopped onion: 2 large tablespoons
Finely chopped shallot or red onion: 1 large tablespoon
Finely chopped garlic: 2 cloves
Finely chopped herbs (of your choice/I usually include fresh Italian
parsley, rosemary, sweet basil and celery): 2 large tablespoons)
Whole pink pepper: 1 teaspoon
Breadcrumbs: 2 large tablespoons
salt, pepper, nutmeg to taste. You can add your favourite spices, of course!
Olive oil: 2 tablespoons
Fresh sprigs of thyme and rosemary: half a dozen each
Lightly seasonthe whole quail with a little salt and pepper.
Mix all the ingredients of the filling into a bowl and fill the quails with it.
Place the quails on an oiled oven plate. Place the thyme and rosemary sprigs on the quails. Pour a little olive over both quails and tp each with a dollop of butter.
Preheat the oven to 200 degrees Celsius/about 400F.
Cook the quail until you are satisfied (taste vastly differ with people).
Ratatouille
This can done the day before. Re-heated ratatouille is even better.
I will not bother with weights and measures as there are thousands of ways.
Just know that I use an equal quantity of egg-plants/aubergines, onion, and courgettes/zucchini.
First cut them to the same (important) wanted size (the smaller, the quicker the cooking). Heat olive oil in a large pan. Pour the lot into the pan and cook until onions have become translucent. Turn down the fir to low. Add chopped garlic, one lemon juice, a glass of white wine, plenty of roughly cut tomatoes. Season with Chopped fresh herbs (the more, the better!), salt (easy on that! You can rectify later!), pepper, nutmeg and others.
Cover and let cook until you are satisfied with taste and texture.
Service and presentation:
Take out quails.
Take out the filling and place on a side plate.
Open the quail and “flatten” them.
Serve the quails on a large plate. Top it with the filling and surround it with plenty of ratatouille.
Bon appetit!
———————–
New Vegetable: urui/Hosta Montana

Last Sunday, while visiting my favourite supermarket inside the Shizuoka JR Station in search of unusual vegetables I had the pleasure to re-discover that increasingly popular Japanese vegetable, namely urui.
Its Latin name id Hosta Montana. If someone knows the English name, I would be very grateful to be enlightened!
Now, originally this vegetable was a “sansai/wild vegetable” until it has been successfully grown almost all over Japan.

The real name of this mountain plant is Oobagibooshi, too long a name to be marketed, hence the “new” name “urui” for the cultivated species.
At full maturity it can reach imposing height and width.
Like asparaguses, it is harvested early before it extends over a foot/30 cm height.

The leaves are still small, thin and tender then.
The whole plant, unless cooked as tenpura or fried, needs to be lightly boiled in lightly salted water beforehand.

To prepare the plant for the evening snack I had in mind for the Missus (Natasha, Tangled Noodle, do you remember? LOL) I cut the plant into 3 equal lengths and boiled the two bottom ones first as they would take longer. Once boiled to satsifaction I took theme out and cooled them under cold water, cut them lengthwise to thin enough strips and laid them onto a sheet of kitchen paper.
I boiled the leaves just long enough to make them tender, cooled them under cold water and spread them on a sheet of kitchen paper.

I had cooked a fine ratatouille beforehand, let it cool completely and added a dressing of my making with soft Dijon mustard, tarragon white wine vinegar, walnut oil, pepper and salt.
Now vegan and vegetarian friends should proceed directly to the dish I created as the rest ill not suit them!

Next I lightly fried small scallops (after marinating then in lemon juice for a couple of minutes) just enough to keep them almost raw inside and put them aside to cool. I did the same, marinade included with some white shrimps.
Note: to attain their “standing shape” is very easy. First “peel” them leaving the tail ends for better “handling”, make a shallow cut along their back, take out the innards and fry just enough to cok both sides to a nice color and keep them almost hlf raw inside. This way they will be firm but extremely tender.

As for the dish itself, vegan and vegetarian friends can forget the seafood and replace it with more ratatouille and edible flowers for example.
I built an “enclosure” with the cut urui stem, filled it with ratatouille. I placed the seafood geomatrically above the ratatouille. Around it I alternately placed urui leaves, trevise with edible flowers and watercress.
I made a point to take a pic before we sprinkled the lot with dressing (I leave the choice to you!)
Great with a Blanquette de Limoux sparkling wine!
——————-
Vegan/Vegetarian Japanese Dressing: Gomadare/Sesame Dressing

Following a few queries about gomadare/seasme dressing I (and the Missus) use a lot, I felt a little information and a simple recipe would come in useful.
Gomadare is a great tasty dressing that can be used indifferently with cold dishes as a normal dressing, or in and with hot food, especially nabe/Japanese pot-au-feu, shabu-shabu and any meat or veg actually.
The problem that the gomadare sold over the counter is not vegan, or even vegetarian for that matter (it usually contains egg white and I don’t know what!)
Now, here is a simple recipe that will add that little zest and “consistency” to your favourite food:
Ingredients (for about 2 people):
white sesame seeds: 2 large tablespoons
soy milk: 4 large tablespoons
miso: 1 teaspoon
soy sauce: a little (up to taste)
sugar: a little
ground white sesame: a little
First ground together with a pestle the white sesame seeds, soy milk and miso until it has attained a nice smooth consistency.
If have difficulty mixing it, heat it a little.
Add soy sauce, sugar and ground white sesame to taste.
A little experimentation will work wonders.
Tip: my favourite dish is to peel ripe figs (see pic), cut them in quarters and pour a generous amount of gomadare over it!
Enjoy!
——————————
Vegetarian Japanese Cuisine: Fried Tofu and Vegetables

The other night, the Missus thought that some healthy food was in order, that is as much for herself as for me, what with her drinking wine and me savouring my Japanese sake!
She used already deep-fried tofu cubes called “nama-age” bought at the nearby supermarket, cut them to bite-size, saute them on a non-stick frypan as they were (no need for oil) with a liberal amount of pizza cheese and served them with a good measure of freshly chopped thin leeks. All the while on another pan she fried slightly boiled renkon/lotus roots slices with eringi mushrooms cut lengthwise and half-cut Brussels sprouts with some olive oil, a litle salt, pepper and a spicy seasoning mix.
Once ready she added themhot on the same plate.
So simple and tasty!
————————–
“Sakamushi Asari/Cockles steamed in Sake

The night before, the Missus did not feel like cooking anything big and came with a succession of “snacks”.
One of them was cockles she had steamed in Sake or “Sakamushi Asari”.
She usually utilizes Japanese sake, but this time she opted for old Chinese rice wine. Of course one can replicate the recipe with a dry white wine!
When you choose your cockles at the market, tap them ligtly with a finger. If they are alive you will see them retract whatever was poking outside. If not, disregard them.
First leave the cockles in slightly salted water overnight to have them disgorge any sand that has been inevitably sucked inside.
Next day drain water and have them “dance” inside a bowl by making them twirl/run around by hand for a minute. This will have them retracting more inside. After cooking they will detach easily from their shells. Incidentally, “tossing” them will not work.
Drop them in a fry pan with a good glass of sake , some mirin/sweet sake and som shoyu ponzu (normal soy sauce is too salty or strong). Cover with a glass lid and heat them on a strong fire until they are all open. Serve them in dish with a good measure of chopped thin leeks.
Simple is sometimes the best!
———————–
Chirashizushi: Marinated Tuna Sushi for Lunch

The Missus does not work on Thursday. This is the day we usually go out at night, but the frigid temperature outside having discouraged her to venture into town, she decided to cook both lunch and dinner for us for my (and her own ) pleasure!
For lunch we had a salad of beans, yams from Ishigaki Island and greens with a big bowl of miso and mushrooms soup. As for the main dish featured above, she prepare “Chirashizushi/Sushi on a plate or in a lunch box.
She steamed the rice with a piece of konbu/seaweed.
She later added this seaweed shredded once the rice had been mixed with the rice vinegar, sugar and some “secrets”. She also mixed in some shredded “takuan”/yellow pickled daikon to balance the sweetness of the sushi. Sushi in Shizuoka in generally “sweeter” than that found in other areas of japan, notably Tokyo where it is more “vinegary”.
On top of the rice she placed slices of “maguro”/tuna she had marinated beforehand in konbu ponzu ( a lot lighter tha soy sauce!) and mirin. She added “ikura”/salmon roe and “tobikko”/flying fish roe and completed for color effect and balance pieces of “shiso”/perilla leaves. A dollop of real grated wasabi, et voila!
She couldn’t help remark how much she would price it for customers at her virtual restaurant! LOL (not a bad price, actually!)
————————-
Blue-Fin Robin and Scampi baked in Foil Paper

Last Friday, on my way back from University, I visited the big Parche Supermarket inside Shizuoka City JR Station as I wanted to cook some seafood for the Missus that night!

I was lucky to find a couple of medium-sized “Houbou/Blue-Fin Robin” for a little over 4 US$. This fish was caught off the western part of Shizuoka shore. I also discovered a few great value fresh “Te-naga Ebi/Scampi” caught in Suruga Bay (Shizuoka Prefecture). I only needed to check with the vegetables stand nearby and I was back home!

Things are (most of the time) best when kept simple.
I had had the fishmonger dress the fish beforehand, so I needed only to make a couple of shallow cuts across the skin.
In two separate large sheets of foil paper, I place one fish (seasoned with salt and pepper) in the middle, flanked it with two (on the the left) and one scampi (on the right), filled the upper right corner with plenty of fresh basil and dill. I placed mini asparaguses and large fresh broad beans along them, added a good portion of white wine, a little olive oil, some freshly pressed lime juice and a good measure of sweet and hot Thai sauce.
I closed the foil tightly around the whole and baked it on grill at 250 degrees Celsius for 25 minutes.
Served at once, they made for a great and light dinner enjoyed with white wine (for the Missus) and Japanese sake (for me!)
————————-
Avocado and Crab Gratin/Gratin d’Avocat et de Crabe

Today is the second of January, and as I generally cook on holidays, I proposed the following to the Missus:

As my other half loves gratinsin any form, it was not difficult to convince her!
I’m not going to burden you with numbers, so here is the recipe, which I tried to keep simple and calorie-light!

I used bout a quarter of a yellow (yes, you heard it!) cauliflower grown locally in Asabata, Shizuoka City, cut it small enough pieces and cooked them the Missus’ way, that is, I put them in a non-stick frypan with half a centimetre of water and cocered it with a glass lid. I switched on the fire to medium and waited the water to boil. As soon as it started boiling I turned the fire to minimum, cooked the cauliflower for one minute, switched off and let it covered for one more minute. I then drained completely and held it under running cold water for a few seconds to cool down, then put them aside in a strainer.

I used a medium-sized avocado, cut it into two halves, took off the large seed by stabbing it with the “talon” of a kitchen knife and twisting it out.

I peeled the avocado and brushed both halves with lemon juice.
Next I used the equivalent of a small tin of crab meat, added some lemon juice and some sweet wine wine to it. I mixed the lot and quickly pressed the juices out. I filled both halves of the avocado with some crab meat. I kept the juices for the bechamel sauce.
I chopped a good quantity of Italian parsley and put it aside.

I buttered the inside of two glass oven dishes, put the avocado halves in the middle upside down, arranged the cauliflower around it and garnished the top of the avocado halves with the remaining crab.

I prepared the bechamel (white) sauce by making a roux with 50 g. of butter, two large spoons of flour, then added the crab juices, 200cc (one cup) of milk, 80 cc of sour cream. When the bechamel had “caught”, I added salt, pepper, theme, nutmeg and four spices and dropped in the chopped Italian parsley.
I spread the bechamel sauce allover the dishes and let it cool completely. This way the bechamel sauce will not “run out” inside the oven. I sprinkled the lot with cheese and baked it the oven at 180 degrees for about 25 minutes (or until it attains the colour needed).

We ate it with a salad just out of the oven.
I chose a fairly firm avocado on purpose for better effect when cutting it out with my spoon, but it’s up to your taste.
I’m sure anyone can improvise and improve on that!
———————
Vegan Farandole

Last Sunday, not the New Year I must admit, I had to cook dinner for my other half, and I just happened to be litterally submerged with vegetables.
Why not create something vegeterian, or even better, something vegan, at least to justify my omnivorous preferences? I thought.
Well, I came with a simple idea that can expanded at infinitum. It has the merit of making use of very healthy ingredients and help the system take a much needed rest! LOL


I utilized three different oils from three different countries to add a little inernationalization: Olive oil from Italy, Walnut oil from France and Argan oil from Morocco!
In the centre of the plate I arranged a “circle” of boiled potatoes mixed in “brandade style” with plenty of olive oil, avocado, black olives, lemon juice, a minimum of salt, chopped fresh garlic, pepper, nutmeg, thyme and yuzu chili pepper. Indian friends would probably add plenty more spices.
I surrounded it with a thin crown of boiled diced brocoli stems and shiso/perilla shoots/mini leaves.

I then added plenty of dressing around the lot. The dressing was made with walnut oil, taragon white wine vinegar, soft Dijon mustard (with seeds), lemon juice, a little salt, pepper and a large amount of very finely chopped fresh parsley and basil. It was very consistent and easy to spread without “leaking” everywhere.
Around the whole, I arranged boiled green brocoli, white cauliflower and yellow cauliflower (beautiful and very tasty) all grown in Shizuoka Prefecture.
I decorated the potato core with plum tomato wedges, and sprinkled both the cauliflower(s) and tomatoes with a little dash of argan oil (take it easy with this particular oil as it is particularly fragrant!).
I hope this will give ideas to my vegan and vegetarian friends for the New Year repast! By the way, “Farandole is a dance!
————————–
Open Quiche (with Leek, Bacon and Potato)

Some people, sometimes rightly, complain that quiches, for all their quality, are a bit heavy because of the pastry. I sometimes cook them without pastry, calling them “open Quiche”. They are simple to make and are welcome by foodies with an allergy to flour.
Here is the simple one I made for the Missus last night a very cold night!)
Ingredients (for 2 to 4 people):
-Eggs: 3 large
-Fresh Cream: 400 cc (2 cups)
-Fresh leek: one large, chopped.
-Potato: 1 medium-large
-Bacon: 2 large rashers, cut in 1 cm-thin strips
-Lemon juice: 1 teaspoon
-Grated parmesan cheese: 1 large tablespoon
-Butter: 50 g for frying vegetables + enough to coat inside of oven dish
-Salt ( as little as possible), pepper, nutmeg, thyme, laurel and anything else you wish according to your preferences.
Recipe:
-Bring a pan full of salted water to boil, drop all the chopped leek in and boil for a couple of minutes. Take out and plunge the leek into cold water. Let cool, then drain, and put them aside in draining dish to allow any excess water to go away. This will take care of the leek’s astringency and make it softer. If too wet, press water out before adding them to the quiche.
-Boil potato to 80%, plunge in cold water (this way, it will not break or disappear inside the quiche), peel and cut into 1 cm square cubes. Put aside.
-Dry-fry (that is, do not add any oil) bacon until the colour has changed. Put aside.
-In same fry-pan, to preserve the juices left by the bacon, drop 50 g of butter and lightly sautee the leeks and potato for a couple of minutes. Put aside.
-Pre-heat oven to 180 degrees Celsius (about 360 degrees F).
-In a bowl drop the leek, bacon and potato, season with lemon juice, a little salt, plenty of pepper and spices and mix well.
-In another bowl break the eggs and beat them into an omelette. Add fresh cream and mix well. Add a little salt, pepper and spices according to taste. Last parmesan cheese. Mix and check taste.
-Butter the inside of a large shallow oven dish (glass is best as you can see the inside cooking). Spread the bacon, potato and leek mix over the bottom. Pour in the omelette over the whole. Check and arrange the heavier food inside the omelette with a fork for more evenness.
-Cook for about 40 minutes

Serve hot. You should be able to cut it and transfer it easily if you have buttered the dish properly. Serve with a fresh salad and a light red wine or real ale!
Enjoy!
———————
Healthier, tastier fried Potatoes!

Fried potatoes have been temptying us since the 17th Century when the Belgians first experimented cooking them in oil. At the time, deep-frying, imported by Crusaders from the Middle East, was the only absolutely safe way to cook, especially in “flat countries” as Belgium and Holland were called, as water was a bed for all kinds of diseases.
Incidentally, Paris had a good laugh when some time ago a misinformed gentleman proposed than French Fries should be re-named “Freedom Fries” on the White House menus. Sorry, mate, but they are Belgian, not French!
Now, eveyone knows that boiled potatoes are healthy, if somewhat bland in taste, whereas fried potatoes are tasty but hideously high in unwanted calories.
There is a simple method half way which will enable you to enjoy your favourite snack/main dish with a lighter heart (and midriff) and at the same time allow you to serve a savoury dish to your ravenous friends or family! (But don’t overeat them!)
INGREDIENTS
(for 2 to 4, depending whether it is an accompaniment or full dish):
-4 large potatoes
-1 large echalotte/shallot (if unavailable, half a red onion is great!), finely chopped
-3 cloves of garlic, finely chopped
-Bacon (vegan and vegetarians, please skip this keeping in mind you will have to add a little salt)-1 large rasher cut in small pieces (half a cm square or half the size of your little finger nail, cut short!)
-Parmesan/Parmiggiano Cheese (vegans, please skip this or use alternative), freshly grated, 3 large tablespoons.
-Salt (for the potatoes boiling water, otherwise as little as possible, as bacon and cheese will contain enough!)
-Pepper, nutmeg. Foodies who like their food Indian-style may add a little powdered curry mix and chili pepper.
-Olive oil: 2 large tablespoons
RECIPE:
-Boil potatoes in plenty of salted water. If you do not add salt to the water, the potatoes will end up very bland in taste.
-Once the potates are boiled at about 80%, plunge them into cold water. This little trick will prevent them from breaking up later.
-When potatoes are cold enough, peel and cut them in wedges (the size is up to you).
-In deep enough frying pan dry-fry (no oil added) the chopped bacon until it becomes a nice crisp and dark. Put aside on a small dish. For non-vegan/vegetarians, do not wipe the pan, or you will miss a lot of taste!
-Pour two large tablespoons of olive oil in the same frying pan. That is enough, and the oil will be “sucked in” by the potatoes with the result that the potatoes will not be “greasy”. Use olive oil, extra virgin, as this is best, not only for taste, but for health (the vitamin C contained in olive oil do not disappear even cooked for a long time).
-When potatoes have almost reached the wanted colour, drop in shallots, garlic, fried bacon, pepper, nutmeg (and salt if you absolutely must use some!). Toss-fry until shallots have turned transparent.
-Pour the lot into a serving dish and sprinkle parmesan over it.
Enjoy at once!
Sometimes, simple is best!
—————————–
Salmon Trout Pie

With cold weather prevailing, one expects a hearty hot meal back home from a long work day.
I personally cook dinner twice or three times a week at the most, but I can guarantee you that the Missus does expect a proper meal if I happen to be back home for her!
The problem is that I tend to cook too much, and I consequently end up finishing both plate to the detriment of my waistline! LOL.
In winter reasonably-priced salmon trout is readily available, and taking in account my partner’s inordinate love for salon, it is easy enough to please her!
Here is what I concocted for her last week Friday:
INGREDIENTS (for 2 to 4 persons depending on your appetite!)
-Salmon trout: a large (~15 cm long) piece/filet. Cut the ends square if needed. The small bits can be put on top wherever to adjust the level of the contents. Pare off all the excess fat as it tends to sog the pie. In any case cooked fish fat is not appealing either in shape or taste!
-Frozen pie sheets: 2 large enugh to leave necessary margin around the fish.
-Lemon juice: 1 large lemon juice squeezed into a small glass.
-Fresh basil: 20 leaves, finely chopped/cut.
-Fresh Italian parsley: 10 sprigs, finely chopped/cut.
-White mushrooms (other varieties are fine),: 4 large, finely chopped.
-Fresh shiso/perilla leaves: 12 large. If not available, use 24 salad spinach leaves. Boil them in salted water for 15 seconds. Spread on kitchen paper to suck off as much water as possible.
-Scallops: 4 large, sliced in two.
-Egg: 1 large, beaten.
-Shallot/Echalotte: 1, large, finely chopped.
-Garlic: 2 cloves, finely chopped.
-White wine: 50cc/one quarter cup.
-Olive oil: 2 large tablespoons.
-Salt, pepper, nutmeg to taste. You may add (or do without) spices according to taste and tradition.
RECIPE:
-Pour oil in a non-stick fryig pan. Drop in chopped shallots and garlic. On a medium fire, when shallts are becoming transparent, add half of the lemon juice and all the wine. Stir. Lower the fire to gentle, drop in chpped mushrooms, a little sale, pepper, nutmeg and spices. Slowly fry until there is almost no juices left. Take off fire, pour the lot on a flat plate and let cool off.
-Preheat oven to 210 degrees C. (about 420 Degrees F)
-Spread one pie sheet onto a large piece of cooking paper laid over the oven plate.
-Cut salmon trout into 3 equal “sheets/layers” with a large sharp knife. Spread bottom slice on pie sheet. Brush it lightly with lemon juice. Sprinkle a little salt and pepper.

-Spread chopped basil and Italian parsley on top. Then spread fried vegetables, taking care to include as little juice as possible.

-Spread second slice of salmon trout on top. Brush with a little lemon juice and sprinkle a little salt and pepper. Spread half of the perilla leaves (or spinach) on top. Spread the sliced scallops on top. Brush with a little lemon juice. Spread the remaining leaves over the scallops.

-Spread the last slice of salmon trout over the top. Brush with a little lemon juice and sprinkle a littlle salt and pepper.

-Brush beaten egg over th uncovered parts of the pie sheet.
Spread the second pie sheet over the whole, strching it carefully as to fall eaqually onto the bottom pie sheet. Press “margins” (I do it with a fork) and roll them so as to “close” the pie.
Brush the whole surface with beaten egg (the more, the better!).

Cook at 210 degrees for 15minutes, then lower to 160 degrees (about 290 degrees F) for 15 more minutes. Cook a little while longer if you are not satisfied with the colour of the pie.
Served with cream dressing and a tossed salad, it should satisfy any appetite.
Serve with white wine or sparkling wine!
Enjoy!
—————————
Oven-Baked Potatoes and Bacon

I’ve always been a “keep everything simple” fan when it comes to cooking,
After all, one can attain any heights with a lot of money and time on hand.
That is the work of epicurean specialists! “Little people” like I, will find more pleasure cooking something simple but with character for cherished company.
Here is very simple dish I recently concocted for fun!
Ingredients (for 2 people):
Small turnips: 6
Small potatoes: 6
Wide rashers of bacon: 6
Fresh rosemary (to taste)
Salt, white pepper (to taste)
Fine Ratatouille:
Medium-large onion: 1
Shallot: 1 large
Garlic: 2 cloves
Aubergine/egg plant: 1
Courgette/zucchini: 1
Red sweet pimento: 1
Yellow sweet pimento: 1
Olive oil: 50cc (a quarter of a cup)
1 lemon juice
Fresh herbs (finely chopped): basil, Italian parsley (to taste)
White wine or Noilly Prat: 50cc (a quarter of a cup)
Pastis/Ricard/Pernod: a “bottle cap”
Salt, pepper, nutmeg (to taste). Add chili pepper or other spices if you wish!
1) Fine Ratatouille:
Chop onion, shallot, aubergine and courgette in small cubes. Cruch garlic cloves and chop fine. Heat up the olive oil in a deep pan. Once oil is hot enough drop in all the above chopped vegetables and fry, stirring regularly, until onions become translucent. Turn down fire to low. Drop in chopped pimentos, chopped herbs, lemon juice, wine, Pastis, salt, pepper, nutmeg and whatever spices. Stir the whole, cover with lid and let cook until all vegetables are sufficiently soft.
This can prepared well in advance as reheated ratatouille is even better! Don’t worry if you have made too much of it as this can be used for all kinds of dishes such as omelette garnish, on cold crostini, and so on!
2) Boil potatoes in salted water until they are 80% cooked. Take them out of the water and plunge them in cold water for a while. This a simple trick to prevent them from breaking up later! Put them on a cloth or kitchen paper to absorb water.
3) Preheat oven to 180 degrees Celsius (level 6/7)
Peel potatoes. If they are new with a very thin skin, do not bother peeling them! Wrap each one in rasher of bacon. Secure the bacon around the potato by skewering them with a thin wooden toothpick. Place them on an oven plate coated with olive oil. Sprinkle a little pepper on them. Salt is not needed as plenty is contained inside bacon! Abundantly sprinkle with rosemary leaves. Bake until bacon has reached a nice crispy state.
4) Peel turnips and cut into four wedges each, leaving a little of the stem for good effect.
Boil them in slighted salted water just long enough for them to get tender. This should not take very long. Bear in mind that over-boiled turnips will get mushy and crumble away!
5) Once the potatoes are cooked, on a large plate you have kept hot either in hot water or inside the oven, first pour a good amount of ratatouille in the middle. Then place turnips around as shown on picture. Last, carefully pull toothpicks out of the potatoes and place the latter above the ratatouille.
Enjoy with a great beer or strong white wine (red wine is fine, too. LOL)
——————————-
SHISO/PERILLA LEAVES AND FLOWERS

I felt compelled to answer a question from Rowena and provide some useful information on “shiso” or perilla/beefsteak plant in a simple posting that I hope will help Japanese food lovers and vegetarians!
First of all, one can grow shiso, be it green or violet, almost anywhere as long as you have plenty of sunshine and water opportune times (as long as you water it yourself, fine!).
For example, Rowena presently lives in Italy and has successfully grown some from seeds I sent her.
Seeds should be planted in March/ April. The hotter the prevailing climate, the earlier it should be done. Prepare some moist vegetables-growing soil and make small shallow holes on top at a comfortable distance from each other. drop 2 or 3 seeds in each hole. Cover with more soil and spread a newspar sheet over the lot. Keep in shade. Once the first shoots have come out, take newspaper out and expose to sun all day long. Water morning and evening at the base of the stems, not on the leaves (or they wuld “burn”!).

By August (or earlier) to September the shiso will start flowering!
These flowers, if picked early enough are edible!

(Pic taken at Tomii)
Reputable Sushi and Japanese restaurants extensively use them all year round. They make for exquisite decoration and are really tasty!
Now, if you want your own seeds, wait until the folwers and stems turn brown and shake them over a plate. You should get plenty of minuscule seeds for the following year. I checked this very morning with my neighbour, a retired farmer who is looking after his own garden. He said there is little use to keep them indoors in winter unless you want to start a greeh House business with all the hassles involved! Just collect the seeds and replant! Actually such seeds could become a source of business in Italy and elsewhere!

Now, the leaves can be accomodated in hundred of ways. Pick them up young and tender enough. The Missus keep them in a plastic Tupperware-type box with a sheet of clean kitchen paper imbibed with clean water (put it at the bottom of the box) before storing it in the fridge vegetables compartment.

You can wrap them around nigiri/rice balls instead of nori/seaweed.

Make a liberal use of them with sashimi!
They are also great as tenpura!
Do not hrow away the small or damaged leaves. Chop them fine and add them to fresh salads or to any stews and ratatouille!

The violet variety is edible of course, although the Japanese do not use for decoration like the gree one, except for the flowers.
They usually pickle them for their sake or add them to other pickled vegetables such as cucumber.
They also make juice, sherbet or saices with them, too.
———————–
JAPANESE OMELETTE/TAMAGOYAKI: PRESENTATION (1)

As promised to Bill in Japanese Omellete/Tamagoyaki: Basic recipe 1 posting, here are some examples of presentation:
Above is a very popular way of cutting and serving cold, especially at sushi restaurants.

The accent here is not so much on the regularity, but on the colour, making it very home-style.

A very “clean and regular” presentation. Served with grated daikon and soy sauce.

Another example of home-made style served with shiitake mushrooms.

A “classical and professional” presentation!
Will come with sushi presentation next time!
———————————-
JAPANESE OMELETTE/TAMAGOYAKI: BASIC RECIPE (1)

I’ve been asked of late about the basic recipe for “Tamagoyaki”, or Japanese traditional omelette.
There are two ways of making it:
1) the slightly difficult one with chopsticks I’m going to explain today.
2) the easier one, but not traditional way, using European/American tools, which will become another report.
Incidentally I will write a post about presentation, too!
For the traditional recipe,you will need a long pair of chopsticks and a non-stick frypan. Traditional or not, the fry pan will have to be rectangular or square and of a size adapted to the number of eggs used.
Ingredients:
Eggs: 10
Dashi/Japanese stock: 180ml (9 tenth of a cup- A cup is 200ml)
Cooking sugar: 45g
Soy sauce: half a teaspoon
Salt: a pinch
Salad oil for frying
Recipe:

Pour in a bowl all the eggs, dashi, sugar and salt. Mix with a whisker. Do not mix to perfection. This will leave some beautiful white patterns in the omelette.

First heat frypan well. Pour in a little oil and wait until it starts “smoking”. Do not forget the whole process is done over a strong fire!
Get a piece of kitchen paper impregnated with oil handy for the next step.
First pour in half of the eggs.
As the omelette cooks burst any air bubbles open with chopsticks to obtain a uniform cooking.

Fold in eggs from the far end towards you little by little, bursting bubbles open at the same time.
Do not worry too much at this stage if you miss some of them. Try and proceed as quickly as possible.

Keep folding in at your pace until all eggs are rolled in.

Away from the fire, wipe the vacant space wit the oild paper, pour in a little eggs.From now on the new egg layer should kept thin. Burst bubbles open as the eggs cook.

Fold each layer around the omelette by turning it aver towards you, let it slip away from you, brush some oil in, add a new layer of eggs, cook and fold, and continue until all eggs are used.
Remember that all should be done over a high fire. It would be easier to do over a low fire, but then the eggs will not be as light and “fluffy”.
Eat hot or cold. Can be cut in all kind of shapes for presentation, salads, or maki.
The Japanese also mix the eggs with raw shrimp of fish paste to attain an even lighter and thinner omelette.
—————————–
MUSSLES IN CURRY CREAM SAUCE

Last Friday night, my usual night out (alone) which had to be postponed because of my numerous commitments the week after, ended in my cooking dinner for the Missus. As soon as I reached Shizuoka JR Station back from University I visited JR Station Parche Big Supermarket in search for fresh oysters. Apparently they were out of season and had to rethink our dinner, when I found some Japanese grown fresh mussles which gave me a good idea.
I know two friends who might be interested to know all about it: The Left Over Queen, who like her nickname says, is always after practical recipes, and Foodhoe who likes his seafood so much!
Mussles in Curry Cream Sauce
Ingredients:

-Mussles: 3~4 dozens (wash and brush them first under running water and pull “roots” out)


-Shallot (echalotte): 1, finely chopped
-Garlic: 3~5 cloves, finely chopped
-Ciboulette (very thin chives): a “bunch (see above pic)
-Basil: a “fistful”
-Lean Bacon: a slice, cut into small pieces

-Sour cream: a glass (Half a cup), 120g

-Noilly: a glass (half a cup). If unavailable, any sweet wine will do.

-Curry paste (possibly Garam Masala): 1 large tablespoon
-Olive oil: 2 large tablespoons
-Pepper: to taste.
N.B.: No need for salt as there is already plenty in the bacon and curry paste!
Recipe:
In a deep large deep pan pour the oil and heat over medium fire. Drop in shallots and garlic and fry until shallots turn transparent. Pour in Noilly, curry past and pepper. Mix well. Drop in all the mussles. Cover with a glass lid.
When all the mussles have opened (discard the ones that haven’t later), drop in the sour cream and mix well. Let cook for a minute, then add ciboulette and basil. Stir. Serve at once.
Make sure you have prepared a dish for the dicarded shells. They are more easily eaten with your fingers, so keep a finger bowl or wet towel handy.
Now, you will be left with a lot of good sauce which would be a shame to throw away. Last Friday I prepared spaghetti for my pasta-crazy Missus and mixed them into the sauce with a little olive oil. My personal choice would have been the sauce poured over boiled potatoes (instead of fried potatoes usually served back home). Otherwise it could become the base for a soup. If you find the sauce a bit too strong, mix in some yoghurt.
Bon appetit!
————————–
Seafood Souffle

As explained before, souffle is not that complicated.
There are simple rules to follow though:
-Get all your ingredients ready within reach first.
-Souffle must be savoured as soon as it comes out of the oven. As the adage says, “The guests wait for the souffle; the souffle does not wait for the guests!”.
It is another way to eat seafod in season and it’s a favourite when Spring and Autumn nights are still cool or cold. Of course it is a great dish in winter as it will warm up your guests or family!
Ingredients can be easy replaced according to season or supply. The spices indicated are basic and also open to imagination!
Ingredients (large portions for 2 persons)
-Eggs:5
Separate yolks from whites. Keep yolks in a small dish. Pour the whites into a large bowl with a pinch of salt.
-Milk: 1 cup/200 cc
-Butter: 50 grams
-Flour: 70 grams/2 large tablespoons
-Salt, pepper, nutmeg, thyme (powder) to taste.
-Olive oil: 1 large tablespoon
-Oysters: 12 out of their shells in a small strainer to allow excess water out.
-Mussles: 24 large shells bushed and cleaned under running water.
-Crab: 1 small tin. If fresh, a “fistful” slightly boiled or steamed).
-Shallots: 1 large, thinly chopped
-Garlic: 1 clove, thinly chopped
-Noilly or sweet white wine: 1 glass/50cc/a quarter cup
-Thinly chopped fresh herbs (Italian parsley, basil, etc.): 1 “fistful”.
Recipe:
1) Pour oil into a deep non-stick frypan over a medium high fire. Cook shallots and garic until shallots turn transparent. Take care that garlic does not darken.
2) Drop the mussles in. Close with glass lid.
3) When mussles are all open switch off fire and take them out shaking all vegetables and juice out. Delicately separate mussles from their shells. Put aside in a small dish. Discard shells.
4) Switch on ffire again to medium and drop oysters in.
Cook them just long enough for them to stay tender. Switch off fire and take oysters out delicately. Put aside in a small dish.
5) Take crab out of the tin and squeeze out juices into the frying pan.
Put aside in a small dish.
6) Switch on fire again and reduce sauce at least to half. Switch off fire and strain the sauce into a cup. Put aside for white sauce.
7) White sauce:
On a medium fire, in a large deep pot melt butter completely. Drop in all the flour and whisk until smooth. Pour in milk little by little, whiking all the time to attain a smooth sauce. Add salt, pepper, nutmeg and thyme, and cup of reduced juices. Mix. Keep stirring gently until sauce is very thick and adheres to the whisker.
8) Switch off fire. Mix in the yolks with whisker until smooth. Drop in fresh herbs and mix well.
Beat the egg whites until very firm
Fold whites into sauce one third at a time with a spatula (if you mix with a whisker, the souffle will not rise. If you pour all the whites at once you will end up with white “blobs” and uncooked liquid yellow sauce).
9) butter the inside of 2 (or more reducing the size) oven dishes about 12 cm across and 7 cm high.
Pour in one layer of sauce on the bottom of each dish.
Place half of the oysters in each dish and cover with one more layer of sauce.
Place half of the mussles on top and cover with one more layer of sauce.
Spread half of the crab in each dish on top of the last layer of sauce and cover the lot with the rest of the sauce.
Preheat the oven to 180 degrees.
Cook for 35~45 minutes depending on your oven.
Chck if souffle is ready with a thin stick. It should come out with no sauce attached to it.
Serve immediately!
—————————
Duck Confit White Sauce Gnocchi

For once, I took advantage of the Internet to concoct some great and simple food for the Missus last Sunday.
There is a great company based in Osaka City called Dining Plus Com selling online all kinds of imported foods from France, Italy, Belgium and many other countries at unbeatable prices. Furthermore, whatever you order will reach you within 24 hours or on the requested day. I’m sure that Gaijin Tonic in paticular will jump onto that opportunity! I know that Lojol‘s Missus has heard of it, and being a great cook herself, she will have to satisfy some new requests!
Ingredients (2~4 people):

(courtesy of Dining Plus Com)
Duck Confit leg: 1

(Courtesy of Dining Plus Com)
Frozen Gnocchi: 200g
Bacon: 2 large slices, cut in thin strips across.
Mushrooms of your choice: 1 large fistful (frozen mushrooms are fine as they give out a lot of great juices! A good way to use leftovers!), sliced if necessary.
Garlic: 1 clove, chopped in slices
Madeira Wine (or Red Port): 50 cc (a quarter of a cup)
Fresh cream: 200 cc
Sour cream: 1 large tablespoon
Herbs: parsley, dill and sweet basil (of course, it is your choice), a couple of tablespoons finely chopped.
Salt, pepper, nutmeg, thyme, laurel (all powdered). Keep inmind you will need very little salt.
Recipe:
-Heat a large pan of salted water (1 litre). It will have to be brought to boil when the sauce is being made.
-Heat a large deep non-stick frying pan and place Duck Confit leg skin down. Cover with a glass lid. Lower fire to medium and let cook. The duck is already cooked. What you want is to cook the skin to a crispy state.
When satisfied with the cooking switch off fire. DO NOT throw the fat or wash the pan!
When duck has cooled a bit (try to proceed as hot as possible), shred the duck away from the bone. Try to obtain very thn strips. As for the grilled skin, cut it in thin strips. Discard excess fat sticking to the bone or under the skin. Keep in separate bowl.
-Throw in the sliced garlic in the pan on a medium fire. Once they have reached a brownish colour, carefully take them out and discard them.
-Throw in the bacon strips and fry until crispy. Carefully take them out and put them aside with duck.
-Lower the fire to low medium and throw in the mushrooms. When cooked to satisfaction, take them out carefully and put them aside with duck.
-Turn fire to medium high. Pour in the Madeira wine and stir with a wooden spatula to get it well-mixed with the juices. Pour in the fresh cream and sour cream. Stir until smooth.
-Throw the frozen gnocchi into boiling water. When water boils again, count 1~2 minutes for gnocchi to be ready.
-Add spices to sauce and mix in well. Add duck, bacon and mushrooms. Stir. Only then check if more salt is needed, which I doubt quite some is already included in the duck and bacon.
-When gnocchi are ready, take them out of water, drain them (excess water is not a problem. It can actually be used to lighten the sauce in case you find it too thick) and add them into pan. Stir.
-When ready, pour the lot inl a arge dish and sprinkle with the chopped herbs. Serve and eat at once.
Little secret: as for many other recipes, use the same pan and DO NOT wash it! You could add some parmiggiano cheese over it, but I would think it a bit heavy.
————————–
Vegetables and Seafood Gratin

Gratins should not be complicated. Restaurants serve them for a good reason. They are easy to prepare and come at a handsome profit the moment you present them in individual portions with a few expensive decorative items. Alright, they certainly look better than in your plate at home, but this is what you pay for!
The key is to be well-organized, so make sure you have everything within hand’s reach!
The recipe below leaves plenty of room for improvisation, even for vegetarians! I know that Foodhoe will try it as soon as possible!
Ingredients (for 2~4 people):
-Potatoes: 2, medium-sized, cut in 8
-Cauliflower: a handful of “flowers” cut to size
-Mussles: 1~2 dozens
-Oysters: 12 (without the shells! LOL)
-Crab: a whole, medium-sized, completely dressed (you cannot cook the shell, sorry!), with “miso”/brains on a separate plate. If fresh crab not available, use good quality tinned crab. Strain it carefully first by pressing it in your fist. Water can be used in white sauce.
-1 large echalotte, finely chopped. If unavailable use one small violet onion or small sweet onion.
-Garlic: 2 cloves, finely chopped
-Basil: 12 leaves, thinly cut
Noilly Prat or sweet white wine: 50cc (1 quarter cup)
Olive oil
Salt, pepper.
-White sauce:
Milk: 300cc (1 and a half cup)
Butter: 50 g
Flour: 60g (2 full large spoons). This may reduced or increased depending on the consistency you wish to obtain.
Salt, pepper, nutmeg, laurel
Curry paste: 1 spoon (optional. If you like your food spicy, then increase amount)
Finely shredded cheese: to taste
Recipe:
1) Boil cut potatoes and cauliflower beforehand in salted water until “80% cooked”. Strain water and put aside within reach.
2) Wash mussles under cold running water and pull out “roots”. In large deep non-stick frying pan pour about 2 large spoons of olive oil. Heat oil and drop echalotte and garlic inside. As soon as the echalottes (or onion) become transparent, pour in the wine and all the mussles. Cover with glass lid. As soon as the mussles are all open, switch off fire. Take mussles out one by one, shake them over the pan to leave only the meat inside. Take off the meat and leave it inside a small bowl. If they give off “water” in the bowl, throw liquid away.
3) Switch on fire again and keep to medium. Drop oysters inside. Let them cook until they have changed colour. Switch off fire and take them carefully out one by one, and leave them in small bowl. If they give off “water” in the bowl, throw liquid away.
4) Switch on fire again to high and reduce the “soup” left inside the frying pan. Once it has reduced to about 50cc/one quarter cup, strain it into a cup and keep it aside for white sauce.
5) Lightly wipe (do not wash in water!) the frying pan with clean kitchen paper. Drop in some butter. Switch on heat to medium and lightly saute/fry first the cauliflower for a couple of minutes with a little salt and pepper, and put aside. Do the same with potatoes. This will help the vegetables “suck in” the gratin taste.
6) Preheat oven at 180 degrees Celsius (medium high)
7) Drop the butter (50g) into frying pan and let melt. Drop in flour and stir until smooth. Pour in the seafood juices (“soup”) and stir. Once smooth, add milk half by half and keep stirring until it has reached the appropriate consistency. Switch off fire.
First stir in the curry paste, then crab “miso/brains”. Add salt, pepper, nutmeg and laurel to taste. Add crab and basil and stir until you have reached a certain homogeneity.
8) In a large shallow oven dish, place potatoes, cauliflower, mussles and oyters equally (to avoid arguments!). No need to butter the dish beforehand as all ingredients contain enough fat.
Spread white sauce equally over vegetables and seafood. Sprinkle the lot with shredded cheese (the more, the better for those who like their gratin with a dark cheese “topping”!).
Cook in oven for 30 minutes, or until it has reached the appropriate colour (all the ingredients having been cooked, nothing to worry about if you decide to cook it at 250 degrees Celsius to just grill the top).

Serve hot and enjoy. Of course, you could cook the gratin in individual dishes, but it is so nice to break the whole and serve it steaming onto the plate. Sorry, the pictures do not do justice to the dish, but then if it is looks you are caring about, you could always ask for it at a restaurant! LOL
Small secret: Cook everything in the same large non-stick frying pan. Wipe it, do not wash it! It will give this extra taste!
————————–
Home-style Donburi

You do not have to go to a Japanese restaurant or sushi bar to eat “donburi” if you happen to have a wife who not only likes them but can also concoct them!
In short, my better (worse?) half came up with following for lunch:
Plain steamed rice topped with slices of “akami”/ lean tuna part, avocado salad with mayonnaise and wasabi pickles (the latter provided a nice balance with a spicy touch), boiled sirasu/whitebait sprinkled with “hijiki” seaweed and “tobikko”/flying fish roe.
The tobikko added a nice colour finish touh. It is quite cheap down here in Shizuoka City. From I saw on Chuckeats Blog, it seems quite a treat over there in the U.S.!
I poured a little Shizuoka-made wasabi dressing on top. This dressing is a lot milder than pure grated wasabi with a little sweetness which combines well with the fish!
Cream Sauce Mushrooms
—————————————

We are still in mushrooms season, wild ones or cultivated species. Mushrooms are low in calories, but high in quality, whether it concerns taste or nutrients.
Here is the recipe of a dish my father cooked for us last September back home in France. It can accompany any meat, especially white-flesh meat, or can be appreciated on its own as accompaniment with a sold white wine or heady Japanese sake.
Ingredients (3~4 people):
Mixed mushrooms of your choice, fresh or frozen (if frozen, let them thaw slowly inside refrigerator for a few hours and get rid of excess water): 500g
Shallots (echalottes): 2 finely chopped
Garlic: 2~3 cloves finely chopped (crush garlic before chopping it. Do not forget to discard core!)
Parsley or Italian flat parsley: half a cup finely chopped
Fresh cream: 200cc
Madeira wine: 50cc (yellow port is fine, too, as well as sweet sherry)
Olive oil and unsalted butter: about 2 large spoons of each
Salt, pepper, nutmeg (to taste)
Recipe:
On a medium fire in large frypan melt an equal quantity of olive oil and unsalted butter (some people prefer more, some less. Experiment!). Throw in the shallots and garlic and slowly fry until shallots turn transparent. Throw in all the mushrooms and fry untilthey give back enough water. Add Madeira wine. Stir well. Next add fresh cream and stir until cream is perfectly blended. Add salt, peeper and nutmeg last, stir. Check taste and add more spices if needed.
Pour the whole in a large dish and sprinkle parsley over the mushrooms before serving.
Eat hot.
————————
Homemade California Roll

I would like to dedicate this particular recipe to Allison!
My better (worse?) half came up with this simple recipe the same day she prepared the bonito sushi (see previous post).
Once again she used traditional sushi rice added with fine pieces of pickled fresh ginger.
On a large piece of cooking cellophane paper he first placed thin strips of avocado and slices of smoked salmon, and finally the rice, keeping in mind to place as to form a regular shape cylinder.

She then wrapped the cellophane paper around the whole as shown on above picture.
She cut the sushi roll through the cellophane paper with a sharp knife she wiped between each cut.
She finally served the cuts topped “Tobikko” (flying fish roe). Lghtly dipped in shoyu, great with more sake!
—————————–
Homemade Bonito Sushi

My better (worse?) half came up with this idea after she got hold of quality “katsuo tataki” (slightly grilled bonito).
She prepared the sushi rice balls according to tradition with the addition of fine pieces of pickled fresh ginger (as this is the season rigt now).

She then placed a slice of bonito seasoned with ponzu with more thin sliced pickled ginger, “tobikko” (flying fish roe) and finley chopped thin leeks>
Great with sake!
————————-
Zucchini Gratin

The good thing about my recent trip back home in France is that I have plenty of simple recipes to share!
This one was cooked by my father Andre (83!), and my better (worse?) half can’t refrain from raving about it!
It is very simple indeed:
Ingredients:
for 2^4 people
3~4 medium-size zucchini (courgettes)
3 eggs
1 cup of fresh cream
Breadcrumbs
Salt, pepper, nutmeg (other spices according to preference)

Clean and cut zucchini into large chunks. Do not peel skin.
Grind into robot or cut/grate very finely. Mix in some salt and pepper.
In a large saucepan drop some butter and olive oil and cook on medium fire until very soft. Switch off fire and let completely cool down.
In a bowl beat the eggs into an omelette. Pour in and mix fresh cream. Add salt, pepper and nutmeg to taste. Add mashed zucchini and stir well.
Coat an oven dish with butter and pour all the zucchini paste. sprinkle with plenty of very fine breadcrumbs. Add parmeggiano cheese if you like it.
Cook in oven at 180 Celsius degrees until top has turned a nice brown colour.
Can served hot, lukewarm or cold.
——————-
Dragon Fruit Shoots Tempura

The Missus came back home last night with an unsual “vegetable”: Dragon Fruit Shoots.
The Japanese have come with the best idea to sample any new vegetable: tempura!
Technically speaking it originated in Portugal whose sailors introduced it to Japan a few centuries ago. The word itself is Portuguese.

My better (worse?) cut them into halves and prepared batter. She favours her own style, heavier than the Japanese, but lighter than the European/American “fritters”


She took the opportunity to add some other tempura made with shrimps and goya.
Served with ma-cha tea powder and salt mixed with sakura/cherry blossoms powder, it just turned out perfect with beer and sake!
———————
Shrimp Snack

Here is a simple snack recipe which my beteer (worse half?) came up with last night:
Ingredients (2 people):
20 small shrimps
10 chickory/endive leaves
Mayonnaise
Thai Chili Sauce
Spices to taste
Deep fry powder
Oil (for frying/deep frying)
Use frozen or fresh shrimps. Take off water by laying between two sheets of kitchen absorbing paper.
In a bowl prepare a mixture of mayonnaise, Thai chili sauce, pepper and any spices you wish to add. Taste before using.
Drop all the shrimps in the bowl and mix with hot mayonnaise mixture.
Heat oil to 180 degrees Celsius.
Place chickory/endive leaves in two long dishes as in picture above.
Take two shrimps at a time and roll them together quickly in deep fry powder and drop them in deepfry oil.
Deepfry for a minute and leave shrimps on an oil absorbing paper to take excess oil off.
Place them inside chickory leaves (see pic) and serve at once.
Great with beer in summer!
———————————
Stuffed Mussles

Mussles are plentiful at the big supermarkets in Shizuoka Prefecture, where thay can be bough fresh.
Here a great simple appetizer you can offer any time of the year.
Remember this is only the basic recipe to which you can add your own spice, herbs and vegetables!
INGREDIENTS (for 2 people)
24 large mussles
1 medium-size onion
2 shallots
2 large garlic cloves
a small length of celery
a fistful of fresh basil leaves
hal f a cup (100cc) of tomato puree
Olive oil
1 cup of white wine
Salt, pepper, clove, nutmeg to taste
Breadcrumbs
RECIPE:
1) Clean and brush mussles
2) Pour the wine in a large deep pan and heat over medium fire
3) Cook mussles inside the pot until all mussles are open (discard theones you can’t open)
4) Take mussles out of the pot, drain and extract shellfish. Keep the 8 largest half shells
5) In a fry pan pour some olive oil and cook over medium fire the onions, shallots, celery, garlic and basil, all finely chopped (add any fresh herbs available and of your liking)
6) Stop fire when onions and shallots have become soft and transparent. Pour the lot into a mixing bowl. Add tomato puree, salt, pepper, nutmeg and clove. Mix well. Check taste and adjust.
7) Place 3 mussles in each shell. Cover with with above mixture (the more, the better!) and sprinkle breadcrumbs all over.
8) Cook in oven at 180 degrees Celsius for 10 minutes at the last moment.
9) On individual plates, cut and place tomatoes and cucumbers (or let you imagination run!) as shown on photograph. Sprinkle with dressing of your choice.
Take mussles out of the oven and place them on plates.
Eat at once!
————————–
Nectarines Tart

Peaches are already on the market, and nectarines will appear soon!
These peaches being smaller and a lot firmer, they make a great fruit in tarts.
Here is a simple enough recipes you could apply for other fruit such as apricots, apples and even mangoes!
Ingredients (for 6 people):
Pastry: flour: 200g
butter: 75g
egg: 1
powdered sugar: 50g
water
salt
Filling: nectarines: 750g
butter: 100g
powdered sugar
almond powder: 125g
eggs: 2
rum: 1 tablespoon
minced pistachio: 1 tablespoon
glazing sugar: 2 tablespoons
Recipe:
A) Pastry:
In an all-purpose bowl mix eggs with sugar until smooth. Then mix in butter (softened) until smooth. Add a pinch of salt. Then mix in flour little
by little to obtain a homogeneous paste. Mix in water little by little until pastry is “as soft as your earlobe”. Wrap in cellophane and leave in refrigerator for an hour.
B) Take pastry out of refrigerator and knead a little until soft enough to spread.
Spread inside tart dish and punch a few holes with a fork.
C) Preheat oven to 6 (180 degrees Ceslius). Melt the butter and pour it in an electric blender (if you do not have one, use some elbow power and mix in all-purpose bowl), add almond powder, sugar, whole eggs and rum. Blend util smooth and pour on pastry.
D) Clean nectarines in cold water. Wipe and cut them in thin slices. Put them onto almond paste pushing them each a little onto the paste so as to make a nice regular pattern for better impression and easier cutting. Sprinkle with glazing sugar. Cook for 50 minutes.
Take out of the oven and out of its mold onto a dish or cake grill. Let it cool. Sprinkle with minced pistachio before serving.
———————
Ratatouille

Ratatouille as accompaniment to Stuffed Tomato and Grilled Goat Cheese
In Summer Ratatouille will please both omnivores and vegetarians as it can be served on its own as it is or as an accompaniment to other foods (see pic above).
It can be made in almost any country in the world, but particularly here in Shizuoka Prefecture due to the abundance of great vegetables!
Ingredients (for 4 to 6 people):
Onions: 3 large
Aubergines (egg-plants): 4
Courgettes (zucchini): 4
Tomatoes: 500g
Peppers (pimento): 2 to 4 (mix colours)
Garlic: 2 cloves
Olive oil: 1 cup (extra virgin oil PLEASE!)
Bouquet garni (parsley, thyme, laurel)
Salt & pepper to taste
Soft spices to taste (clove, nutmeg, sage, etc.)
Recipe:
Peel and slice the onions, aubergines and courgettes. Cut the tomatoes in pieces. Cit in strips the peppers after ridding them of their seeds.
Heat the olive oil in a deep saucepan. Throw in the onions first and one minute later all the vegetables the garlic cloves , the bouquet garni, salt, peppers and spices.
Cover and let simmer on small fire for one hour and thirty minutes, mixing now and then to prevent the stew to stick on the bottom of the saucepan.
If too much water is rtill left in the stew, half cover halfway. Take garlic and bouquwr garni before serving.
NOTES: This the basic recipe. I usually add some tomato puree. The size of the cut vegetables depend on their purpose. The smaller they are cut, the shorter the cooking time. Can be served hot as accompaniment (side dish) or as main course for vegetarians (add chick peas!) or refrigerated as snacks for beer in summer.
—————–
Apple Souffle

Apples are everywhere on the markets these days. This is a good time to try something different. And I said before, this is not as complicated as it sounds or looks!
I’m sure that Dragonmommie, Czech Absinthe and Lojol will enjoy it!
INGREDIENTS (4 people):
Apples: 1kg (green probably best)
Eggs: 6
Butter: 50g
Powder Sugar: 100g
5 Sponge Biscuits or the equivalent in Sponge (Short) Cake
Calvados (French Apple Brandy): 100cc
Preheat the oven to 200 degrees Celsius.
Wash the apples and wipe them dry.
Take off stems, cut in four and cook as they are in a covered saucepan inside the oven for one hour.
Take out and sieve flesh of apples. Pour this compote into a fry-pan and cook on a small fire for 5 minutes to take out excess water.
Stop the fire and mix in the 6 egg yolks.
Beat the whites with 50g of powder sugar. Fold in the beaten whites delicately inside the cooled down compote with a spatula trying to achieve the lightest possible mixture.
Cut the sponge biscuits and imbibe them with the Calvados.
Butter and sugar the inside of a souffle dish.
Pour in half of the souffle mixture.
Then spread the calvados-imbibed biscuits and top with the rest of the souffle mixture.
Cook for 15 minutes at 200 degrees celsius.
Take out and eat at once!
———————
Coq Au Vin/Wine Chicken

You’ve got a one-too-many bottle of red wine, or “unwanted” present!
No worries! Here is a simple recipe to use it! As the alcohol will disappear during the cooking, everyone can enjoy it!
Ingredients (6 people):
Cockerel or chicken (cut in appropriate-sized pieces): 2kg
Butter: 40g
Lard: 100g
Onion: 1
Echalotes (highly flavoured small onions): 2
Carrot: 1 small one
Garlic: 3 cloves
Flour: 40g
Cognac ( or marc or brandy): 50cc
Tomato puree: 1 tablespoon
Red wine (the stronger, the better): 750cc
Bacon: 125g
White mushrooms (champignons de Paris, white agarics): 250g
Bouquet garni (fresh thyme+parsley+laurel)
Salt & pepper to taste
Recipe:
In a deep saucepan heat 40g of butter and the lard cut in pieces (if soft, just as it is). Cook the pieces of chicken until golden. Then add onion, echalotes, carrot, garlic (all finely cut). Sprinkle with flour. Mix well. Pour in the Cognac and flambe on high fire (light the alcohol). Then pour in the wine and one cup of water, and the tomato puree. Add salt and pepper and the bouquet garni. Pit lid on. Let simmer on small fire for 1 hour and thirty minutes to two hours depending on the chicken’s firmness.
Cut the bacon in pieces. Put them in cold water. Bring the water to boil for a few seconds and drain the bacon. Cut the bottom of the mushrooms stems. Clean and slice. Cook the bacon in a small saucepan on small fire for a few minutes. Add the mushrooms. Saute (fry) on high fire for five to eight minutes. Pour the lot in a deep serving dish. Keep warm.
Take the chicken pieces out of the saucepan. Put them on the bacon and mushrooms.
Sieve the sauce and reduce on high fire for a few minutes if necessary. To make the sauce thicker and richer add the chicken liver crushed. Pour the sauce onto the chicken. Sprinkle with freshly minced parsley and serve with plain boiled potatoes.
——————
Tricolor Vegetable Terrine

Like souffles, people tend to give up the idea of making terrines or pates a bit too quickly.
It is not complicated and has two advantages:
1) it is open to a myriad of variations
2) you can serve a whole party with them.
Here is one who will please even vegetarians!
INGREDIENTS (6 people):
Cauliflower: 500g
Brocoli: 500g
Carrot: 500g
1 Cabbage Heart
Eggs: 6
Fresh Cream: 500cc
Salt
White Pepper
Laurel, Thyme, Nutmeg (to taste)
RECIPE:
Peel carrots and cut into thick slices. Separate stems of cauliflower and brocoli.
Steam-cook the whole for 15 minutes. Put some brocoli heads aside for later decoration.
Food-process carrots, brocoli and cauliflower into separate bowls.
In each bowl add 2 eggs and one third of the cream. Season with salt, white pepper, nutmeg (careful on that one!), laurel and thyme to taste and mix well.
Preheat oven to ( 180 degrees Celsius).
Separate leaves of cabbage and dip them for 3 minutes in boiling water and drain thouroughly.
In a 2-litre cake mold cover inner surface with cabbage leaves, then pour in cauliflower mixture first. Plant brocoli heads head first, then pour in the carrot mixture and finally the brocoli mixture. Cover top with cabbage leaves.
Cook for one hour in oven in bain-marie.
Let it cool down before unmolding.
Cut in slices lukewarm or cold.
Decorate with Spring herbs and optionally serve with either a tomato coulis or mayonnaise
——————–
Duck Breast

Some people make a big story of cooking duck. It is quite simple, actually, especially with a minimum of preparation. It has the other advantage to be open to an infinite array of variations!
The pic above was for one person. As I cooked it for both of us, just imagine that there was another identical plate.
Here is how I proceded:
Ingredients: 1 large duck breast (can be ordered easily over the Internet)
Olive oil 3 tablespoons
Whisky 3 “caps” (I use the bottle cap)
Port wine (or any sweeet red wine) half a cup (100cc)
Cold butter 2 large tablespoons
Salt and pepper to taste
6 small potatoes cut in “wedges”
1 large tablespoon of olive oil
Half a cup (100cc) of green “flageolet” beans (fine green beans)
1 tablespoon of baby onions (frozen ar fine)
1 rasher of bacon cut to the size of your largest nail (LOL)
Salt, pepper, thyme to taste (careful with the salt as I mixed the veg with a little gravy from the duck!)
Fine greens (small leaves: you can buy them already mixed and packed
Dressing of your choice (easy on it, or it will spill onto the duck!)
1) Take skin off duck breast and discard. For people who cannot without it, make shallow incisions all over it, sprinkle with a little salt and pepper, brush it lightly and fry it skin facing down for 80% of the cooking time!)
2) sponge off humidity with kitchen paper towel and put it aside.
3) Boil potatoes to about “80% cooked” (their core should be still solid), cool immediately under cold water, peel and cut in wedges (not stiks of fries!)
4) In small deep pan fry bacon with no oil until the pieces are crispy. Put aside on small plate. Don’t wash the pan. Pour in half a cup (100cc) of water and boil beans. When beans are ready, there should be little water left. Mix in thawed baby onions and bacon. Do Not season yet.
Keep of fire and cover
5) Now you will work with two frypans at the same time. Be careful and keep in mind that if the oil becomes too hot, it might ignite, so keep a large towel handy (last time I almost started a fire. Luckily I had the reflex to cover the frypan with the towel. The fire extinguished immediately. NEVER try to extinguish with water as it will explode in your face!).
On your right (unless you are left-handed), pour the oil for the fried potatoes. It does need to be too hot. Throw potatoes in and let fry, shaking them around from time to time. Fry them until they are golden (use a non-stick pan and the results will delight you!)
On your left, heat the oil for the duck. It needs to be quite hot. Place duck breast in middle. Sprinkle salt and pepper all over it according to your preference. Fry both sides for 30 seconds. Turn down the fire to medium and carefully pour in the whisky (not cap by cap but with a small glass you would have filled before hand). Let the whisky ignite and shake the duck breast around until the flames have extinguished. Lower the fire a bit more and cover with lid.
How do you know the duck is cooked. When you press it with a finger, it should pop back easily with a little gravy/juice seeping out. Experience helping your eyes will be enough to judge when the time is right. Do not worry if you find out that some of the middle of the duck breast does not seem cooked enough. Some people like it well cooked while others like it rare. You can always choose the slices according to taste. Purist like it almost raw in its centre, though.
When the breast is cooked, put it on a cutting board. You will cut it at the llast minute.
6) Add some of the gravy to the beans and reheat to your preference.
7) On two large plates decorate the top third with greens (see pic above). You will add the dressing on top just before serving.
8) pour the Port wine into the frying pan and stir it with the gravy. reduce it on small fire.
8) The fried potatoes should be ready by now. While the sauce is reducing, place the potatoes side by side in half a circle. As you will place the duck slices over it, there is no need to season them.
9) Once the gravy has reduced enough, mix in the cold butter until smooth. it will prevent the sauce from “separating). Taste and season it if needed.
10) Cut the duck breast into thin slices and place them side by side on top of the fried potatoes (see pic)
11) With a tablespoon, place beans like on the pic.
12) Pour gravy onto the duck slices.
13) Sprinkle greens with dressing and serve.
If you are a wine fan, serve this dish with a full bodied red.
Variations: I add some some finely cut parsley and basil to the beans at the last time. some finely cut thin leeks sprinkled over the duck slices look good. You can add some red colour with thinly cut tomatoes on both sides of or around the beans.
Enjoy!
——————–
Gironde Tot Fait

The Gironde Estuary between Bordeaux and the Atlantic Ocean is famous for the following cake, a kind of French rum-flavoured short cake. This cake is best accompanied by wine jam or fresh grapes. Enjoy an old rum with it.
I dedicate this recipe to the green scales of Dragonmommie (LOL). She might have to wait before her son can taste it, but I’m sure her DH will appreciate it!
Ingredients (4 people or more):
Powdered sugar: 200g
Flour: 200g
Rum: 150cc
Vanilla extract ( or essence): 1 teaspoon
Milk: 3 tablespoons
Butter: 30g
Salt
Recipe:
Separate egg yolks from whites. Beat the egg yolks with the sugar in a big all-purpose bowl until it whitens. Add flour, vanilla & rum swiftly beating at same time. Add milk and mix well.
Preheat oven to 6 (180 degrees Celsius). Beat the whites with a pinch of salt until very firm and gently mix with above mixture.
Butter the inside of an oven dish (square if possible) and pour in mixture. Cook for 30 minutes. Serve lukewarm or cold.
———————-
Lemon Cointreau Souffle

This particular recipe is deicated to Dragonmommie‘s sweet tooth (sweet fang?)
It is easier than it sounds! You might have to keep the kids off it, though (LOL)
Ingredients (for 4 people):
Almond powder: 50g
Sugar: 100g (+ 30g for coating inside of molds)
Flour: 50g
Milk: 250cc
Butter: 50g (+ 20g for coating inside of molds)
Cointreau (or orange liqueur)
Eggs: 4
Lemon (clean!): 1
Glazing sugar
Salt
Recipe:
Coat insides of molds of 4 small souffle molds with butter and then sugar.
Preheat the oven at 6 (180 degrees Celsius).
Grate the lemon skin and press out the juice. Put aside.
Separate egg yolks from whites.
In a saucepan, on a small fire, melt butter, mix on flour and cook, stirring gently all the time for 2 minutes, making sure the colour does not change.
Add milk and mix on a stronger fire until thick.
Take off fire. Add sugar, almond powder, grated lemon skin, lemon juice and Cointreau and the the egg yolks one by one and mix well.
Beat the whites with a pinch of salt until very firm. Fold the whites in the mixture delicately. Pour mixture inside molds up to their rims.
Cook for 20 minutes.
Take out of the oven, sprinkle with glazing sugar and serve at once.
————–
Roquefort Bkue Cheese and Potato Gratin

Here is a dish for my with a big appetite at Foodhoe, Czeh Absinthe and Jan and some of my friends who appreciate vegetarian food such as Allison!
Ingredients (for 2 to 4 people):
Potatoes: 5 medium to large
Butter: 50g
Flour: 30g
Milk: 100cc
Thick sour cream: 100g
Roquefort cheese: 40g (If not , use any other strong blue cheese)
Garlic: 2 cloves, chopped
Basil: a few leaves, chopped
Italian parsley: a few sprigs, chopped
Thin leeks: a couple stems, chopped
Salt: to taste
Pepper: to taste
Nutmeg: to taste
Recipe:
Peel potatoes, rinse and cook for 15 minutes in boiling salted water.
Drain and cut in thin slices.
Butter the inside of a shallow oven dish (25×3 cm).
Preheat oven to 200 Celsius degrees.
In a saucepan, on a small fire, melt butter and cook garlic and all herbs gently for a couple of minutes. Add flour and stir until mixture is smooth. Add milk first and mix well with a whisk, then add sour cream and mix again. Mix in salt and spices to taste. Switch off fire and mix in Roquefort cheese as smoothly as possible.
Place a first layer of potato slices evenly inside the oven dish. Sprinkle a little salt, pepper and nutmeg. Repeat operation until all potatoes are used up.
Pour cheese sauce evenly on top of potatoes and cook for 25 minutes. Serve at once.
This is also a good snack to accompany a strong beer or cider!
—————-
Cheese Souffle
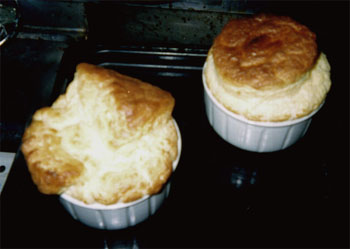
When you mention the word “Souffle”, the first reaction you get is: “Too difficult”. It is actually dead easy, and I can tell you that some restaurants make an enormous profit from them!
Ingredients (4 people):
Eggs: 4
Flour: 50g
Butter: 50g
Milk: 300cc
Shredded cheese: 100g
Salt
White Pepper
Nutmeg
Thyme
Laurel
Recipe:
Preheat oven to 180 degrees Celsius.
Butter well the inside of a (possibly round) deep oven dish (about 18cm x 8cm). This will help the souffle rise and prevent it fom sticking.
Separate egg yolks from egg whites.
In a large bowl add a little salt to whites and beat until solid.
On a small fire, prepare a Bechamel sauce (white sauce):
Melt butter completely, pour in flour and mix well with spatula until smooth. Pour in milk and mix well (diffferent people have different techniques, but I found that the best technique is to mix half of the milk little by little first, then pour in the rest and use a whisker to make a smooth sauce). Add salt, pepper and spices. Keep stirring gently.
Once the sauce has thickened to the point of almost solid, take off the fire (or switch off the fire).
Mix in the egg yolks with a spatula until colour is even. Then proceed the same with the cheese little by little until mixture comes smooth off the spatula.
Check that the whites have not gone back to liquid (That happened to me quite a few times, so make sure to check! In such a case, just beat them again. They will go back to a satisfactory state quite fast.). Mix in half first as delicately as possible with a spatula (not a whisker, or you will break the air bubbles in the whites and the souffle will not rise!). Then do the same with the second half. Pour in the mixture in the dish and put in the oven to bake for 45 minutes ( although that depends with every oven). To check whether the souffle is properly cooked, insert a thin wooden stick or knife deep into the souffle. It should come out smooth.
Before serving, make sure that everybody is at the table before serving. ” The guests wait for a Souffle, a Souffle does not wait for the guests!”
NOTES:1) This souffle can be cooked in individual dishes. In that case the cooking time shall be about 30~35 minutes.
2) Instead of cheese you could use tinned tuna (2 x cans), or fresh spinach (one bunch; boil it a couple of minutes in salted water first, then drain thouroughly, and mince it as thinly as possible), or crab (add a little brandy and mix beforehand), or thin short narrow strips of ham, or even ham & cheese. The variations are endless.
———————–
Hot Green Aspargus Flan

Now is the season for Asparaguses, both white and green.
Here a traditional French recipe for the green ones. It is not as difficult as the title might suggest!
When you choose your asparaguses, check their stems where they have been cut. The more moisture, the less peeling needed!
INGREDIENTS (4 people):
Green Asparaguses: 1.25 kg
Eggs: 5
Milk: 250cc
Butter: 50g
Trefoil or Italian Parsley (optional): 4 sprigs for decoration
Thyme, laurel & nutmeg (optional & varying to taste)
Salt
White Pepper
RECIPE:
Peel asparaguses from top, cut out the bottom fibery part. Cut the tips and keep them aside.
Cut the stems in 1 cm-thick slices and put them in a pot. pour in milk, salt, white pepper and spices to taste. Let cook for 15 minutes. Take away from fire and transfer to food processor.
Add a few leaves of trefoil or Italian parsley and process to a fine mash.
Preheat oven to 6 (180 degrees Celsius) and put a large dish with water in it to be ready as a bain-marie.
Break the eggs in a large bowl, beat slightly, pour in the asparagus puree and mix.
Butter the inside of 4 small oven dishes (ramequin-style), pour in the mixture and cook in bain-marie for 20 minutes.
During that time put the asparagus tips in a frying pan, add the rest of the butter, 200cc of water, some salt and let cook for 20 minutes stirring from time to time until there is no more liquid left.
When the puddings are cooked, unmold them onto individual plates and decorate with asparagus tips and some trefoil or Italian parsley.
Serve at once.
—————–
Potato Pizza

Have you ever wondered how to make a pizza when you do not have the bread dough or the ready-made bread? Have you ever thought that for once you could bypass the bread and it its soggy appearance as soon as it has cooled down/
The solution is cheap, easy to prepare, tasty (I can hear the fried potato addicts lick their lips in anticipation…) and open to infinite variations!
Now, how do you prepare that?
For the pizza above, I used 3 large potatoes (enough for 4 persons). If you plan to make a very large one, say use 5 or 6 potatoes, but the it will become pretty thick. Better experiment first!
Peel the potatoes and shred them as thin as possible. Wash them under running water, drain them thoroughly and take as much moisture off in cloth or kitchen paper towel. Put them in a large bowl and add salt, pepper according to your need. I always add a generous amount of nutmeg. Mix well.
In a large non-stick frying pan of the size wanted for the pizza, pour two tablespoons of of olive oil and heat sufficiently. Put all the potatoes in the frying pan and spread them evenly. Press the whole upper surface with a spoon, spatula or flat piece of metal to help potatoes to adhere quickly. Fry on middle fire until the potatoes have become translucent on the whole upper surface. Check how cooked the lower surface then. Wait until it has become a deep brown colour. Only then, should you be able to turn it over without breaking it. When both sides have cooked to a crispy dark brown colour slide onto an oven plate covered with baking paper. Let it cool a bit.
Preheat the oven to 180 degrees Celsius.
As for the garnish, it is entirely up to your imagination!
Usually I first brush the “potato bread” with tomato ketchup or puree and Thai sweet chili sauce. Then I had bacon (raw or fried), thin slices of onion or Belgian shallots, at least three types of thinly slices pimentoes and plenty of cheese.
As for the one in the picture above, I utilized left overs of that particular day:
bacon fried to a crisp, smoked salmon marinated in Thai sweet chili sauce, previously sauteed mushroomsand pimento slices, the whole with a generous helping of grated cheese, some seasoning and fresh herbs, including basil and Italian flat parsley.
Enjoy!
——————–
Tuna Trio Hors d’oeuvre

Here what my better (worse?) half came up last night as a starter after she found a good bargain at our nearby Coop Supermarket. Plenty for two, thw fish costing only 440 yen!
From top left around the clock:
-Maguro akami (lean part of the tuna) thin sashimo topped with homemade wasabi plant pickles and wasabi dressing
-Maguro akami/maguro zuke (lean part of the tuna marinated Japanese style) topped with “shigeki rayu” (Chinese style hot sesame oil) dressing from Ishigaki Island, Okinawa.
-Negitoro (minced tuna semi-fat part but without the usual chopped leeks) topped with “kizami tamanegi” (onion cream) dressing
The whole on a bed of fresh cress grown in our Prefecture. The perfect starter for her wine and my sake (I mean the drink!)
———————
Scallops Salad

My wife, a couple of days ago, was “stuck” with some succulent-looking scallops. The problem was they were too small to make acceptable sashimi. So for once, she forgot she was Japanese and opted for the European thinking.
She had some very resh cress (cresson) grown in Shizuoka Prefecture as well as a variety of tomatoes called “Aamera”. These tomatoes are the smallest that I have ever seen and are grown in our Prefecture only (so far). They are very firm and very sweet. You could serve them together with a plate of red fruit!

So as you can see on the picture, she first made a thin bed of cress topped with avocado slices, made a rondo of scallops in the center with a core of cut aamera tomatoes. It certainly looked more difficult than it really was.
Topped with a dressing of your choice, with the oprion of some cottage cheese and finely cut Italian parsley or basil, it makes fro a beautiful appetizer!
———————–
Seafood Spaghetti Salad

Simple recipes actually means what I’m ordered to cook, prepare or invent by my better (worse?) half on Sunday nights as her job keeps her busy on weekends. These concoctions might come helpful for those gentlemen keen to preserve peace at home!
As for measures and proportions, I will it to your imagination, although a good observation of the picture should be a good enough guide to you! The plate pictured was one serving.
Prepare or choose a dressing for the spaghetti. I usually use soft Dijon Mustard, Xeres vinegar, hazelnut oil, salt, pepper and a few baies roses. Naturally, Olive oil, wine vinegar, soft mustard, salt and pepper is fine, too.
Boil the spaghetti to the consistency you prefer, drain them and hold them under running cold water for 30 seconds, shaking them well to prevent them from cooking any longer.
Drain the water energically and stir in some dressing for taste and to prevent them from sticking to each other. Leave in a all-purpose bowl.
At the top of the picture are slightly sauteed scallops with onion confit.
To make the onion confit (can be done the day before or a few hours in advance), peel and cut 2 large onions in thin slices. Discard the “foot” (bottom core) as it is indigestible. Fry them in a pot with 100g of white butter on a medium fire. When the onion slices have become soft and translucent, add a large tablespoon of honey, a cup of red wine, a tablespoon each of Xeres vinegar and Port wine. Season with salt and white pepper (thin powder if possible). Simer until most of the liwuid has reduced. Check and add more honey if not sweet enough. A little tomato puree might help,too. Let it cool and keep it away from any heat and light source (do not leave it in the fridge as it might congeal).
Sautee the scallops with a little slat and lemom juice on a small amout of olive oile. As soon as they have reache a very light brown colour, take them off the fire and let them rest on a grill to get rid of excess liquids.
At the bottom of the picture are small prawns.
Take off the carapace, tail and heads (discard or use for making broth).
Make a shallow incision all along the middle of their back.
Sautee them like the scallops. As soon as they changed colour, put them to rest with the scallops.
Keeping in mind you are making two servings, cut a tablespoon each of red, yellow and orange sweet pimentos in small cubes. Fry them in olive oil without any seasoning. When soft, drop them in all-purpose bowl. Do the same with a little assortment of scallops, small shrimps and cockles (can be bought easily frozen at large supermarkets), or whatever seafood you can put your hands on. Keep in mind they ought to be of all the same approximate size (that’s a lot of “keep inmind”, isn’t it?)
When all ingredients have cooled down to room temperature and this just before you are going to serve them, toss in some finely cut fresh tomatoes (if you add them too early they leave out toomuch water in contact with salt!) join the pimentos and seafood in the same bowl and mix in a rasoable amount of dressing. Take half out and mix it with the spaghetti.
Place the spaghetti in the middle.
Arrange scallops interspaced with some onion confit above the spaghetti as in the picture.
Arrange sauteed prawns below as in the picture.
Add a good quantity of “baby leaves” of your choice with rest of the veg and seafood salad and arrange on both side of the spaghetti.
Of course this is open to any kind of variations. I just hope I stimulated you into your own recipes!
Bon appetit!

Great website and wonderful looking Recipes!!!!!!!
I am hoping you might be able to help me locate a Shrimp Moose and Sole dish I found many years ago, but lost the recipe.
The sole is used to line the inside of a bunt pan and the shrimp moose is poured into the inner circle being held by the sole. Then the sole is folded over the shrimp moose mixture and baked in the oven. The dish can be served hot or cold as an appetizer.
Thank you in advance for any help you might be able to provide.
Best regards,
Mike McTamney
LikeLike