This is a compilation of all the vegan recipes I have either come across or written recipes about this past year.
I sincerely hope other foodies will find it useful for reference and copying/sharing as all pics and articles in this posting are for sharing!
VEGAN TOFU CUISINE: AGEDASHI TOFU

“Agedashidofu” or (Tofu first deep-fried, then served with dashi soup” is a very popular Japanese dish that can easily be adapted to fit vegetarian and vegan priorities!
Moreover, whatever dashi/soup is left can be poured onto a bowl of freshly staemed rice for a fillingand healthy suppelementary dish!
Veagn Agedashidofu!
INGREDIENTS: For 2 people
-Tofu (momen tofu) 1/2 a large piece (can of course be increased!)
-flour: 1 tablespoon (whatever flour as this could add an interesting variation!)
-Cornstarch: 1 tablespoon
-Oil for deep-frying
-Freshly grated daikon (to taste)
-Thinly chopped leek (to taste)
-Dashi (konbu/seawed dashi): 100 ml
-Soy sauce: 2 tablespoons
-Mirin/sweet sake:2 tablepoons
-You may add spices of your choice, especially grated ginger and hot chili powder!
RECIPE:
1. Pressas much water out the tofu as possible.
Cut the tofu into large pieces. Take as much as humidity off their surface by wrapping inside a clean cloth for a while.
Mix the flour and cornstarch.
Roll the tofu pieces into the flour and cornstarch so as to cover all sides.
If you don’t have enough flour/cornstarch, prepare more.
Drop in deep-frying oil at 170 degrees.
2. Prepare the dashi soup by heating the konbu dashi with the soy sauce and mirin (and extra spices if wanted).
3. Pour the dashi in individaul dishes.
Place fried tofu in the middle.
Top tofu with freshly grated daikon and chopped leek.
SUGGESTION:
Boil some cut mushrooms in the dashi before serving them together with the tofu!
Easy and healthy, isn’t it?
————
VEGAN SMOKED TOFU

It is sometimes a hard world for vegans when it comes to find new ideas and recipes, even you love tofu!
Here is a simple way to prepare and enjoy tofu as it was a big piece of cheese!
Vegan Smoked Tofu!
INGREDIENTS: for ? People
-Tofu: a large piece 300~400g or more
-Miso of your liking, as much as you wish
-Soy sauce, not too much (beware the salt)
-Sake or mirin, a little just for the taste
-Spices, if you wish!
RECIPE:

-As the tofu shouldn’t be too soft, choose “momendofu”, or slightly solid.

-Place the tofu on a clean cloth.
-Top it with a clean plate or board.
-Put a heavy weight on top.
-Leave it like this for half a day. The tofu will reduce to half.

-Smear the whole tofu on every face with plenty of a mixture of miso, soy sauce and other ingredients of your choice. The more, the better.

-Wrap it carefully in cellophane paper and leave it in the fridge overnight.

-Take it out of the fridge and take off the cellophane paper.
-Let it dry for 2 hours at room temperature over a piece of kitchen paper.

-Smoke inside a Chinese smoking set for 1 hour.

-Very practical for smoking small quantities!

-Here you are! Enjoy!
———————–
VEGAN RICE CUPCAKES

Just discovered this cupcake recipe for my vegan (I’m not) friends with the extra bonus of possible variations!
Japanese style vegan rice cupaakes!
INGREDIENTS: For 1 mug cup (arrange quantities accordingly for a greater number)
-Rice powder (Ris Blanc): 4 tablespoons
-Cornstarch: 1 tablespoon
-Sugar (of your choice, honey might be feasible): 1 tablespoon
-Baking Powder: Half a teaspoon
-Olive oil: 1 tablespoon
-Soy milk: 4 tablespoons
RECIPE:
–
-In an oven ramequin or mug cup first pour rice powder, cornstarch, sugar and baking powder and mix well.
Next add olive oil and soy milk and mix well.

-Depending on the kind of rce powder and soy milk you use, you may have to increase the amount of one or both for a smoother mixture. Experiment!

-Cook insid emicrowave for 2 minutes or more. Check by pushing a thin wooden or meddle stick. It should come out clean. The taste is light. You may add sugar.
-Have a good look at the cake while it cooks. It should not be more than 2 minutes 30 seconds.
If you use kabocha powder, you will need 1 small teaspoon plus 1 teaspoon of water.

-The above green cupcake was made by adding 1 teaspoon of spinach powder and 1 teaspoon of soy milk!

-Add 1 teaspoon of cocoa powder and 1 teaspoon of soy milk for a cocoa cupcake!

-Add 1 tablespoon of carrot powder and 1 teaspoon of soy milk for a carrot cupcake.

-Add crushed apple for the above!
—————————
VEGAN TOFU LEMON CUPCAKES

This is a slightly different version of the Japanese style vegan tofu cupcake I introduced a couple of days ago. It will give you an idea of how to play on that idea!
INGREDIENTS: For about 16 cakes
-Tofu (kinu tofu): 180 g
-Sugar (of your choice): 0 g
-Soy milk: 3 tablespoons
-Lemon juice: 1 tablespoon
-Olive oil: 2 tablespoons
-Flour (use chestnut flour if you are wheat allergic): 160 g
-Baking powder: 2 teaspoons
-Grated lemon skin: 1 whole lemon
-Dried English tea leaves, finely chopped ( the contents of 1 tea bag is adequate)
RECIPE:
-Mix flour and baking powder well.
Mix soy milk and lemon juice separately and and set apart.
-In a large bowl drop in the tofu and sugar. Mix well until you obtain a smooth paste. Add the soy milk, lemon juice and olive oil. Mix the lot thoroughly with a whisker.
-Add the all flour and baking powder mixture and mix in with a spatula until floury lumps have disappeared, but don’t mix too much!
-Pour mixture into cups and sprinkle them with grated lemon skin and dried tea.
-Bake inside oven for 16 minutes at 190 degrees Celsius.
If you make mini cupcakes, 12 minutes should sufficient.
keep looking at the colour of your cupcakes!
——————
VEGAN TOFU CUPCAKES

Cupcakes are the norm all over the world when it comes to bakery and tofu is a must for vegans.
Now, it is possible to make very simple cupcakes for vegans!
Wheat flour allergics can replace the wheat flour with chestnut flour like the Corsicans and Portguese do in their traditional food!
This is only the basic recipe to which you can add fruits and vegetables!
Vegan Tofu Cupcakes!
INGREDIENTS: For 5~6 cupcakes
-Tofu (kinu toufu): 300 g
-All-purpose flour (for substitutes, read above): 100 g
-Sugar (white, cane, or even honey): 30 g
RECIPE:

-Get ingrediens ready and pre-heat oven to 200 degrees Celsius.

-Mix tofu and sugar. Mix well.

-Sprinkle flour over tofu and mix roughly so as to leave a little flour on the surface.

-Bake for 25~30 minutes at 200 degrees Celsius or until desired colour.

-Dead simple, aren’t they?
Now your skills will reside in what you add!
——————–
VEGAN TOFU CARPACCIO

I’ve been in tofu recipe search mode for quite a while, and I finally found one to please my vegan friends who can’t boast a carpaccio of their own!
It is ridiculously easy, but it makes for great impression!
Choose the best ingredients!
Vegan Tofu Carpaccio!
INGREDIENTS:
-Tofu (kinu tofu/silk tofu): as much as you like?
-Salt (Guerande for example): to taste
-Black pepper (freshly ground only, please!): to taste
-Lemon juice (organic lemon, please!): to taste
-Olive oil (EVO): to taste
-Pink pepper/baies roses: to taste
As you can see, it is basically up to you!
Look for some great organic green leaf vegetables to make a “bed” for the tofu.
RECIPE:
-Wrap tofu inside a large piece of kitchen paper.
Put the wrapped tofu inside a tupperware box (no lid, please) and top the tofu with a light weight.
Leave overnight (a full day, if you can) inside the refrigerator.
-Take out the tofu (discard the water).
-Cut it slices and plave it on a bed of leaf vegetables.
-Sprinkle in that order with salt, pepper, lemon juice and olive oil.
-Srop a few pink pepper grains for decoration and taste.
Simple, ain’t it?
————————
VEGAN ITALIAN TOFU SALAD

The Japanese come with some simple and tasty new ideas for Vegans and Vegetarians!
I just discovered this recipe. It is basically a Cabrese-style salad.
The twist is that the cheese is replaced by tofu!
Vegan Italian Tofu Salad:
INGREDIENTS:
-Tofu (kinu dofu): half/200g
-Tomato: 1 large
-Sweet basil: 10 leaves
-Dressing:
Wine vinegar (white): 1/4 cup
White wine: 1/4 cup
Salt: 1/3 teaspoon
Whole black pepper: 3 grains, crushed
Garlic: 1/2 clove
Fresh red chili: 1/2
Olive oil (EVO): 1.1/4~ tablespoon
Onion: 15 g, grated
RECIPE:
-Cut tofu into 1 cm thick slices.
-After taking out the stem part, cut tomatoes into half moons.
-Leave tofu tomatoes in a bowl full of iced water.
-Crush and mince garlic. Mix it with the wine vinefar, white wine, salt, pepper and chili. Cook in a pan until the lot has reduced to half. Let cool.
-Take tomatoes and tofu out the iced water (drain as much water as possible) and drop them in a large bowl. Add onion and olive oil. Mix well.
-Place tomatoes, tofu and basil alternately as shown in picture on a srving dish. Pour dressing all over.
NOTE:
-For calorie conscious vegetarians, tofu has almost none while chesse has loads of them!
———————–
Vegan Japanese Dessert: Tofu Puddings!

It’s been some time since I have featured a recipe for the Tofu Tribe, (Terecita, Elin, Jenn and Jennifer !
I though it was about time I introduced them to a very easy way to make a dessert with tofu!
TOFU PUDDING!
INGREDIENTS: for 5 ramequins
-Water: 100 ml
-Agar agar powder: 3 g
-Tofu: 400 ml
-Sugar: 30 g
-Lemon juice: 1 lemon
RECIPE:
-Heat the mashed tofu without bringing it to a boil. Add sugar and let it dissolve into the tofu. Mix if necesary.
-In a deep pan pour the water and add the agar agar. Mix well as you heat on a medium fire. Once cissolved continue mixing until the water has become transparent.
-Take off fire. Add tofu to agar agar water little by little and mix well. Add lemon juice and mix. Wait for a little while. Pour in ramequins or recipients of your choice.
Chill well before serving!

Same recipe as above but replace water with English tea!
Vegan should make the tea with soy milk or water only!

Same with orang juice!
In this case use 100 ml of water and 200 ml of organice orange juice!

For this one replace orange juice with pineapple juice!
————————–
Vegan Japanese Dessert; Fruit Jelly

The Japanese do have some simple ideas to please vegans and vegetarians alike, especially when it comes to simple, tasty and healthy desserts.
Here is a simple fruit jelly dessert you can adapt according to seasons and availability (try it with your kids!):
INGREDIENTS: For 2 large cups
1)
-100% orange juice (organic if possible) 200ml
-Water: 200 ml
-Agar agar: 2^4 g (depending how solid you like your jelly)
2)
-100% apple juice (organic if possible): 200 ml
Water: 200 ml
-Agar agar: 2~4 g
-Grapefruit: 1 peeled and and quartered (all skins off)
-Mint leaves and blueberries for final touch
RECIPE:

-Pour water in a pan. Add agar agar. Heat a little to dissolve agar agar. Add orange juice. Pour into two glass cup of your choice and leave inside the fridge until it solidifies completely.

-Add grapefruit.
-Reapeat with apple juice: pour water in a pan and add agar agar. Heat slowly to dissolve agar agar. Add fruit juice. Pour the lot over the grapefruit.

-Add grapefruit and mint to your liking and put inside refrigerator to solidify.

-Variation with 3 layers!

-As it appears on your spoon!

-The other way round!
———————–
Vegan French Cuisine: Green Peas & Mint Chutney

I’ve said before that the French are also fond of vegetarian and vegan cuisine and are always ready to adapt their traditional rcipes to different priorities.
Here is a French-style chutney that even my Indian friends will appreciate:
Green Peas & Mint Chutney!
INGREDIENTS: for 4~6 persons
-Fresh green peas: 300 g
-Small new onions: 2, thinly sliced
-Olive oil (EV): 2 tablespoons
-Brown sugar (light brown variety if possible): 1 tablespoon
-Freshly grated ginger: 1 teaspoon
-Mint: 3 large sprigs, finely cut (reserve a few leaves for decoration)
-Green lemon juice: 1
-Salt & pepper to taste
RECIPE:
-Cook the gree peas (out of their pods!) in a pan full of boiling salted water for 4~5 minutes. Try and preserve some firmness. Cool completely.
-At the same time cook the onions in the oive oil for 2~3 minutes, taking car not to “colour” them.
Add grated ginger, sugar, lemon juice, salt and pepper. Let simmer for 2~3 minutes.
-Mash the green peas (keep some whole for better effect the you will add at the end) and add to the onions. Let simmer for 2^3 more minutes. Lats add the finely cut mint and transfer the chutney into a bowl.
Serve cool or slgtly chilled.
NOTE:
You can mash all the green peas, but keeping a few whole added with a few mint leaves will look great!
—————–
LEEKS MARINATED IN PONZU & MUSTARD

Sorry Holly , but I will have to take a (very small) break away from leeks after this article, otherwise Comestiblog will really think I’m leaking from everywhere!
This is a very easy recipe that you can use as an appetizer or on top of freshly steamed rice.
“Ponzu” is a kind of light Japanese sweet rice vinegar based dressing one can use instead of soy sauce with the immediate result of reducing salt intake.
Leeks Marinated with Ponzu & Mustard!
INGREDIENTS: For 2 persons
-Long leeks (Japanese style): 1
-Ponzu: 3 large tablespoons
-Mustard (containg seeds)/You can improvise here and introduce various kinds of mustards, such as cassis mustard and so on!
RECIPE:
-Cut the leek in 5~6 cm long pieces
-Fry the leeks in oil of your choice until they change colour a little.
-If you wish to eat it hot, season with mustard and ponzu, saute just a little and serve.
-If you wish to eat it cold, Mix with mustard and ponzu in a bowl, let cool and place in the fridge.
-One can improvise the amount of sauce to one’s liking.
I personally like it served as in above picture.
Simple and healthy!
—————————-
LEEKS & SHIITAKE MUSHROOMS

Here is another posting for Holly who has showed such an enthusiasm for leeks. This mini-series of very simple recipes on leeks will also please vegans and vegetarians!
Leeks and Shiitake Mushrooms!
INGREDIENTS: For 2~3 people
-Shiitake Mushrooms: 6~8 fresh
-Leeks: 2~3 depending on their size. Choose them long and mostly white
-Sesame oil: to taste
-Salt & pepper: to taste
-Soy sauce: to taste
RECIPE:
-Chop the leeks fine and mix with sesame oil in a bowl
-Take the stems off the mushrooms. Sprinkle mushrooms with salt and pepper. Fill with plenty of chopped leeks.
-Bake in oven for 4~5 minutes until they acquire a pleasant colour.
-Season with soy sauce before serving.
NOTE:
You ca easily bring variations with chili pepper, Thai sweet and hot sauce, and chopped herbs of any kind!
Eat as soon as out of the oven (with a beer?)
———————-
LEEKS & MISO SAVOURY SAUCE

Here is the next posting for Holly who has showed such an enthusiasm for leeks. This mini-series of very simple recipes on leeks will also please vegans and vegetarians!
This particular recipe can serve as an accompaniment for many things, especially rice!
Leeks & Miso Savoury Sauce!
INGREDIENTS: For one serving
-Leek/green outside layer is best: 2 or 3 layers/chopped very fine
-Garlic: 2 cloves/crushed and finely chopped
-Fresh ginger: same volume as garlic/grated
-Miso (of your choice. I like it fairly strong): 150 g
-Sugar: 2~3 large tablespoons
-Japanese sake (cooking sake is fine): 2 large tablespoons
-Mirin/sweet sake: 1 large tablespoon
-Sesame oil: 1 large tablepoon
RECIPE:
-Heat sesame oil in frypan. Throw in chopped leeks, grated ginger and chopped garlic and sautee over a medium fire.
-Once the leeks are cooked soft, switch off fire. Add miso, sugar, Japanese sake and mirin and mix well.
-Put back onto fire. Taking care not to “boil” it, cook it for a while stirring regularly.
-Pour it inside a glas jar and securely close it. Can be kept safe for up to 2 months.
NOTE:
Choose your leeks as fresh as possible.
Check the sugar for taste.
—————————-
LEEKS & TOFU

Since Holly has showed such an enthusiasm for leeks, I had a look in my Japanese recipe notes and came with a mini-series of very simple recipes on leeks that will also please vegans and vegetarians!
As it is also very easy tofu recipe, he “Tofu Tribe” (Terecita, Elin, Jenn and Jennifer should be interested!
Leeks 6 Tofu!
INGREDIENTS: for one hungry person
-Tofu: 1 cho: 250 g
-Leek: 1 (choose it long and thin)
-Salt: a big pinch
-Sesame oil: 2 large tablespoons
RECIPE:
-Take as much water off the tofu as possible.
This can be done by envelopping it into a clean cloth and putting a weight on top.
-Chop the leeks very finely, as much a syo like (the more the better) and drop them into a bowl. Add the salt and sesame oil.
Mix well and delicately pour it on top of the tofu you will have place on a serving plate.
One may season it with a little chili pepper or black pepper.
Eat it with a spoon and have a beer with it!
—————————–
Vegan French Cuisine: Crunchy Quinoa and Seasonal Vegetables in Honey

French Cuisine can easily be adapted to vegan priorities and needs.
Quinoa is an excellent source of proteins, making it more valuable for vegans!
Note: Rinse quinoa just before usng it to eliminate its tartness.
Crunchy Quinoa and Seasonal Vegetables in Honey!
INGREDIENTS: for 6 persons
-Quinoa: 300 g
-Fennel bulbs: 2
-Carrots: 3
-Turnips: 2 large
-Onions: 2 large
-Honey (liquid): 4 large tablespoons
-Soy sauce: 4 large tablespoons
-Fresh coriander: enough to taste and chopped/thinly cut
-Olive oil (EV)
-Pepper
RECIPE:
-Cook quinoa in 700 ml of boiling salted water for 10 minutes. Drain and keep warm.
-Peel and clean all the vegetables. Cut the fennel, onions and turnips into small wedges and slice carrots. This is where you can improvise!
-Heat 1 large tablespoon of olive oil (EV) in a large frypan (a wok would be best!). First drop the carrots and turnips and fry them on a strong fire for 3 minutes. Add 1 tablespoon of liquid honey and cook on a medium fire for 7 minutes, stirring from time to time.
-Transfer the vegetables into a large plate. Wipe the frypan with kitchen paper. Heat 1 large tablespoon of olive oil (EV). When it is hot enough drop in the fennel and the onions and fry over strong fire for 3 minutes.
-Add the turnips and carrots with 2 more large tablespoon of honey. Let cook over a medium fire, stirring form time to time for 5 minutes.
Add the soy sauce and the last large tablespoon of honey. Fry over a medium fire, stirring from time to time, for 5 more minutes.
-Season with pepper and mix. Sprinkle with plenty of fresh coriander.
Serve immediately over the crunchy quinoa and eat while it is hot.
Simple ane easy, isn’t it?
Bon appetit!
——————————
Japanese Vegan Udon, Dried Shiitake and Konbu Salad

I’ve been looking around me recently for ideas so as to help my vegan and vegetarian friends with new ideas. Here is a simple one I just found for a healthy and tasty salad:
Japanese Vegan Udon, Shiitake and Umeboshi Salad!
INGREDIENTS: For one dish
-Udon: 1 pack of boiled udon ready for use
-Dried Shiitake Mushrooms: 4
-Konbu/seaweeed
-Salad Oil: 3 large tablespoons
-Soy sauce: 50 ml
-Mirin/sweet sake: 50 ml
-Real mineral water: 100 ml
-Cucumber, lettuce, mini tomatoes: as per taste
RECIPE:

-In a pan, drop cut dried shiitake, cho@@ed konbu/seaeed and oil. Fry gently.
-On a low fire add soy sauce and mirin.

-When you are satisfied that the shiitake are soft enough, drop the whole into mixer,nlender. Add water and process unti you obatin a sauce like in the picture.
-Boil udon quickly. Cool them under running clear water. Drain throuroughly and place on a dish.
-Arrange lettuce, cucumber on top of udon as on the picture, showing up enough of the udon.

-pour the sauce on top and decorate with mini tomatoes.
Enjoy!
——————————-
Easy Vegan Tomato Appetizer

Just found the idea in a Japanese cookbook for an easy vegan/vegetarian appetizer based on tomato:
Agar agar Tomato Jelly!
INGREDIENTS:
-Tomato Juice: 300 ml (make your own juice form tomatoes freshly bought or picked!9
-Orange Juice: 250 ml (same a for tomato juice. Choose biologically grown ones!)
-Sugar: 3 large tablespoons
-Agar agar powder: 4 g
RECIPE:
-Pour all ingredients into pan. Het until suagr and agar and agra are completely dissolved.
-Pour into recipients o your choice and let cool.
-Put inside the fridge and serve when the jelly has completely solidified.
NOTES:
This is a very basic recipe, which calls for variations and ideas:
-If on a diet, discard sugar, and add a lttle celery salt, white pepper and spices of your choice. ecorate with basil leaves.
-Can be used as solid base under fruit or vegetable salads!
-Mixing alcohol with it, vodka for example, and you have jelly cocktail.
Have some good fun!
———————-
Japanese Vegan Snack: Ume-Shiso Kyuuri/Cucumber, Pickled Plums & Perilla Salad

Here is one simple recipe I consider as a Japanese “National” snack that will have all vegans and vegetarians rushing for:
Ume-Shiso Kyuuri/Cucumber, Pickled Plums & Perilla Salad!
Ingredients might not be easy to find, although they are probably available on the Internet under various forms.
INGREDIENTS:
-Cucumbers. If possible, Japanese style, long, thin and crunchy
-Shiso/perilla leaves: 4
-Umeboshi/Japanese pickled plums (there are salty and slightly sweet varieties. Either is fine!)
-Salt: 2 small pimches
-Sesame oil: a little
RECIPE:
-Wash cucmbers under running clear water and wipe them thoroughly with kitchen paper.
-Cut both ends of cucumbers and discard. Tight-seal cucumbers inside a vynil pouch and break (instead of cutting) them roughly into bite-sized pieces by hitting them with pestle over a kitchen wooden board.
-Discard pip/stone inside umeboshi and cut into small pieces.
Cut the shiso into very thin strips.
-In a bowl, mix thoroughly by hand cucumber, umeboshi and shiso.
Add salt an sesame oil. Stir and serve.
Note: Will be very tasty after being chilled inside the fridge.
The best umeboshi for this recipe are the sweet ones pickled into honey.
Make sure that the cucumber are dry after first washing them or the dish will be running with water.
I personally add some sesame seeds for effect and taste!
—————————-
Seaweed-pickled Cucumbers

Cucumbers are in season, and the Japanese pickle a lot of them before they become scarce and more expensive!
Here is a very simple recipe to preserve them and enjoy them anytime (with a cool drink?):
Seaweed-pickled Cucumbers!
INGREDIENTS: For 1~2 persons
-Cucumber: 1 fairly long. Japanese cucumbers are comparatively thin and crunchy. Be aware that the large soft cucumbers found in “Western” countries might not be appropriate. Moreover, the Japanese eat the cucumbers whole.
-Salt: a pinch
-Salted seaweed (shio konbu): to taste. I personally like quite a lot!
-Sesame oil: to taste (do some pesonal research/experiments as to how much you would fancy!)
-White sesame seeds: to taste. i use quite a good amount myself!
RECIPE:
-Cut both extremities of the cucumber and discard.
Wash rapidly.
Close inside a vynil pouch and strike cucumber with a wooden pestle or the equivalent to break cucumber in uneven pieces.
-Take out. Drop cucmber pieces into a bowl. Add salt. Stir with yoyr hand. Let rest for a while.
Discard water which has seeped out of the cucumber.
Add salted seaweed. Stir the whole gently by hand for a little while.
-Transfer onto a dish. Arrange it for presentation. Sprinkle with sesame oil, then sesame seeds.
Note: Some people like it without the salt.
Washing the cucumber will take acidity out.
Breaking the cucumber by beating it will allow other ingredients to penetrate it more efficiently. If you don’t like the breaking method and prefer to cut the cucmber instead, let it rest for 10 minutes before adding the salt.
—————————
Zucchini and Potato in Soy sauce Marinade

As Lojol rightly said, zucchini is a very versatile vegetable that can be paired with all kinds of other ingredients.
Here is a simple recipe to illustrate:
Zucchini and Potato Soy Sauce Marinade!
INGREDIENTS: For 3~4 people
-Zucchini: 1 medium large, 200 g
-Potatoes: 2 small, 200 g
-Olive Oil (for frying)
-Salt and pepper: a little to taste
-EV Olive Oil: 1 large tablespoon
-Soy sauce: 2 large tablespoons
RECIPE:

-Withe a vegetable peeler, peel small strips of zucchini skin for better pattern.
Cut Zucchini into 8 mm thick slices and again across to create “half moons”.
Peel skin off potatoes, cut in 8 mm thick slices and clean in clear cold water.
-Drain potatoes (don’t wipe them) and put them inside a heat-resistant bow. Cover bowl with cooking cellophane paper. Leave 4~4:30 minutes inside Microwave oven at 500W.
-Pour soy sauce and EV oil in another bowl and mix well with an electic whisk.
-Heat olive oil in a frying pan and fry zucchini over a fairly fire.
-When the zucchini has aattained a satisfying color on both sides, add potatoes. Fry for 1~2 minutes. Add a little salt (not much needed there) and asome pepper ( a little more might be welcome.
Mix and drop everything into the soy sauce-olive oil marinade while it is still hot.
-Turn over for time to time until it has completely cooled down.
-Serve with a few small tomato slices for better colour presentation!
————————
Non-Mayonnaise Avocado and Soy Beans Coleslaw

Here is a simple coleslaw recipe that vegans, vegetarians and omnivores alike can enjoy in Summer:
Non-Mayonnaise Avocado and Soy Beans Coleslaw!
INGREDIENTS: For 4 people
-Cabbage: 4~5 leaves
-Onion: half a large one, shredded, washed in cold water and drained before usage
-Avocado: 1 large
-Lemon Juice (or apple vinegar): 1 large Tablespoon
-Soybeans: 100 g. Boiled in water, cooled and drained (if uanavailable, can be replaced with any kinds of beans or chick peas)
-Salt and Pepper: to taste
RECIPE:
Cut the cabbage in vey thin strips (chopped). Drop into a large bowl. add a little salt. Mix and little while.
As explained above, mince onion, washi in clear cold water and drain thoroughly to take off the onion acidity.

Once the cabbage has become softer, mix with onion, cut avocado and lemon juice. Mix the whole, crushing/mashing the avocado in at the same time.
Once mixed to you liking, add soy beans and check taste. Rectify if necessary.

Note: Put chopped onion inside a stocking-style fined netting piece. Keeping it close with your hand, dip it in cold clear water for a while, then take out and press water out. If you do it stongly enough, no need to waste kitchen paper!
Careful about the amount of salt added to the cabbage. Too much and the cabbage will become soggy. If there is too much salt, watch it with clean cold water. The cabbage will taste and feel better if still a little crunchy.
Serve inside a half avocado “skin” (keep some sprinkled with a little lemon juice and securely closed inside a Tuperware box in side the fridge until usage).
———————-
AVOCADO AND WATERMELON SALAD

Here is a very simple and basic recipe for a summer snack or starter that should please vegans, vegetarians and omnivores alike: Avocado and watermelon sala!
INGREDIENTS: For 2 ~3 people
-Watermelon flesh without skin or pips/seeds: 50~60 g
-Freshly pressed lemon juice: half a large tablespoon
-Avocado: 1 whole, ripe
-Thinly chopped onion: 1 large tablespoon
-Shiso/perilla leaves: 2~3
-Salt: 1 pinvh
-Soy sauce: a little (according to taste)
-Coarsely ground black pepper: a little (according to taste)
RECIPE:
-Cut watermelon in 7~8 mm cubes and sprinkle with lemon juice.
Chop shiso/perilla thinly after having rolled them together.
Take meat out of avocado and mash it.
-In a bowl mix avocado, chopped onion and shiso together. Add salt and soy sauce. Mix well.
-On a plate place avocado mix first. decorate with watermelon. Last sprinkle the coarsely ground black pepper on the watermelon.
Serve.
This still leaves you with plenty of leeway for improvisation and variation!
Enjoy!
————————-
TOFU AND WAKAME SALAD

Here is another very easy recipe to help you and the “Tofu Tribe” (Terecita, Elin, Jenn and Jennifer modify and preserve tofu for all kinds of usages!
I’d like to take the opportunity to apologize to Tinako for my past mistake!
Tofu and Wakame Salad!
INGREDIENTS: For 2~3 people
-Tofu: 300 g
-Salt-preserved wakame: 20 g
If bought dried, let it “come back” in lukewarm water first.
If you are worried about the salt, let them rest in water for a while first and drain.
-Kawaire daikon, or any fresh sprouts available: To taste.
-Ponzu: 2 large tablespoons
-Sesame oil: half a large tablespoon
-White sesame seeds: to taste
RECIPE:

Leave tofu in clean cold water for 30 minutes. Wash and clean wakame seaweed and cut in bite-sized pieces. Cut sprouts in thirds.

In bowl mix seaweed, sprouts, ponzu and sesame oil.

Drain tofu and cut in bite-sized pieces. Mix in.
Place salad in serving bowls and sprinkle white sesame seeds.
Note: You can use either kinu tofu or momen tofu.
You may use green shiso/perilla leaves vinaigrette instead of ponzu.
In summer add cut plum tomatoes.
I personally like to add a little sweet umeboshi/pickled Japanese plums!
—————————
TOFU SHIOZUKE/SALT-PRESERVED TOFU

Here is an easy recipe to help you and the “Tofu Tribe” (Terecita, Elin, Jenn and Jennifer modify and preserve tofu for all kind of usages!
Tofu Shiozuke/Salt-preserved Tofu!
INGREDIENTS:
-Tofu: 1 “cho”/200 g (Kinu or Momen type)
-Salt: 2g
RECIPE:

Take tofu block out of its package and put it kitchen working plank. Sprinkle it with 1 g of salt.

Cover with a sheet of kitchen paper.

Cover the tofu and its kitchen paper with a plastic Tupperware-type box.

Turn box and plank over holding them together.

Take off plank and sprinkle the tofu bottom face with 1 g of salt.

Close paper kitchen over tofu.

Close the box and leave inside refrigerator in the evening.

Next morning there should be about 20cc of water having seeped through the kitchen paper. Discard water.

Wrap again in new clean kitchen paper. Put back into dry Tupperware-type plastic box and close. Put back into fridge until the next morning.
The tofu will have reduced size by half by then.

That’s how it would look. Smaller and firmer. More water should have seeped out. Discard it.
USE SAMPLES:

On a bowl of freshly steamed rice serve with with thinly sliced raw okra, preserved chrysanthemum leaves. Then pour hot tea on top!

Pickle it with fresh miso for one night and eat it as a snack!

Beautiful in salad with avocado slices!

Served with chopped vegetables and garlic chips!

Stuffed inside Aburaage with boiled beans then grilled and seasoned with seaweed dashi/stock and ponzu!
——————————
TOFU RECIPES: TIPS FOR EASY SNACKS

I was thinking of the “Tofu Tribe” (Terecita, Elin, Jenn and Jennifer) when riding the bu to work this morning. No bicycle these days as we are in the midlle of the rainy season!
The day before the Missus had served a quick snack (see pic above) consisting of tofu on which she poured extra virgin olive oil, coarsely ground black pepper and a little salt.
Very simple. Not very artistic, I admit, but the idea was there.
Now, many vegans and vegetarians like their tofu, but are running out of ideas…
How about, for example, creating a plate (use a large one with “compartments” for better effect!) with an assortment of tofu pieces seasoned with different varieties of oils, ground peppers and other spices, finely chopped vegetables such as carrots, cucumbers for good colouring. I love my tofu mounted with chopped shiso/perilla leaves, umeboshi/Japanese pickled plums meat and a dash of ponzu!
And what about natto/fermented beans with chopped shiso leaves and grated fresh ginger?
You could do the same thing with fried tofu, deep-fried tofu and aburaage.
How about a piece of fsh tofu mounted with freshly cut and fried aburaage, wasabi, grated fresh ginger and ponzu?
Endless bliss!
Will be introducing oils in my next posting!
————————
Tofu recipe: Tofu Manju with Ankake Sauce/Tofu Dumplings in Sweet and Sour Sauce

Here is another simple tofu recipe dedicated to Elin, all tofu lovers, vegans and vegetarians:
Tofu Manju with Ankake Sauce/Tofu Dumplings in Sweet and Sour Sauce!
INGREDIENTS:
-Tofu (momen tofu style9: 1 “Cho”/200 g
-Carrot: one fifth
-String beans: 2~3
cornstarch: 1 large tablespoon
-salt: a pinch
For sweet and sour sauce:
-Dashi (Konbu dashi/seaweeed stock): half a cup/100 ml
-Soy sauce: half a large tablespoon
-Sugar:2 large tablespoons
-Rice vinegar: 1 large tablespoon
-Cornstarch dissolved in water: to one’s personal liking
RECIPE: For 2 people

Press water out of tofu. Sift it completely. Boil finely cut carrots and string beans until soft enough. Drain all water.

drop tofu and vegetables in a mixing bowl. Mix in cornstarch and salt. Divisde in 4 and make balls. Wrap each individually in cellophane paper. Twist cellophane warap and secure with rubber band or string.
Steam for at least 4 minutes.
Sweet and sour sauce:
Heat dashi stock, soy sauce, rice vinegar and sugar, stirring all the time. Mix in cornstarch dissolved in water.
The sauce is ready.
Serve dumplings on plate and cover them with the sauce!
Enjoy!
————————
Vegan/Vegetarian Recipe: Japanese-style String Beans and Tofu

Here is a simple and popular Japanese recipe that can please anyone, vegans, vegetarians and omnivores alike: String Beans and Tofu!
INGREDIENTS: For 2 people
-String Beans, 5~6
-Tofu: half a block
-Miso (of your choice), 1 teaspoon
-Mirin/sweet sake, half a teaspoon
-Sugar, half a teaspoon
-Freshly crushed Sesame seeds (do it in a mortar with pestle)
RECIPE:
-Drain water form tofu and roughly mix with miso, mirin and sugar.
-Peel away strings if any, cut beans into 4cm trunks and boil for 40 seconds. The beans should still be a bit crispy. Drain and let cool.
-Drop beans into tofu. Mix roughly with a spoon, cutting the tofu into small bits as in above pic.
-Sprinkle with sesame powder before serving.
Enjoy!
Naturally, this could be one of a whole plate of vegan/vegetarian snacks.
One can also add lightly boiled carrots. The combinations are endless!
—————–
Vegan & Vegetarian feast at Tomii: Sansai/Japanese Mountain Wild Plants

It seems I can’t away from Tomii these days!
The reason (s) is (are) pretty simple:
This Japanese restaurant not only offers the best value for food (although a little expensive), but they scrupulously serve only seasonal culinary marvels!

“Sanbo”
Its young (33) second-generation chef-owner, Kazuya Tomii, has always been surprised to hear that many expat vegans or vegetarians had a hard time to find appropriate food in restaurants or even markets.

Vegetables and fruit from Shizuoka Prefecture
Having spent 6 years learning his trade in Tokyo, Kyoto, Gifu and Shizuoka before taking over in 2004, he knows very well there is plenty to savour for non-meat eaters!

Sansai/Japanese Wild Mountain Plants from Yamagata Prefecture
When I went there for dinner last Friday, he had just received a whole batch of “Sansai” from a relative in Yamagata Prefecture who owns a mountain (no joke) awash with these succulent wild plants!
I don’t have to tell you that I went vegetarian on that particular night!
I asked him to just prepare them away as he deemed best with some great local Shizuoka Sake!
Here is what I was served (I keep all the items in Japanese in case you have the occasion to find them. Asking in English would be very complicated. If needed, I will send a glossary to any friend who asks for it!):

Hors d’oeuvres/starter:
From top clockwise
-Ginbo
-Ukogi
-Ichiya Kogomi

Top: Amadokoro with white miso sauce
Bottom: Aka Kogomi

A better view of the sansai from Yamagata Prefecture!

Nice ware to serve hot sake in!

Udo and konyaku kimpira!

Sansai Tempura!
From left to right:
-Aka kogomi
-Tara no me
-Udo leaf
-Amadokoro (long stem)
-Koshiabura
Note: vegans, when making tempura, should use cornstarch instead of egg whites!

Agedashi yasai with mochi!
Now, this particular dish is absolutely vegan and vegetarian. Very satisfying!
I guarantee you I was full!
TOMII
Shizuoka City, Aoi Ku, Tokiwa-cho, 1-2-7, Tomii Bldg, 1F
Tel.: 054-274-0666
Business hours: 17:00~22:00
Closed on Sundays
HOMEPAGE (Japanese)
———————
New Vegetable: urui/Hosta Montana

Last Sunday, while visiting my favourite supermarket inside the Shizuoka JR Station in search of unusual vegetables I had the pleasure to re-discover that increasingly popular Japanese vegetable, namely urui.
Its Latin name id Hosta Montana. If someone knows the English name, I would be very grateful to be enlightened!
Now, originally this vegetable was a “sansai/wild vegetable” until it has been successfully grown almost all over Japan.

The real name of this mountain plant is Oobagibooshi, too long a name to be marketed, hence the “new” name “urui” for the cultivated species.
At full maturity it can reach imposing height and width.
Like asparaguses, it is harvested early before it extends over a foot/30 cm height.

The leaves are still small, thin and tender then.
The whole plant, unless cooked as tenpura or fried, needs to be lightly boiled in lightly salted water beforehand.

To prepare the plant for the evening snack I had in mind for the Missus (Natasha, Tangled Noodle, do you remember? LOL) I cut the plant into 3 equal lengths and boiled the two bottom ones first as they would take longer. Once boiled to satsifaction I took theme out and cooled them under cold water, cut them lengthwise to thin enough strips and laid them onto a sheet of kitchen paper.
I boiled the leaves just long enough to make them tender, cooled them under cold water and spread them on a sheet of kitchen paper.

I had cooked a fine ratatouille beforehand, let it cool completely and added a dressing of my making with soft Dijon mustard, tarragon white wine vinegar, walnut oil, pepper and salt.
Now vegan and vegetarian friends should proceed directly to the dish I created as the rest ill not suit them!

Next I lightly fried small scallops (after marinating then in lemon juice for a couple of minutes) just enough to keep them almost raw inside and put them aside to cool. I did the same, marinade included with some white shrimps.
Note: to attain their “standing shape” is very easy. First “peel” them leaving the tail ends for better “handling”, make a shallow cut along their back, take out the innards and fry just enough to cok both sides to a nice color and keep them almost hlf raw inside. This way they will be firm but extremely tender.

As for the dish itself, vegan and vegetarian friends can forget the seafood and replace it with more ratatouille and edible flowers for example.
I built an “enclosure” with the cut urui stem, filled it with ratatouille. I placed the seafood geomatrically above the ratatouille. Around it I alternately placed urui leaves, trevise with edible flowers and watercress.
I made a point to take a pic before we sprinkled the lot with dressing (I leave the choice to you!)
Great with a Blanquette de Limoux sparkling wine!
——————-
Vegan/Vegetarian Japanese Dressing: Gomadare/Sesame Dressing

Following a few queries about gomadare/seasme dressing I (and the Missus) use a lot, I felt a little information and a simple recipe would come in useful.
Gomadare is a great tasty dressing that can be used indifferently with cold dishes as a normal dressing, or in and with hot food, especially nabe/Japanese pot-au-feu, shabu-shabu and any meat or veg actually.
The problem that the gomadare sold over the counter is not vegan, or even vegetarian for that matter (it usually contains egg white and I don’t know what!)
Now, here is a simple recipe that will add that little zest and “consistency” to your favourite food:
Ingredients (for about 2 people):
white sesame seeds: 2 large tablespoons
soy milk: 4 large tablespoons
miso: 1 teaspoon
soy sauce: a little (up to taste)
sugar: a little
ground white sesame: a little
First ground together with a pestle the white sesame seeds, soy milk and miso until it has attained a nice smooth consistency.
If have difficulty mixing it, heat it a little.
Add soy sauce, sugar and ground white sesame to taste.
A little experimentation will work wonders.
Tip: my favourite dish is to peel ripe figs (see pic), cut them in quarters and pour a generous amount of gomadare over it!
Enjoy!
——————————
Japanese Vegan & Vegetarian Delicacy: “Sea Grapes/Umibudou”

Although not from Shizuoka, this Okinawa delicacy regularly appears in good supermarkets such as Shizuoka JR Station Supermarket and in good Japanese restaurants.
Although called Sea Grapes (Umibudou) for their shape, it is a saweed variety!
Its Latin name is “Caulerpa lentillifera” for the purists.

Apparently they can be found in some islands an seas in South Eastern Asia and Oceania. World vegetarian and vegans, look out for them (I mean discovere and eat them! LOL)!
The whole seaweed can reach betwen 2 and 5 metres, but only the extremities including the “grapes” are consumed.
In Okinawa where they have been eaten eons, they are also called “green caviar”!
You can eat them raw of course with soy sauce or rice vinegar mixed with mustard.

In sushi, as “gunkan/maothership”, they certainly make for great fun and taste!
Beware of counterfeits! No less than the JAS was recently caught selling them in August 2008!
Growing them in Japan has apparently been successful, great news for vegans and vegetarians who will find a great source of iodine and other beneficial elements!
Didi I say it? They are delicious/”oishii”!
————————–
“Mukashi Mushi Pan”/Old=fashioned Steamed Bread

Although I’m neither a vegetarian or vegan, I make a point to introduce anything I discover here which might help friends out!
Fukasawa Foods in Shibakawa Cho at the foot of Mount Fuji produces all year round an incredible array of soba/buckwheat noodles, udon/wheat flour noodles, ice-creams, cakes and I don’t know what else.

Now, all their food is organic. No artificial fertilizers are used for whatever they grow or buy, and no additives or preservatives are used in any of their product, which means all have to be properly stored and eaten quickly.
Vegans will be happy to know they use tofu instead of any dairy product.
This particular cake called “Mukashi Mushi Pan” or Old-Fashioned Steamed Bread was made with wheat flour, tofu, brown sugar, raisins, salt, vegetable oil.
That is all!
One cake could have easily been held inside your palm, but it was very fulfilling and delicious!
They have other varieties made with pumpkin and other vegetables.
Fukasawa Foods
Fuji Gun, Shibakawa Cho, Naibo, 3895-8
Tel.: 0544-65-0143
Closed on Tuesdays
HOMEPAGE (Japanese)
—————————–
Ginger as a Vegetable

Ginger when eaten outside Japan generally comes under its semi-dry or dry root.
Actually here, and in Shizuoka especially, fresh ginger or “Ha Shoga”/Leaf Ginger comes into some great recipes to please any one who does not consume meat (of course ginger is used in many meat recipes!)


Extensively grown in our Prefecture, it can be bought fresh in season in any Supermarket:


There are many ways to prepare and eat it:

Fresh Ginger pickled in miso.
Very practical when you can buy loads in season. Choose your miso paste well so as avoid too much salt!

Everyone knows pickled sliced ginger (use fresh plants only!) served with sushi!

Ginger can be steamed with rice or served very finely cut on top of a bowl of steaming rice!

Ginger is great finely chopped and fried with egg-plant/aubergines, soy sauce and mirin!
(Plan to introduce recipe!)

Fresh thin ginger roots are simply beautiful fried/sauteed with othe vegetables!
(Plan to introduce recipe!)
Enjoy!
————————-
Myoga as a Vegetable

Myōga (茗荷) or myoga ginger (Zingiber mioga, Zingiberaceae) is an herbaceous, deciduous, perennial native to Japan that is grown for its edible flower buds and flavorful shoots.


As a woodland plant myoga has specific shade requirements for its growth. It is frost-tolerant to 0F, -18C possibly colder.
Some constituents of myoga have shown promise for potentially anti-carcinogenic properties
A traditional crop in Japan, myoga has been introduced to cultivation in Australia and New Zealand for export to the Japanese market. I’ve always wondered if it were available on American and European Markets.
It is a great plant for use in vegetarian and vegan dishes as it adds lots of soft flavors.
Flower buds are usually found finely shredded raw in Japanese cuisine as a garnish.
But there are many other possibilities:

Tenpura.
Actually some Japanese restaurants will prepare the flowers as well as tenpura.
Vegans should replace the egg white included in the batter with a little cornstarch.

Myoga in Miso Soup.
Cut the myoga into thin strips and just add them to the miso soup inside bowls before serving it.

Myoga Gohan/Myoga Rice.
Cut the myoga in very thin strips and put it on top of the rice before steaming it. When the rice is cokked, mix in the myoga with rice and serve.
Vegetarians and Vegans may use genmai/whole rice for higher nutritients.
Beautiful when freshly cooked!

Myoga Pickles
Wash myoga quickly under running water. Drain and take excess water with kitchen paper.
Best pickled with amazu/sweet rice vinegar. If not available use rice vinegar, sugar and soft umeboshi/Japanese pickled plums.
Enjoy!
————————
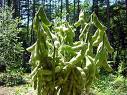
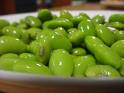
Edamame/Japanese Green Soybeans
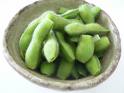
I’ve always been somewhat puzzled to find the word “edamame” in my U.S. (and European) friends’ blogs. This conspicuous vegetable seems to conjure grand images of Japanese gastronomy in spite of its almost base status in this country.
After all, “edamame” (枝豆/branch bean in Japanese) is nothing but green soybeans, a food mass-produced and heavily exported by North American farmers.
Or, is it that the soybean’s image has fallen so low on the other side of the Pacific because some people grow it for bio-ethanol that restaurateurs feel more comfortable with a grand-sounding Japanese name?
Alright, before I get collared by Foodhoe or Gaijin Tonic for indulging into a cheap rant, let me introduce my own recipe for preparing the “delicacy”:
One does not have to boil it, cool it and serve it sprinkled with salt. This is probably the worst and least healthy way to consume it!
If you can, choose them fresh on the branch(es). This will guarantee they haven’t lost any of their nutrient qualities.
Cut out all the pods and throw away the branches (or re-process them inside your fertilizer box!).
Clean the pods under running water.
Drain water, but do not wipe them dry.
Drop them in an appropriate-sized non-stick pan and hand-rub them in a little coarse salt. The less salt, the better, but enough to season all pods. Experience and personal preferences will tell you how much you need.
Cover pan with a glass lid and switch on fire to medium-low. Cook until water seeps out of the pods. Switch off fire and keep inside covered pan (do not take the lid off!) for a good 5 minutes. By then, they should be sufficiently cooked.
Serve immediately.

In Japan there exists another variety called Kuro Edamame/黒枝豆-Black Edamame.
Actually they are a light brown-green soybean grown in Shizuoka Prefecture and elsewhere. They are definitely tastier and deserve the title of “delicacy”.
The beans out of their pods also make for great addition to salads, artful presentation with meat dishes, and are great mixed inside “nigiri”!
———————————–
VEGETABLES AT YASATEI

It was another one of my quick “evening breaks” this evening, and I just decided to pop up at Yasatei as I knew I would be able to nibble on a great morsel or two.
Now, what I ordered should please vegetarians and vegans alike (I’m neither), but I suspect Simaldeff (because of his weight problems). Allison (she loves her veg) and Lindsay (always keen on Healthy food) would particularly be curious to find out what I ate.
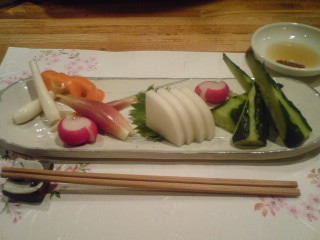
Well, I ordered “yuuki yasai no sashimi”.
Translation: bio vegetables sashimi.
From left to right:
“Eshyaletto/Japanese echalottes”, “daidai piman/soft orange pimento”, “myoga/ginger sprouts”, “aka radisyu/red radishes”, “shiso/perilla”, “daikon/Japanese long radish”, and “kyuuri/cucumber”.
All vegetables, except for the orange soft pimento also have the merit to be grown in Shizoka Prefecture!

As for “seasoning”, I was offered “goma abura/sesame oil” from Kyoto (see pic) with salt and miso paste.
Yasaitei
Shizuoka City, Aoi Ku, Tokiwa-Cho, 1-6-2 Green Heights Wamon 1-C
Tel.: 054-2543277
Reservations highly recommended
———————————
Sushi Iroha Restaurant

Although I’m not a vegetarian nor a vegan, I do understand the needs of people with different regimen and always try to inform them about gastronomic options available in Japan and Shizuoka Prefecture.
Now, sushi for strict vegetarians or vegans exist as sown in those two pictures I took yesterday in a very small but famous Sushi Restaurant called Sushi Iroha in Iwata City, south of Toyoda JR Station.
The picture above features vegetables all grown in then neighbourhood Which were first cooked or/and marinated:
From left to right and top to bottom:
Konnyaku/Devil’s Tongue Yuber Paste (nigiri)
Celery marinated in Amazu/sweet vinegar and Umeboshi/salted Japanese plum (nigiri)
Shiro Negi/white leek (nigiri)
Na no hana/Rape Blossoms (nigiri)
Gobo/Burdock Roots (nigiri)
Satsuma Imo/Yams (gunkan)
Daikon/Japanese Long Radish (gunkan)

Next I was served a sublime creation concocted with Ebine Imo/Ebine Tuber served mille-feuilles style intersped with sushi rice and presnted with dashes of olive oil, seame oil/goma abura and soy sauce/shoyu.
HOMEPAGE (Japanese)
——————-
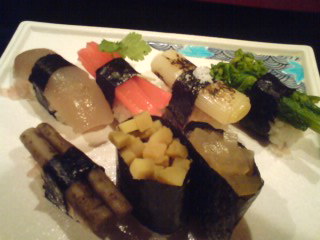
VEGAN SUSHI

Here are other very typical examples of sushi fit for Vegetarians and even vegans!
So next time you are planning to eat sushi, come armed with your knowledge and tease your favourite sushi chef with it!
Top picture:
From right to left, top to bottom:
Yuuba (tofu sheets), Takenoko (bamboo shoot), Myoga (ginger sprout), Gobo (burdock roots)
Ki no mi (leaf vegetable variety), Awafu (cooked tofu), Kamo Nasu (pickled eggplant/aubergine variety), Hakusai Maki (Chinese cabbage roll)
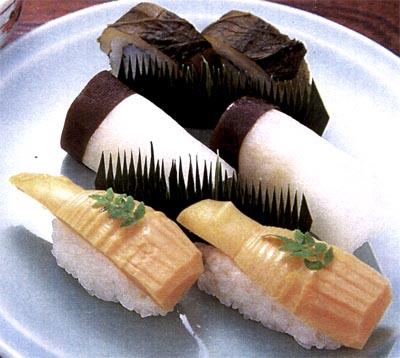
From top to bottom:
Sugiku no Ha Maki ((pickled chrysanthemum plant roll), Kabu Tsukemono (pickled turnip), Takenoko (bamboo shoot)
————————
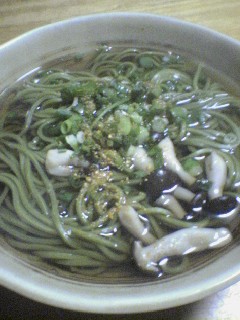
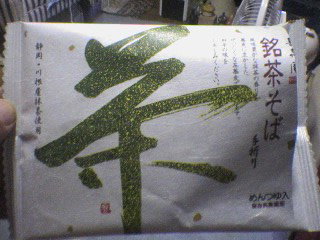
Tea Buckwheat Noodles/”Tya-soba”

Shizuoka Prefecture is celebrated for its green tea all the World.
Vegeterians (and vegans!), rejoice! A company called Ikejima Foods in Hamakita Ku, Hamamatsu City has come up with Tea Buckwheat Noodles/Tya-soba!.
Tea comes from the Kawane area which produces some of the best tea in the Prefecture.
The noodles contain no preservatives and neither the noodles, nor the tsuyu/soup contains any animal extracts whatsoever (no milk or egg products).
One pack contains enough for 4 small or 2 medium portions.

As for cooking, here are simple instructions:
Cold Noodles style:
Dilute tsuyu/soup in 100 ml of clean water.
In one big pan heat 2 litres of water. Bring to boiling point. Drop in noodles. Lower fire to samll. Stir with long chopsticks. The noodles are ready when they readily come to the surface. Wash them rapidly under running cold water inside a “zaru”/small basket or inside a bowl full of cold water until noodles are cool enough. Drain water and place on a flat dish over a bamboo net if possible. Eat noodles by dipping them in tsuyu/soup to which you can add freshly cut raw leeks and wasabi (or any spices you fancy!)
Hot noodles style:
Dilute tsuyu/soup into 230 ml of hot water.
Cook noodles as for cold style. Drain and drop into bowl full of tsuyu/soup. Add vegetables, freshly cut raw leeks and spices to taste.
“Meicha Soba”
Ikejima Foods
Hamamatsu City, Hamakita Ku, Terajima, 2351
Tel.: 053-587-1025
RECOMMENDED RELATED SITES
Not-Just-Recipes, Bengal cuisine, Cooking Vegetarian, Frank Fariello, Gluten-free Vegan Family, Meatless MamaFrank Fariello, , Warren Bobrow
Please check the new postings at:
sake, shochu and sushi
—————————————-
日本語のブログ
—————————————-